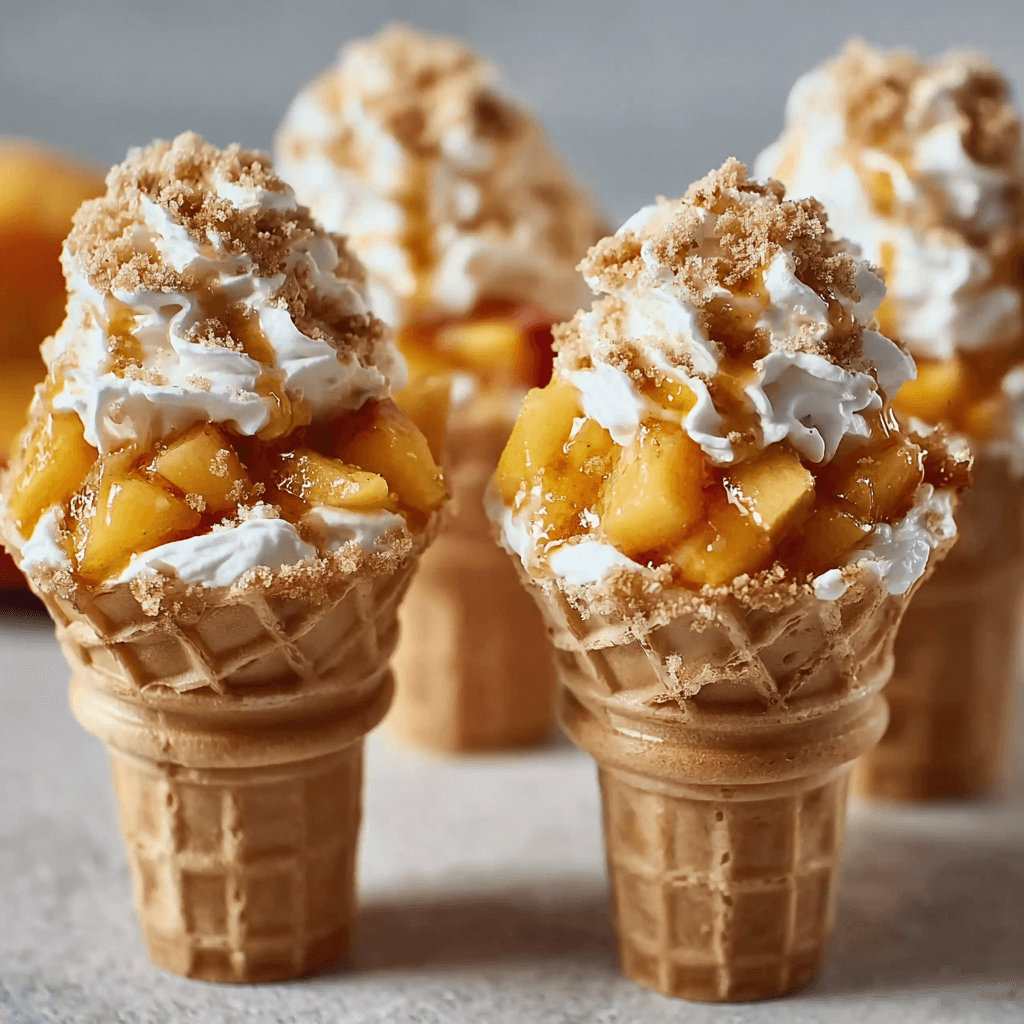
Easy Peach Cobbler Cheesecake Cones (No-Bake Filling!)
This is the ultimate summer dessert mashup. We’re talking juicy, spiced peaches and a rich, no-bake cheesecake filling, all layered into a crisp waffle cone with a buttery crumble topping. It’s a standout in our collection of easy and impressive desserts that delivers maximum flavor with minimal fuss.
Why This Recipe is a Game-Changer
This isn’t just a dessert; it’s an engineered solution for maximum deliciousness and convenience.
- No-Bake Efficiency: The cheesecake filling is entirely no-bake, keeping your kitchen cool. The only heat required is a quick stovetop sauté for the peaches and a brief toasting of the crumble.
- Portable Perfection: It combines three beloved desserts—peach cobbler, cheesecake, and an ice cream cone—into one easy-to-eat, handheld treat. No plates or forks required.
- Flavor Synergy: The warm, spiced peaches perfectly cut through the cool, tangy cream cheese filling. The crunchy cone and buttery crumble add essential texture.
- Crowd-Pleaser: It’s unique, visually appealing, and universally loved by adults and kids. Perfect for barbecues, parties, or a simple weeknight treat.
Component Breakdown: Nailing Each Layer
Success lies in perfecting each of the three core components. Here’s the engineering behind each layer.
- The Peach Cobbler Filling: The goal here is concentrated flavor, not a watery syrup. We achieve this by cooking the peaches until they release their juices, then thickening them slightly with cornstarch. Using both brown sugar and a pinch of cinnamon adds that classic cobbler warmth.
- The No-Bake Cheesecake Filling: The key to a silky smooth, no-lump filling is room temperature ingredients. Cold cream cheese will not blend properly. We use powdered sugar because it dissolves instantly, avoiding grittiness. A touch of heavy cream adds lightness and a luxurious mouthfeel. For a savory twist on creamy fillings, this Creamy Pesto Stuffed Mushrooms recipe is a great example of how versatile cream cheese can be.
- The Crumble Topping & Cone: This adds the essential “cobbler” crunch. We toast it separately to ensure it stays crisp, not soggy. It’s a trick I also use for some of my favorite breakfast recipes. For the cone, a quick swipe of melted chocolate on the inside acts as a waterproof barrier, preventing sogginess.
Step-by-Step Instructions
Prep Time: 25 minutes
Chill Time: 1 hour
Total Time: 1 hour 25 minutes
Yields: 8 cones
Step 1: Make the Crumble Topping
- In a small bowl, combine 1/4 cup all-purpose flour, 1/4 cup rolled oats, 3 tbsp brown sugar, and a pinch of salt.
- Add 3 tbsp of cold, cubed unsalted butter. Use your fingertips to rub the butter into the dry ingredients until it resembles coarse, damp sand.
- Spread the crumble on a small baking sheet and bake at 375°F (190°C) for 8-10 minutes, or until golden brown and fragrant. You can also toast it in a dry skillet over medium heat for 5-7 minutes. Set aside to cool completely.
Step 2: Prepare the Peach Cobbler Filling
- In a medium saucepan, melt 1 tbsp of unsalted butter over medium heat.
- Add 2 cups of diced peaches (fresh or frozen/thawed), 1/4 cup brown sugar, 1/2 tsp cinnamon, and a pinch of nutmeg.
- Cook, stirring occasionally, for 5-7 minutes until the peaches soften and release their juices.
- In a small bowl, whisk 1 tsp of cornstarch with 1 tbsp of cold water to create a slurry. Pour it into the peach mixture.
- Continue cooking for another 1-2 minutes, stirring constantly, until the sauce has thickened. Remove from heat and let it cool completely.
Step 3: Whip the No-Bake Cheesecake Filling
- In a large bowl, beat 8 oz of room temperature cream cheese with an electric mixer until completely smooth and free of lumps.
- Add 3/4 cup powdered sugar, 1 tsp vanilla extract, and a pinch of salt. Beat on low speed until combined, then increase to medium-high and beat until light and fluffy.
- In a separate bowl, whip 1/2 cup of cold heavy cream until stiff peaks form.
- Gently fold the whipped cream into the cream cheese mixture until just combined. Do not overmix.
- Transfer the cheesecake filling to a piping bag (or a large zip-top bag with the corner snipped off) and chill for at least 30 minutes.
Step 4: Assemble the Cones
- Optional but recommended: Melt 1/4 cup of chocolate chips or candy melts. Use a small spatula or brush to coat the inside of each waffle cone with a thin layer of chocolate. This creates a barrier against moisture. Let it set.
- Place a spoonful of the cooled peach filling in the bottom of a cone.
- Pipe a layer of cheesecake filling on top of the peaches.
- Add another small spoonful of the peach filling.
- Top with a final swirl of cheesecake filling.
- Sprinkle generously with the cooled crumble topping.
- Serve immediately for the best texture, or chill for up to 2 hours.
Pro-Tips for Flawless Assembly
- Cool All Components: Ensure the peach filling and crumble are completely cool before assembling. Warmth will melt the cheesecake filling and make the cones soggy.
- The Chocolate Barrier: Do not skip the melted chocolate step if you aren’t serving immediately. It is the single best defense against a soft cone.
- Piping is Key: Using a piping bag gives you clean, distinct layers. A zip-top bag works in a pinch, but a proper piping bag offers more control.
- Don’t Overfill: It’s tempting to pack the cones, but this leads to a messy eating experience. Leave a little room at the top for the final swirl and crumble.
- Creative Variations: This method is a fantastic template. Feel free to explore other fruit fillings from our main recipes page—a cherry pie filling or a spiced apple version would be incredible in the fall.
For Your Next Kitchen Project
After you’ve mastered this sweet treat, consider a savory comfort classic. This One-Pot Chicken and Dumpling Soup recipe is a fantastic option for a cozy dinner.
COMMON MISTAKES TO AVOID
Mistake: A watery, runny peach filling.
Fix: Ensure you cook the filling long enough for the cornstarch slurry to activate and thicken the juices properly. The consistency should be like a thick jam, not a syrup.
Mistake: Lumpy cheesecake filling.
Fix: Your cream cheese was too cold. Always let it sit on the counter for at least an hour to come to room temperature. If you’re in a hurry, you can submerge the foil-wrapped block in warm (not hot) water for 10 minutes.
Mistake: The waffle cones became soft and chewy.
Fix: You either assembled with warm ingredients or skipped the protective chocolate layer. Both are critical for maintaining that signature crunch, especially if the cones will sit for more than a few minutes before being eaten.
FAQ
Q: Can I make these ahead of time?
A: Yes, you can prepare all the components up to 2 days in advance. Store the peach filling and cheesecake filling in separate airtight containers in the refrigerator, and keep the crumble topping in an airtight container at room temperature. Assemble just before serving for the best results.
Q: Can I use different fruits?
A: Absolutely. This recipe works beautifully with diced berries (strawberries, blueberries), cherries, or finely chopped apples cooked with a bit more cinnamon. Adjust sugar based on the fruit’s sweetness.
Q: What other easy desserts can I make for a party?
A: The goal is always high-impact, low-effort. For another quick and easy treat that everyone loves, these chocolate chip muffins are fantastic and can be made in a large batch.
NUTRITIONAL SNAPSHOT
| Nutrient | Amount per Serving |
|---|---|
| Calories | 390 kcal |
| Protein | 5g |
| Fat | 22g |
| Net Carbs | 41g |
| Fiber | 2g |
| Sugar | 28g |