Viral Dubai Pistachio Cheesecake: The No-Bake Recipe
This is the viral Dubai Pistachio Cheesecake, engineered for your kitchen. It’s a no-bake wonder featuring a crisp biscuit base, a silky pistachio cream cheese filling, and a shatteringly crisp crown of toasted kataifi pastry. It has quickly become one of the most requested desserts on my site for a reason: it’s pure decadence.
This guide skips the fluff and gives you the blueprint for a perfect result every time.
The Anatomy of the Dubai Cheesecake
Understanding the three core layers is key to mastering this dessert. Each plays a distinct role in the final texture and flavor.
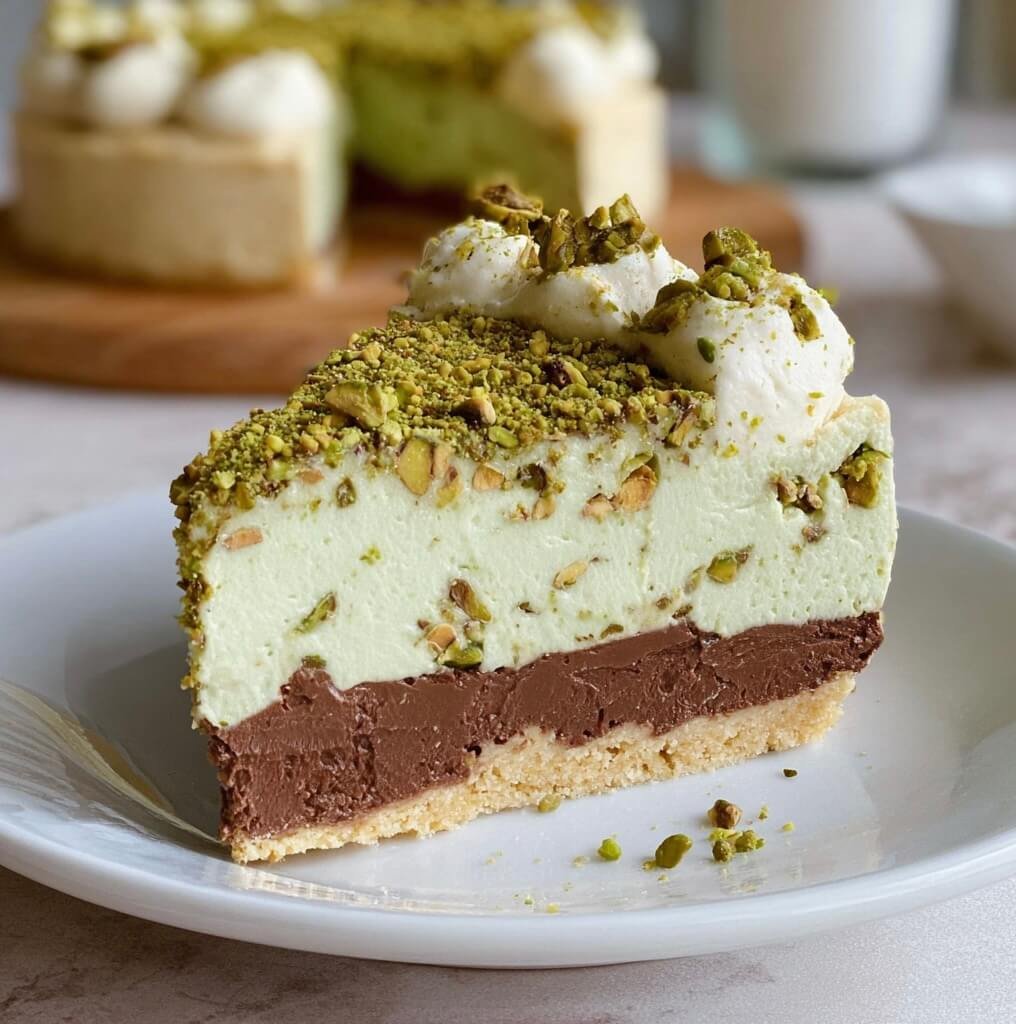
- The Base: A simple, sturdy crust made from crushed digestive biscuits and melted butter. This provides a sweet, salty, and firm foundation.
- The Filling: The heart of the cheesecake. A rich, no-bake filling made from cream cheese, heavy cream, and high-quality pistachio paste for an intense, nutty flavor.
- The Crown: The signature element. Toasted kataifi (shredded phyllo dough) is mixed with a sweet pistachio-tahini coating, creating an unbelievably crunchy, golden topping that contrasts perfectly with the creamy filling.
Key Ingredient Deep Dive
Your success hinges on two special ingredients. Sourcing the right ones makes all the difference.
- Pistachio Paste: This is not the same as pistachio butter. Look for a 100% pure, vibrant green pistachio paste. It’s a smooth, concentrated paste made from finely ground pistachios, often used in professional patisseries. You can find it online or at specialty baking and Middle Eastern grocery stores.
- Kataifi Pastry: This is finely spun strands of dough, essentially shredded phyllo. It’s typically found in the frozen section of Mediterranean or Middle Eastern markets. Thaw it according to package directions before using. If you can’t find it, crushed phyllo sheets or even crushed baklava can work in a pinch, but the texture won’t be quite the same.
Step-by-Step Instructions
Yields: 1 (9-inch) cheesecake
Prep time: 30 minutes
Chill time: 6 hours (minimum)
- Prepare the Pan: Lightly grease a 9-inch springform pan and line the bottom with parchment paper. This guarantees an easy release.
- Make the Crust: In a food processor, pulse the digestive biscuits into fine crumbs. Pour in the melted butter and pulse until the mixture resembles wet sand. Firmly press the crumb mixture into the bottom of the prepared pan. Use the flat bottom of a glass to create an even, compact layer. Place in the freezer to set while you prepare the filling.
- Whip the Cream: In a chilled bowl, beat the cold heavy cream until soft peaks form. Do not overwhip. Set aside in the refrigerator.
- Create the Filling: In a large bowl, beat the room-temperature cream cheese with an electric mixer until completely smooth and free of lumps, about 2-3 minutes. Add the powdered sugar, pistachio paste, and vanilla extract. Beat on medium speed until fully combined and smooth.
- Combine & Assemble: Gently fold the whipped cream into the pistachio-cream cheese mixture in two stages. Be careful not to deflate the air. Pour the finished filling over the chilled crust and spread it into an even layer with an offset spatula.
- Chill to Set: Cover the cheesecake with plastic wrap (ensure it doesn’t touch the surface) and refrigerate for at least 6 hours, or preferably overnight. The cheesecake must be completely firm before you add the topping.
- Toast the Kataifi: Preheat your oven to 350°F (175°C). Gently pull apart the kataifi strands with your fingers. Toss them with the melted butter on a baking sheet. Bake for 10-15 minutes, tossing halfway through, until golden brown and crisp. Let it cool completely.
- Prepare the Topping: In a bowl, whisk together the melted white chocolate (or tahini), pistachio paste, and a pinch of salt until smooth. Once the toasted kataifi is cool, break it into smaller pieces and fold it into the pistachio mixture until evenly coated.
- Final Assembly: Just before serving, carefully release the cheesecake from the springform pan. Spread the crunchy kataifi topping evenly over the surface. Garnish with chopped pistachios. Serve immediately for the best texture.
Pro Tips for a Flawless Finish
- Room Temperature is Crucial: Your cream cheese must be at room temperature to achieve a lump-free, silky filling.
- Don’t Rush the Chill: 6 hours is the absolute minimum. An overnight chill ensures clean, stable slices and allows the flavors to meld.
- Topping Last, Always: Add the kataifi topping right before you plan to serve. This preserves its signature crunch. If you add it too early, it will absorb moisture from the filling and soften.
- Cool Kataifi Completely: Mixing warm kataifi into the coating will cause it to seize up and become clumpy. Patience is key.
Make-Ahead & Storage Strategy
This dessert is perfect for planning ahead. Here’s the operational blueprint.
- 1-2 Days Ahead: The cheesecake base and filling can be fully assembled, covered, and stored in the fridge. This actually improves the flavor.
- 1 Day Ahead: The kataifi can be toasted, cooled, and stored in an airtight container at room temperature to maintain its crispness.
- Leftovers: Store leftover cheesecake covered in the refrigerator for up to 3 days. Note that the kataifi topping will soften over time.
While this showstopper is perfect for special occasions, my library of recipes includes options for every day. Planning a full dinner party? If you make this cheesecake the day before, you free yourself up to focus on a main course like a delicious Crispy Chicken Katsu Curry.
COMMON MISTAKES TO AVOID
- Mistake: A lumpy, grainy filling.
- Fix: Ensure your cream cheese is fully softened to room temperature before you begin mixing. Scrape down the bowl frequently.
- Mistake: The cheesecake doesn’t set properly and is too soft to slice.
- Fix: You either under-whipped the cream or didn’t chill the cheesecake long enough. Give it more time in the refrigerator. Overnight is always the safest bet.
- Mistake: A soggy, disappointing topping.
- Fix: Only add the topping immediately before serving. Storing the toasted kataifi and the assembled cheesecake separately until the last minute is the only way to guarantee that signature crunch.
FAQ
Q: Can I use a different nut paste?
A: Absolutely. Hazelnut or almond paste would also be delicious, though it would no longer be a pistachio cheesecake. Adjust the flavor profile accordingly.
Q: My kataifi topping is too thick and hard to spread. What happened?
A: This usually happens if your melted white chocolate or tahini mixture cools too much before you add the kataifi. Work quickly, and if it thickens, you can gently warm it for a few seconds over a double boiler or in the microwave.
Q: What can I serve this with?
A: This cheesecake is very rich, so it stands on its own. A simple cup of black coffee or mint tea is a perfect pairing. For a complete meal contrast, a light and savory dish like a Poke Bowl with Seared Salmon would be a great lead-in.
NUTRITIONAL SNAPSHOT
| Nutrient | Amount per Serving |
|---|---|
| Calories | 620 kcal |
| Protein | 9g |
| Fat | 48g |
| Net Carbs | 36g |
| Fiber | 3g |
| Sugar | 31g |
Viral Dubai Pistachio Cheesecake: The No-Bake Recipe
Ingredients
- 200g (7oz) digestive biscuits or graham crackers
- 100g (7 tbsp) unsalted butter, melted
- 500g (17.5oz) full-fat cream cheese, at room temperature
- 120g (1 cup) powdered sugar
- 150g (1/2 cup) high-quality pistachio paste
- 1 tsp vanilla extract
- 240ml (1 cup) cold heavy whipping cream
- 100g (3.5oz) kataifi pastry, thawed
- 50g (3.5 tbsp) unsalted butter, melted
- 100g (3.5oz) white chocolate, melted (or 1/3 cup tahini)
- 60g (1/4 cup) pistachio paste
- Pinch of salt
- 2 tbsp chopped raw pistachios for garnish