
Easy No-Bake Mini Valentine Cheesecakes
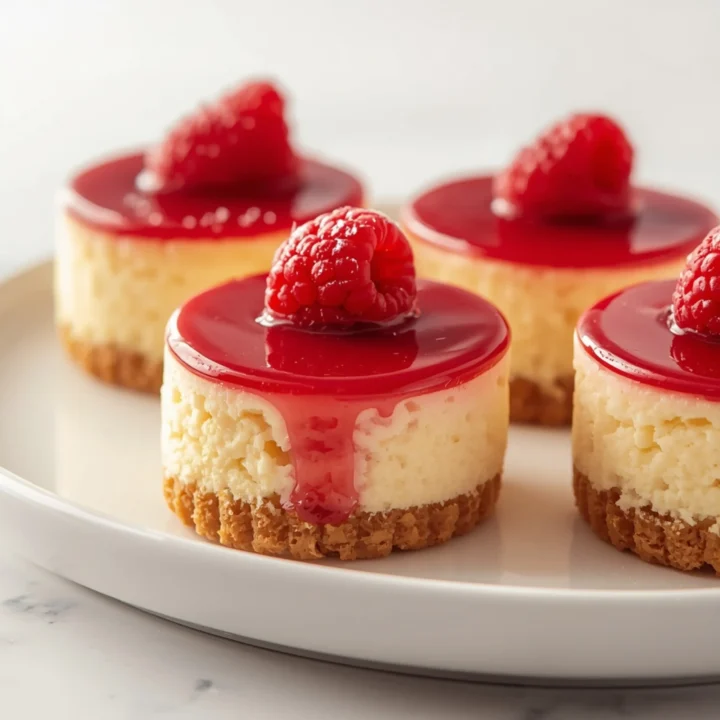
These Mini Valentine Cheesecakes deliver a rich, creamy, and tangy filling over a buttery graham cracker crust, all in a perfect, single-serving portion. This no-bake recipe is engineered for simplicity and impressive results, making it one of our most beloved desserts. At Bites by Lila, we focus on foolproof recipes that fit your life, and this one is a guaranteed Valentine’s Day win.
The No-Bake Advantage: Why This Method Works
Baked cheesecakes are notorious for cracking, requiring water baths, and long cooling times. The no-bake method eliminates these failure points entirely.
- Structure from Fat & Cold: The stability of a no-bake cheesecake comes from the high-fat content in the cream cheese and heavy whipping cream. Chilling solidifies these fats, creating a firm, sliceable texture without any eggs or baking.
- Airtight Texture: Whipping the heavy cream incorporates air, which lightens the dense cream cheese, resulting in a mousse-like consistency that’s rich yet not heavy.
- Flavor Purity: Without the Maillard reaction from baking, the pure, tangy flavor of the cream cheese and vanilla shines through, offering a cleaner, fresher taste.
Key Components & Equipment
A successful outcome depends on the right ingredients and tools. Precision matters.
- Cream Cheese: Full-fat, block-style cream cheese is non-negotiable. Low-fat or whipped varieties contain more water and stabilizers, which will result in a runny filling that won’t set.
- Heavy Whipping Cream: Must be at least 36% milkfat. This is essential for creating stable whipped cream that provides structure.
- Muffin Pan: A standard 12-cup muffin pan with paper liners is the ideal vessel. The liners ensure easy removal and perfect individual portions.
- Mixer: A stand mixer or a powerful hand mixer is crucial for achieving a lump-free cream cheese base and properly whipped cream.
Step-by-Step Instructions
Prep Time: 20 minutes
Chill Time: 4 hours (minimum)
Yields: 12 mini cheesecakes
-
Prepare the Crust:
- In a food processor, pulse 12 graham cracker sheets into fine crumbs. Alternatively, place them in a zip-top bag and crush with a rolling pin.
- In a medium bowl, combine the graham cracker crumbs, 2 tablespoons of granulated sugar, and 6 tablespoons of melted unsalted butter. Mix with a fork until the texture resembles wet sand.
- Line a 12-cup standard muffin tin with paper liners.
- Spoon approximately 1.5 tablespoons of the crust mixture into each liner. Use the bottom of a small glass or a spice jar to press the crumbs down into a firm, even layer.
- Place the pan in the freezer to set while you prepare the filling.
-
Make the Cheesecake Filling:
- In a large bowl using a hand mixer or in the bowl of a stand mixer fitted with the paddle attachment, beat 16 ounces of room temperature block cream cheese on medium speed until completely smooth and free of lumps, about 2-3 minutes. Scrape down the sides and bottom of the bowl.
- Add 1 cup of powdered sugar and 1 teaspoon of vanilla extract. Beat on low speed until combined, then increase to medium and beat until smooth.
- In a separate, chilled bowl, whip 1 cup of cold heavy whipping cream on high speed until stiff peaks form (when you lift the beater, the peak should hold its shape).
- Gently fold about one-third of the whipped cream into the cream cheese mixture to lighten it. Then, fold in the remaining whipped cream until just combined. Do not overmix, as this will deflate the air you incorporated.
-
Assemble and Chill:
- Remove the muffin pan from the freezer.
- Evenly divide the cheesecake filling among the 12 liners, smoothing the tops with a small spatula or the back of a spoon.
- Cover the pan loosely with plastic wrap.
- Refrigerate for at least 4 hours, or preferably overnight. The cheesecakes must be fully chilled to set properly.
Pro Tips for Flawless Texture
Achieving that signature creamy texture is about technique, not just ingredients. After a fantastic dinner, a dessert with perfect texture is non-negotiable.
- Room Temperature is Critical: Your cream cheese must be at room temperature. Cold cream cheese will not blend smoothly, leaving you with a lumpy filling no amount of mixing can fix.
- Don’t Over-Whip: Whip the heavy cream until stiff peaks form, but stop there. Over-whipping can cause the cream to become grainy or separate.
- The Power of Folding: Use a gentle folding motion with a spatula to combine the whipped cream and cream cheese base. This preserves the air you whipped into the cream, which is key to the light, mousse-like texture. Beating it in will deflate the filling.
Make-Ahead & Storage Blueprint
This recipe is ideal for making in advance, freeing up your time on the day of serving.
- Refrigerator: The mini cheesecakes can be made and stored in the refrigerator, covered, for up to 3 days. The flavor actually deepens and improves by the second day.
- Freezer: For longer storage, freeze the cheesecakes (without toppings).
- Place the pan in the freezer until the cheesecakes are solid, about 1-2 hours.
- Remove from the liners and wrap each one individually in plastic wrap, then place them in a freezer-safe bag or container.
- They will keep for up to 2 months. Thaw in the refrigerator for several hours before serving.
COMMON MISTAKES TO AVOID
- Mistake: Lumpy filling.
Fix: Ensure your cream cheese is truly at room temperature. Cut it into cubes to soften it faster. Scrape the bowl frequently during mixing. - Mistake: A runny cheesecake that doesn’t set.
Fix: Do not skimp on the chill time. 4 hours is the absolute minimum. Also, ensure you used full-fat block cream cheese and heavy whipping cream with at least 36% fat. - Mistake: A greasy, crumbly crust.
Fix: Use the precise amount of melted butter. Too much will make it greasy, and too little will prevent it from holding together. Press the crust firmly into the liners to compact it.
FAQ
Q: Can I use a silicone heart-shaped mold for these?
A: Yes, silicone molds work great. You may not need paper liners. Lightly grease the mold if desired, press in the crust, add the filling, and chill. To release, gently peel the silicone away from the frozen or well-chilled cheesecake.
Q: Can I make this a single, full-sized cheesecake?
A: Absolutely. This recipe will fit perfectly in an 8 or 9-inch springform pan. Simply press the crust into the bottom and assemble as directed. Chill for at least 6-8 hours, or overnight, before releasing the springform ring.
Q: What are some other romantic dessert or meal ideas?
A: For a savory counterpoint to these sweet treats, a well-executed main course is key. Some find that recipes like these crispy cheesy cauliflower steaks offer an elegant vegetarian option. If you’re looking for more drink ideas for a special morning, you might explore a Keto Iced Coffee Smoothie.
NUTRITIONAL SNAPSHOT
| Nutrient | Amount per Serving |
|---|---|
| Calories | 380 kcal |
| Protein | 4g |
| Fat | 32g |
| Net Carbs | 19g |
| Fiber | 1g |
| Sugar | 17g |
Easy No-Bake Mini Valentine Cheesecakes
These Mini Valentine Cheesecakes deliver a rich, creamy, and tangy filling over a buttery graham cracker crust, all in a perfect, single-serving portion. This no-bake recipe is engineered for simplicity and impressive results, making it one of our most beloved desserts. At Bites by Lila, we focus on foolproof recipes that fit your life, and this one is a guaranteed Valentine's Day win.
Ingredients
- 1.5 cups (150g) graham cracker crumbs (from ~12 sheets)
- 2 tbsp (25g) granulated sugar
- 6 tbsp (85g) unsalted butter, melted
- 16 oz (452g) full-fat block cream cheese, softened to room temperature
- 1 cup (120g) powdered sugar
- 1 tsp pure vanilla extract
- 1 cup (240ml) cold heavy whipping cream
Instructions
- In a food processor, pulse 12 graham cracker sheets into fine crumbs. Alternatively, place them in a zip-top bag and crush with a rolling pin.
- In a medium bowl, combine the graham cracker crumbs, 2 tablespoons of granulated sugar, and 6 tablespoons of melted unsalted butter. Mix with a fork until the texture resembles wet sand.
- Line a 12-cup standard muffin tin with paper liners.
- Spoon approximately 1.5 tablespoons of the crust mixture into each liner. Use the bottom of a small glass or a spice jar to press the crumbs down into a firm, even layer.
- Place the pan in the freezer to set while you prepare the filling.
- In a large bowl using a hand mixer or in the bowl of a stand mixer fitted with the paddle attachment, beat 16 ounces of room temperature block cream cheese on medium speed until completely smooth and free of lumps, about 2-3 minutes. Scrape down the sides and bottom of the bowl.
- Add 1 cup of powdered sugar and 1 teaspoon of vanilla extract. Beat on low speed until combined, then increase to medium and beat until smooth.
- In a separate, chilled bowl, whip 1 cup of cold heavy whipping cream on high speed until stiff peaks form (when you lift the beater, the peak should hold its shape).
- Gently fold about one-third of the whipped cream into the cream cheese mixture to lighten it. Then, fold in the remaining whipped cream until just combined. Do not overmix, as this will deflate the air you incorporated.
- Remove the muffin pan from the freezer.
- Evenly divide the cheesecake filling among the 12 liners, smoothing the tops with a small spatula or the back of a spoon.
- Cover the pan loosely with plastic wrap.
- Refrigerate for at least 4 hours, or preferably overnight. The cheesecakes must be fully chilled to set properly.