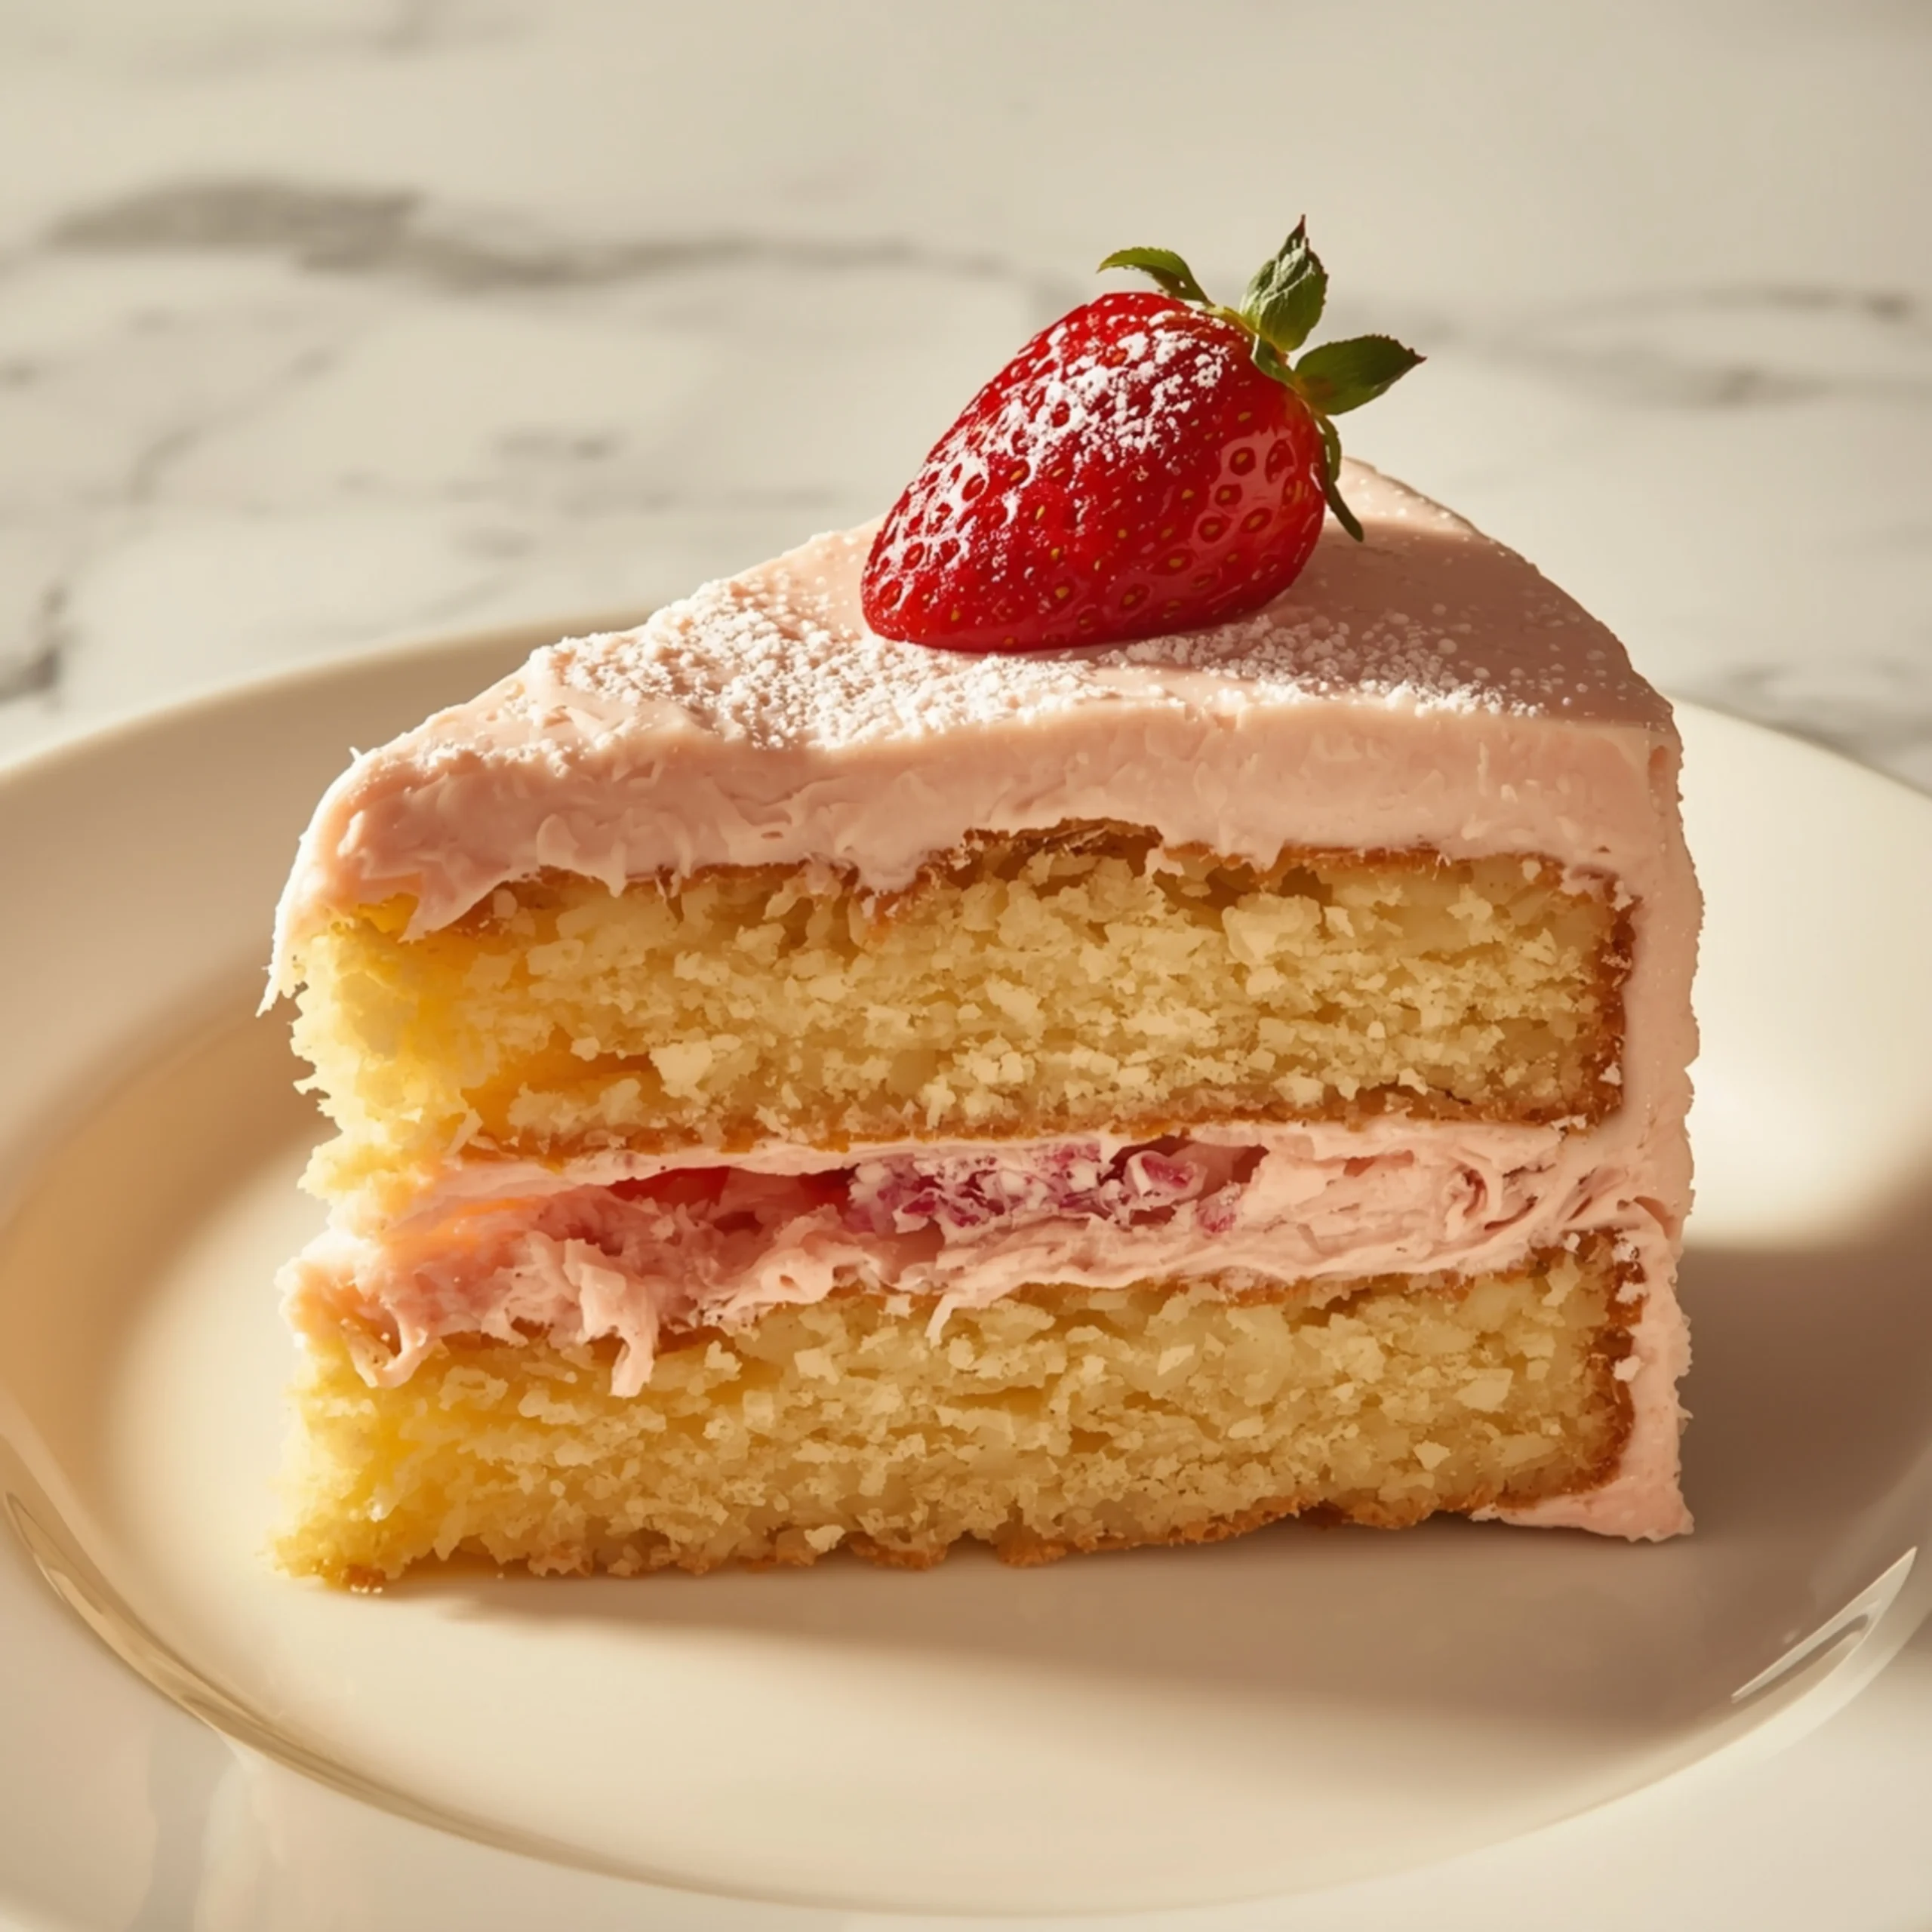
Easy Strawberry Crunch Cake (Ice Cream Bar Inspired)
This Strawberry Crunch Cake channels the nostalgic flavor of a strawberry shortcake ice cream bar into a stunning, layered dessert. We achieve a bakery-quality result with straightforward steps, delivering intense strawberry flavor and an addictive, buttery crunch. This is one of the most requested Desserts on the site for a reason.
Mastering the Strawberry Crunch Topping
The signature element of this cake is the crunch. Getting it right is simple if you understand the function of each component.
- Golden Sandwich Cookies: These form the buttery, sweet base of the crumble. Do not substitute with a plain vanilla wafer; the cream filling adds necessary fat and binding.
- Freeze-Dried Strawberries: This is the non-negotiable secret ingredient. They provide explosive, concentrated strawberry flavor without adding moisture, which would make the topping soggy.
- Melted Butter: This acts as the binder, toasting the cookie crumbs and creating irresistible clusters. Use unsalted to control the final salt level.
Pro-Tip: Pulse the cookies and strawberries in a food processor until they are coarse crumbs. Avoid turning them into a fine powder, as you want texture.
Anatomy of the Perfect Cake & Frosting
While the crunch is the star, the cake and frosting are the foundation.
The Cake Base:
We use a “doctored” white cake mix for consistency and a tender crumb. By swapping water for buttermilk and adding an extra egg yolk, we create a richer, more homemade taste and texture that stands up to the frosting and crunch.
The Cream Cheese Frosting:
This provides the tangy, creamy balance to the sweet cake and topping.
- Temperature is Key: Use truly room temperature block cream cheese and unsalted butter. Cold ingredients will result in a lumpy, greasy frosting.
- Don’t Over-Whip: Beat until just smooth and combined. Over-mixing can break the emulsion, especially in a warm kitchen.
This style of rich, creamy topping is incredibly versatile; for another take on a decadent dessert, this Peppermint Bark Cheesecake recipe shows how a cream cheese base can be adapted for the holidays.
Step-by-Step Instructions
Phase 1: Prepare the Crunch Topping
- Preheat: Set your oven to 350°F (175°C). Line a baking sheet with parchment paper.
- Process: In a food processor, pulse the Golden Oreos and freeze-dried strawberries until coarse crumbs form.
- Combine: Transfer crumbs to a medium bowl. Pour in the melted butter and stir with a fork until all the crumbs are evenly moistened.
- Bake: Spread the mixture onto the prepared baking sheet. Bake for 8-10 minutes, until fragrant and lightly toasted. Set aside to cool completely.
Phase 2: Bake the Strawberry Cakes
- Prep: Keep the oven at 350°F (175°C). Grease and flour two 8-inch round cake pans. Line the bottoms with parchment paper.
- Mix Dry: In a large bowl, whisk together the cake mix, all-purpose flour, and sugar.
- Mix Wet: In a separate bowl, whisk the buttermilk, oil, egg, and egg yolk until combined.
- Combine: Pour the wet ingredients into the dry ingredients. Mix with an electric mixer on low speed until just combined, then increase to medium and beat for 2 minutes until smooth.
- Fold In: Gently fold in the finely diced fresh strawberries.
- Bake: Divide the batter evenly between the two prepared pans. Bake for 30-35 minutes, or until a wooden skewer inserted into the center comes out clean.
- Cool: Let the cakes cool in their pans for 15 minutes before inverting them onto a wire rack to cool completely.
Phase 3: Whip the Cream Cheese Frosting
- Beat: In a large bowl using an electric mixer, beat the room temperature cream cheese and butter on medium-high speed until smooth and creamy, about 2 minutes.
- Add Sugar: Reduce speed to low and gradually add the powdered sugar, mixing until just combined. Add the vanilla extract and salt.
- Finish: Increase speed to medium-high and beat for another 2-3 minutes until light and fluffy.
Assembly Blueprint & Pro Tips
A successful layer cake is built with intention. Follow this sequence for a stable, beautiful result. Many of our special occasion Breakfast dishes follow a similar principle of preparing components separately before the final assembly.
- Level the Cakes: Once completely cool, use a long serrated knife to carefully slice off the domed tops of each cake layer, creating a flat surface.
- First Layer: Place one cake layer on your serving plate or cake stand. Spread about 1 cup of frosting evenly over the top.
- Create a Dam (Optional but Recommended): Pipe a thicker border of frosting around the edge of the first layer. This will hold any filling in. You can add a thin layer of strawberry jam inside the dam for extra flavor.
- Second Layer: Carefully place the second cake layer on top, bottom-side-up, for an extra flat top surface.
- Crumb Coat: Apply a very thin layer of frosting over the entire cake (top and sides). This traps any loose crumbs.
- Chill: Refrigerate the cake for at least 30 minutes to set the crumb coat. This is a critical step for a clean finish.
- Final Coat: Frost the entire cake with the remaining frosting.
- Apply the Crunch: While the frosting is still tacky, gently press the cooled crunch topping all over the sides and top of the cake. Use your hands to scoop and press it into place.
- Final Chill: Refrigerate the finished cake for at least 1 hour before slicing and serving. This allows the frosting to firm up and the flavors to meld.
COMMON MISTAKES TO AVOID
- Mistake: Using fresh strawberries in the crunch topping.
- Fix: Only use freeze-dried strawberries. Fresh or frozen berries will release water, creating a soggy, clumpy mess instead of a crisp crumble.
- Mistake: Frosting a warm cake.
- Fix: Ensure cake layers are 100% cool to the touch. Any residual heat will melt the cream cheese frosting into a soupy disaster.
- Mistake: Skipping the crumb coat and chill step.
- Fix: Always apply a thin “crumb coat” of frosting and chill the cake for 30 minutes. This essential step traps crumbs, ensuring your final layer of frosting is clean and professional-looking.
FAQ
Q: Can I make this cake ahead of time?
A: Yes. The cake layers can be baked, cooled, and wrapped tightly in plastic wrap a day in advance. The crunch topping can be made 2-3 days ahead and stored in an airtight container at room temperature. Frost and assemble the day you plan to serve.
Q: Can I use strawberry cake mix instead of white?
A: Absolutely. A strawberry cake mix will amplify the strawberry flavor even more. Follow the same “doctoring” instructions (buttermilk, extra yolk, etc.) for a rich result.
Q: How do I store leftovers?
A: Store the cake in an airtight container in the refrigerator for up to 4 days. The crunch topping will soften slightly over time but will still be delicious.
NUTRITIONAL SNAPSHOT
| Nutrient | Amount per Serving |
|---|---|
| Calories | 680 kcal |
| Protein | 6g |
| Fat | 38g |
| Net Carbs | 75g |
| Fiber | 2g |
| Sugar | 55g |
If you enjoy this recipe, we have a full collection of Recipes for every occasion. For other fun baking projects, you might enjoy this indulgent Cinnamon Roll Bread Pudding recipe. For another creative take on a classic roll, check out these Irresistible Biscoff Cookie Butter Cinnamon Rolls.

Easy Strawberry Crunch Cake (Ice Cream Bar Inspired)
This Strawberry Crunch Cake channels the nostalgic flavor of a strawberry shortcake ice cream bar into a stunning, layered dessert. We achieve a bakery-quality result with straightforward steps, delivering intense strawberry flavor and an addictive, buttery crunch. This is one of the most requested Desserts on the site for a reason.
Ingredients
- 1 package (11.3 oz) Golden Oreo cookies
- 1.2 oz package freeze-dried strawberries
- 6 tbsp unsalted butter, melted
- 1 box (15.25 oz) white cake mix
- 1/4 cup all-purpose flour
- 1/4 cup granulated sugar
- 1 cup buttermilk, room temperature
- 1/2 cup vegetable oil
- 3 large eggs + 1 egg yolk, room temperature
- 1 cup fresh strawberries, finely diced
- 16 oz block cream cheese, room temperature
- 1 cup (2 sticks) unsalted butter, room temperature
- 5 cups powdered sugar
- 2 tsp vanilla extract
- 1/4 tsp salt
Instructions
- Set your oven to 350°F (175°C). Line a baking sheet with parchment paper.
- In a food processor, pulse the Golden Oreos and freeze-dried strawberries until coarse crumbs form.
- Transfer crumbs to a medium bowl. Pour in the melted butter and stir with a fork until all the crumbs are evenly moistened.
- Spread the mixture onto the prepared baking sheet. Bake for 8-10 minutes, until fragrant and lightly toasted. Set aside to cool completely.
- Keep the oven at 350°F (175°C). Grease and flour two 8-inch round cake pans. Line the bottoms with parchment paper.
- In a large bowl, whisk together the cake mix, all-purpose flour, and sugar.
- In a separate bowl, whisk the buttermilk, oil, egg, and egg yolk until combined.
- Pour the wet ingredients into the dry ingredients. Mix with an electric mixer on low speed until just combined, then increase to medium and beat for 2 minutes until smooth.
- Gently fold in the finely diced fresh strawberries.
- Divide the batter evenly between the two prepared pans. Bake for 30-35 minutes, or until a wooden skewer inserted into the center comes out clean.
- Let the cakes cool in their pans for 15 minutes before inverting them onto a wire rack to cool completely.
- In a large bowl using an electric mixer, beat the room temperature cream cheese and butter on medium-high speed until smooth and creamy, about 2 minutes.
- Reduce speed to low and gradually add the powdered sugar, mixing until just combined. Add the vanilla extract and salt.
- Increase speed to medium-high and beat for another 2-3 minutes until light and fluffy.
- Once completely cool, use a long serrated knife to carefully slice off the domed tops of each cake layer, creating a flat surface.
- Place one cake layer on your serving plate or cake stand. Spread about 1 cup of frosting evenly over the top.
- Pipe a thicker border of frosting around the edge of the first layer. This will hold any filling in. You can add a thin layer of strawberry jam inside the dam for extra flavor.
- Carefully place the second cake layer on top, bottom-side-up, for an extra flat top surface.
- Apply a very thin layer of frosting over the entire cake (top and sides). This traps any loose crumbs.
- Refrigerate the cake for at least 30 minutes to set the crumb coat. This is a critical step for a clean finish.
- Frost the entire cake with the remaining frosting.
- While the frosting is still tacky, gently press the cooled crunch topping all over the sides and top of the cake. Use your hands to scoop and press it into place.
- Refrigerate the finished cake for at least 1 hour before slicing and serving. This allows the frosting to firm up and the flavors to meld.