
Soft & Chewy Homemade Oatmeal Cream Pies (Better Than Store-Bought)
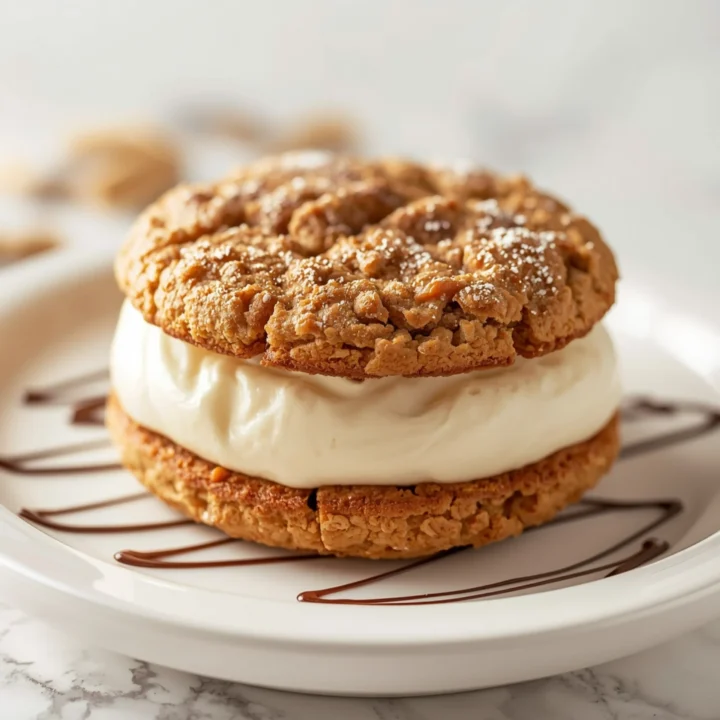
These homemade oatmeal cream pies deliver pure nostalgia. We’re talking two incredibly soft, spiced oatmeal cookies sandwiching a fluffy, stable marshmallow cream filling. Here at Bites by Lila, we focus on simple recipes that feel special, and this one is a perfect example of turning pantry staples into an unforgettable treat.
The Anatomy of a Perfect Oatmeal Cream Pie
Success comes down to two components, each engineered for perfection.
- The Cookie: The goal is maximum chewiness, not crispiness. We achieve this with a specific blend of fats, sugars, and flour. The cookies should be thin, soft, and slightly bendy.
- The Filling: It must be light, fluffy, but structurally sound. It needs to hold its shape without being heavy or greasy. We use a marshmallow-buttercream hybrid that is stable at room temperature.
Ingredient Deep Dive: Keys to a Chewy Cookie
The specific ingredients are chosen for their function. Understanding the “why” gives you control over the final texture.
- Quick-Cook Oats: These are essential. Do not substitute with rolled or steel-cut oats. The smaller, thinner flakes absorb moisture quickly, contributing to a soft, uniform texture without being overly “chunky.”
- Molasses: This is the non-negotiable secret weapon. It adds moisture, a classic flavor, and its hygroscopic nature (attracting water) keeps the cookies soft for days.
- Melted Butter: Using melted butter instead of creamed butter minimizes air incorporation, which results in a denser, chewier cookie rather than a cakey one.
- Brown Sugar: More brown sugar than white sugar increases moisture and chewiness.
Step-by-Step Instructions
Part 1: The Soft Oatmeal Cookies
- Prep: Preheat your oven to 375°F (190°C). Line two large baking sheets with parchment paper. This prevents sticking and ensures even baking.
- Dry Ingredients: In a medium bowl, whisk together the all-purpose flour, baking soda, salt, cinnamon, and nutmeg.
- Wet Ingredients: In a large bowl, whisk the melted butter, brown sugar, and granulated sugar until well combined. Add the egg, vanilla extract, and molasses. Whisk vigorously for about 30 seconds until the mixture is smooth and slightly lightened in color.
- Combine: Pour the dry ingredients into the wet ingredients. Mix with a spatula until just a few streaks of flour remain. Do not overmix. Fold in the quick-cook oats.
- Portion & Bake: Drop rounded tablespoons of dough onto the prepared baking sheets, about 2 inches apart. A 1.5-tablespoon cookie scoop is perfect for uniform size. Bake for 9-11 minutes, or until the edges are set and lightly golden. The centers will look slightly underdone.
- Cool: Let the cookies cool on the baking sheet for 5 minutes before transferring them to a wire rack to cool completely. This is a critical step for a chewy texture.
Part 2: The Marshmallow Cream Filling
- Cream Butter: In a large bowl using a hand mixer or a stand mixer with the paddle attachment, beat the softened butter on medium-high speed until it’s completely smooth and creamy (about 2 minutes).
- Add Fluff & Sugar: Add the marshmallow fluff, powdered sugar, and vanilla extract. Beat on low speed until the ingredients are just combined.
- Whip It: Increase the speed to high and beat for 2-3 minutes until the filling is light, fluffy, and has increased in volume.
Part 3: Assembly
- Match Pairs: Arrange the cooled cookies on your work surface, matching them up by size to create pairs.
- Fill: Pipe or spread a generous amount of filling (about 1.5 tablespoons) onto the flat side of one cookie in each pair.
- Sandwich: Gently press the second cookie (flat side down) onto the filling until it reaches the edges.
- Set (Optional but Recommended): For the most authentic experience, individually wrap each pie in plastic wrap and let them sit at room temperature for a few hours, or overnight. This allows the cookies to soften even further as they absorb moisture from the filling. If you love creating nostalgic treats, check out our full archive of dessert recipes.
Pro-Tips for Assembly Line Success
Making a big batch? Follow this workflow.
- Use a Cookie Scoop: This is the #1 tip for uniformly sized cookies, which makes pairing them for sandwiches a breeze.
- Pipe the Filling: Use a piping bag (a Ziploc bag with the corner snipped off works too) for fast, clean, and even filling distribution.
- Work in Batches: Match all your cookie pairs first. Then, lay them all out and fill one half of every pair. Finally, top them all off.
Make-Ahead & Storage Secrets
These pies get better with time, making them a perfect make-ahead dessert.
- Room Temperature: Wrapped tightly in plastic wrap, the assembled pies are best stored at room temperature for up to 3 days. The texture will be perfect.
- Refrigeration: You can refrigerate them for up to a week, but let them sit at room temp for 20-30 minutes before serving to allow the filling to soften.
- Freezing: Freeze assembled and individually wrapped pies for up to 3 months. Thaw at room temperature. This is a great strategy if you’re also planning other make-ahead party treats, like these delicious chocolate chip pecan pie bars.
COMMON MISTAKES TO AVOID
- Mistake: Using rolled oats. Fix: Stick to quick-cook (1-minute) oats. Their finer texture is crucial for the soft, non-gritty cookie that defines an oatmeal cream pie.
- Mistake: Overbaking the cookies. Fix: Pull them from the oven when the centers look soft and slightly underdone. They will set up as they cool on the pan, preserving that essential chewiness.
- Mistake: Assembling with warm cookies. Fix: Ensure cookies are 100% cooled to room temperature. Any residual heat will melt the butter-based filling, creating a runny mess.
FAQ
Q: Can I make these gluten-free?
A: Yes. Substitute the all-purpose flour with a quality 1:1 gluten-free baking blend (like Bob’s Red Mill) and use certified gluten-free quick-cook oats. The texture will be very similar.
Q: How do I get my cookies perfectly flat?
A: If your cookies are puffing up too much, gently press down on the dough balls with the bottom of a glass before baking. Additionally, you can tap the baking sheet firmly on the counter a couple of times immediately after removing it from the oven to help them settle.
Q: Why is my filling greasy or separated?
A: This usually happens if your butter was too soft or melted. Use butter that is softened to room temperature (around 65°F), not melty. If it separates, try chilling the bowl in the refrigerator for 15-20 minutes, then re-whipping it.
After mastering this sweet and comforting classic, you might want to balance your palate. This Stuffed Bell Pepper Soup with Ground Turkey offers a similarly nostalgic, comforting feel for a weeknight dinner. For a savory dish with an exciting twist, consider this flavorful Coconut Peach Chicken recipe.
NUTRITIONAL SNAPSHOT
| Nutrient | Amount per Serving |
|---|---|
| Calories | 380 kcal |
| Protein | 3g |
| Fat | 18g |
| Net Carbs | 50g |
| Fiber | 1g |
| Sugar | 32g |
Soft & Chewy Homemade Oatmeal Cream Pies (Better Than Store-Bought)
These homemade oatmeal cream pies deliver pure nostalgia. We're talking two incredibly soft, spiced oatmeal cookies sandwiching a fluffy, stable marshmallow cream filling. Here at Bites by Lila, we focus on simple recipes that feel special, and this one is a perfect example of turning pantry staples into an unforgettable treat.
Ingredients
- 1 cup all-purpose flour
- 1/2 tsp baking soda
- 1/2 tsp salt
- 1/2 tsp ground cinnamon
- 1/4 tsp ground nutmeg
- 1/2 cup unsalted butter (melted)
- 1/2 cup packed light brown sugar
- 1/4 cup granulated sugar
- 1 large egg
- 1 tbsp molasses
- 1 tsp vanilla extract
- 1 1/4 cups quick-cook oats
- 1/2 cup unsalted butter (softened)
- 1 jar (7 oz) marshmallow fluff
- 1 1/2 cups powdered sugar
- 1 tsp vanilla extract
Instructions
- Preheat your oven to 375°F (190°C). Line two large baking sheets with parchment paper. This prevents sticking and ensures even baking.
- In a medium bowl, whisk together the all-purpose flour, baking soda, salt, cinnamon, and nutmeg.
- In a large bowl, whisk the melted butter, brown sugar, and granulated sugar until well combined. Add the egg, vanilla extract, and molasses. Whisk vigorously for about 30 seconds until the mixture is smooth and slightly lightened in color.
- Pour the dry ingredients into the wet ingredients. Mix with a spatula until just a few streaks of flour remain. Do not overmix. Fold in the quick-cook oats.
- Drop rounded tablespoons of dough onto the prepared baking sheets, about 2 inches apart. A 1.5-tablespoon cookie scoop is perfect for uniform size. Bake for 9-11 minutes, or until the edges are set and lightly golden. The centers will look slightly underdone.
- Let the cookies cool on the baking sheet for 5 minutes before transferring them to a wire rack to cool completely. This is a critical step for a chewy texture.
- In a large bowl using a hand mixer or a stand mixer with the paddle attachment, beat the softened butter on medium-high speed until it's completely smooth and creamy (about 2 minutes).
- Add the marshmallow fluff, powdered sugar, and vanilla extract. Beat on low speed until the ingredients are just combined.
- Increase the speed to high and beat for 2-3 minutes until the filling is light, fluffy, and has increased in volume.
- Arrange the cooled cookies on your work surface, matching them up by size to create pairs.
- Pipe or spread a generous amount of filling (about 1.5 tablespoons) onto the flat side of one cookie in each pair.
- Gently press the second cookie (flat side down) onto the filling until it reaches the edges.
- For the most authentic experience, individually wrap each pie in plastic wrap and let them sit at room temperature for a few hours, or overnight. This allows the cookies to soften even further as they absorb moisture from the filling.