Rich & Crunchy Butterfinger Balls (Easy No-Bake Recipe)
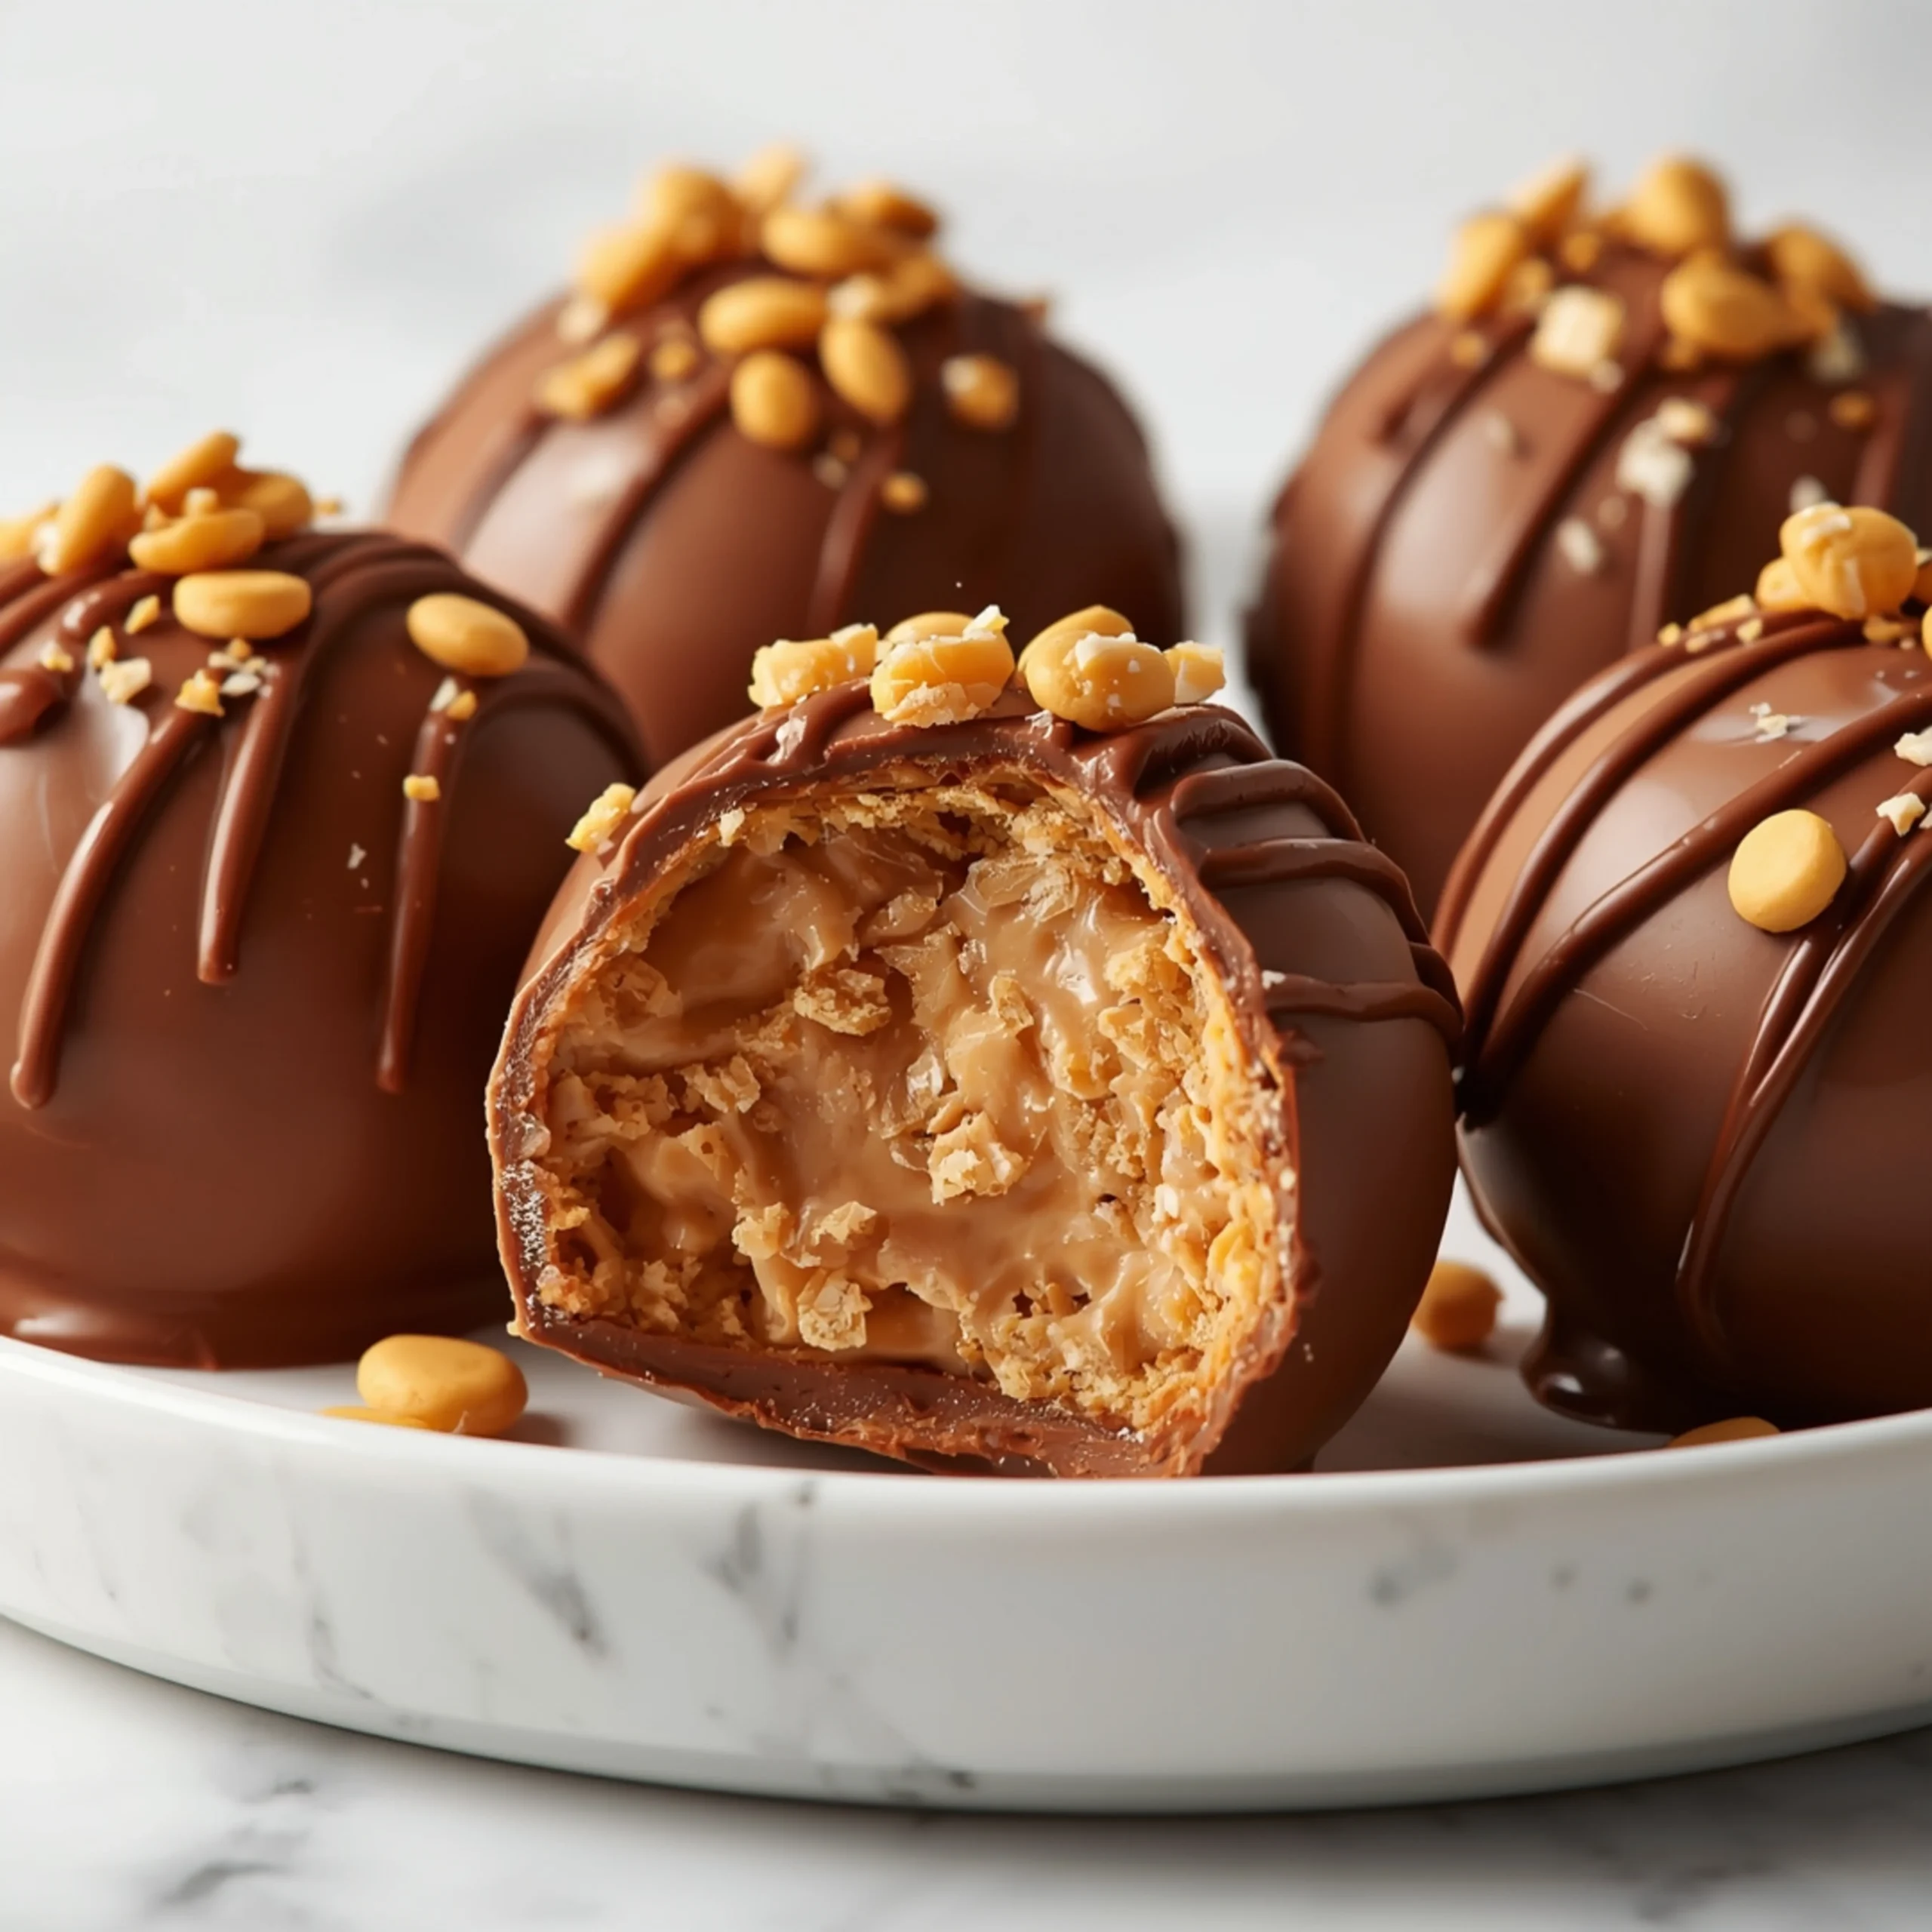
These Butterfinger Balls deliver a perfect textural contrast: a creamy, peanut-buttery center packed with crunchy candy pieces, all wrapped in a smooth chocolate shell. This no-bake recipe is engineered for speed and simplicity, making it a go-to for holidays, parties, or any time a candy craving hits. For more treats that skip the oven, check out our full collection of easy dessert ideas.
The Engineering Behind Perfect Butterfinger Balls
This recipe’s success hinges on a few key principles of food science. Understanding the “why” ensures consistent, delicious results every time.
- The Cream Cheese Binder: Cream cheese isn’t just for flavor. Its high-fat content and thick emulsion structure act as the perfect binder for the crushed candy and powdered sugar. It creates a dense, rich truffle-like texture that holds its shape. Full-fat cream cheese is non-negotiable for the best structure.
- The Chilling Phase (Critical): Chilling the mixture is the most important step. It solidifies the fats in the cream cheese, making the sticky mixture firm enough to roll into perfect spheres. Skipping or rushing this step results in a mess. Chilling the rolled balls again before dipping prevents them from melting into the warm chocolate.
- The Chocolate Coating: We add a small amount of coconut oil or vegetable shortening to the melting chocolate. This lowers the chocolate’s viscosity, creating a thinner, glossier coating that sets beautifully without being cloyingly thick. It’s the secret to a professional-looking finish.
Ingredient Deep Dive & Substitutions
Precision with ingredients yields the best results, but there’s room for flexibility.
- Butterfinger Bars: The star of the show. Use standard, full-size bars. You can crush them in a food processor for a fine, uniform texture or place them in a zip-top bag and crush with a rolling pin for more varied, crunchy chunks.
- Cream Cheese: Use a full-fat, block-style cream cheese (like Philadelphia brand). Tub-style cream cheese has a higher water content and will make your filling too soft.
- Powdered Sugar: Also known as confectioners’ sugar. This dissolves instantly into the cream cheese, ensuring a smooth, non-gritty texture. Do not substitute with granulated sugar.
- Chocolate for Dipping:
- Best for Ease: Chocolate melting wafers (like Ghirardelli or candy melts) are designed to melt smoothly and set hard without tempering.
- Best for Flavor: High-quality chocolate chips (semi-sweet or dark) work great. Just be sure to add the coconut oil to ensure a smooth consistency. You can also use chopped baking chocolate.
- Substitutions & Variations:
- Candy Bars: Heath bars, 5th Avenue bars, or even Reese’s Peanut Butter Cups can be substituted for a different flavor profile.
- Nut Butters: Add 2 tablespoons of creamy peanut butter to the cream cheese mixture to intensify the nutty flavor.
STEP-BY-STEP INSTRUCTIONS
Prep Time: 20 minutes
Chill Time: 1 hour 30 minutes
Yields: Approx. 30 balls
- Crush the Candy: Finely crush the Butterfinger bars. A food processor works best for a uniform, sandy texture with some small chunks. Alternatively, place bars in a sturdy plastic bag, seal it, and crush with a rolling pin or meat mallet. Set aside.
- Mix the Filling: In a large bowl, beat the softened cream cheese with an electric mixer on medium speed until smooth and creamy. Gradually add the powdered sugar and vanilla extract, mixing until fully combined and smooth.
- Combine: Fold the crushed Butterfinger pieces into the cream cheese mixture using a spatula. Mix until evenly distributed. The mixture will be soft and sticky.
- First Chill: Cover the bowl with plastic wrap and refrigerate for at least 1 hour. This step is essential for making the mixture firm enough to handle.
- Roll the Balls: Once chilled, scoop the mixture using a small cookie scoop (about 1 tablespoon per ball) and roll between your palms to form smooth spheres. Place the balls on a baking sheet lined with parchment or wax paper.
- Second Chill: Place the baking sheet with the rolled balls into the freezer for at least 30 minutes. This ensures they are very firm and won’t melt when dipped in the warm chocolate. Planning the perfect party menu is key; while these are chilling, you can explore some great dinner recipes to serve first.
- Melt the Chocolate: While the balls are in the freezer, melt the chocolate wafers or chocolate chips with the coconut oil. You can do this in a microwave-safe bowl in 30-second increments, stirring in between, until smooth. Or, use a double boiler. The goal is a completely smooth, fluid consistency.
- Dip the Balls: Remove the balls from the freezer. Working one at a time, drop a ball into the melted chocolate. Use two forks to roll it around, coating it completely. Lift it out with a fork, allowing excess chocolate to drip off.
- Set and Garnish: Place the dipped ball back on the parchment-lined baking sheet. While the chocolate is still wet, you can sprinkle it with extra crushed Butterfinger crumbs, flaky sea salt, or festive sprinkles.
- Final Set: Let the Butterfinger Balls sit at room temperature until the chocolate is firm, or place them in the refrigerator for 10-15 minutes to speed up the process. Store in an airtight container in the refrigerator.
Pro Tips for Flawless Execution
- Use a Cookie Scoop: This ensures all your balls are uniform in size, so they look professional and set at the same rate.
- Don’t Overheat Chocolate: When microwaving chocolate, use short intervals and stir frequently. Overheated chocolate will become thick, clumpy, and unusable (a process called “seizing”).
- Deep, Narrow Bowl for Dipping: Use a small, deep bowl for melting the chocolate. This makes it much easier to fully submerge and coat the balls without needing an excessive amount of chocolate.
- Parchment Paper is Your Friend: Lining your baking sheets with parchment or wax paper is non-negotiable. It prevents sticking and makes cleanup incredibly easy.
While these no-bake treats are a fantastic project, sometimes you want a savory meal before dessert. For a cozy main course, consider a rich and flavorful dish like this butternut squash and sage pasta, which offers a perfect contrast.
COMMON MISTAKES TO AVOID
- Mistake: The filling is too sticky and soft to roll into balls.
Fix: The mixture isn’t cold enough. It needs more time in the refrigerator. Ensure you chill it for at least the minimum recommended time, or longer if your fridge runs warm.
- Mistake: The chocolate coating is too thick and clumpy.
Fix: Your chocolate was either overheated or needs more fat. Add another teaspoon of coconut oil or vegetable shortening and stir until smooth. If it has seized (become grainy and stiff), it’s unfortunately not salvageable for dipping.
- Mistake: The balls fall apart or “melt” when dipped in the warm chocolate.
Fix: The rolled balls were not cold enough. The 30-minute freeze is a critical step. It makes them solid, so they hold their shape perfectly during the dipping process.
FAQ
Q: Can I make Butterfinger Balls ahead of time?
A: Absolutely. These are perfect for making ahead. You can store them in an airtight container in the refrigerator for up to one week. You can also freeze them for up to a month.
Q: How do I store them so they don’t stick together?
A: Once the chocolate has fully set, you can store them in a single layer in an airtight container. If you need to stack them, place a sheet of parchment or wax paper between the layers to prevent sticking.
Q: Can I use a different kind of chocolate, like white or milk chocolate?
A: Yes! White, milk, or dark chocolate all work beautifully. White chocolate pairs especially well with the peanut butter flavor. Simply follow the same melting and dipping instructions. For other holiday baking inspiration, these Christmas Gooey Butter Cookies are a fantastic option.
NUTRITIONAL SNAPSHOT
| Nutrient | Amount per Serving (1 ball) |
|---|---|
| Calories | 145 kcal |
| Protein | 1.5g |
| Fat | 9g |
| Net Carbs | 14g |
| Fiber | 0.5g |
| Sugar | 13g |

Rich & Crunchy Butterfinger Balls (Easy No-Bake Recipe)
These Butterfinger Balls deliver a perfect textural contrast: a creamy, peanut-buttery center packed with crunchy candy pieces, all wrapped in a smooth chocolate shell. This no-bake recipe is engineered for speed and simplicity, making it a go-to for holidays, parties, or any time a candy craving hits.
Ingredients
- 10 full-size Butterfinger candy bars (about 1.9 oz each), crushed
- 8 oz full-fat block cream cheese, softened
- 1 cup powdered sugar
- 1/2 tsp vanilla extract
- 16 oz chocolate melting wafers (or 1 bag semi-sweet chocolate chips)
- 1 tbsp coconut oil or vegetable shortening (if using chocolate chips)
- Optional: extra crushed Butterfinger for topping, flaky sea salt
Instructions
- Finely crush the Butterfinger bars. A food processor works best for a uniform, sandy texture with some small chunks. Alternatively, place bars in a sturdy plastic bag, seal it, and crush with a rolling pin or meat mallet. Set aside.
- In a large bowl, beat the softened cream cheese with an electric mixer on medium speed until smooth and creamy. Gradually add the powdered sugar and vanilla extract, mixing until fully combined and smooth.
- Fold the crushed Butterfinger pieces into the cream cheese mixture using a spatula. Mix until evenly distributed. The mixture will be soft and sticky.
- Cover the bowl with plastic wrap and refrigerate for at least 1 hour. This step is essential for making the mixture firm enough to handle.
- Once chilled, scoop the mixture using a small cookie scoop (about 1 tablespoon per ball) and roll between your palms to form smooth spheres. Place the balls on a baking sheet lined with parchment or wax paper.
- Place the baking sheet with the rolled balls into the freezer for at least 30 minutes. This ensures they are very firm and won't melt when dipped in the warm chocolate.
- While the balls are in the freezer, melt the chocolate wafers or chocolate chips with the coconut oil. You can do this in a microwave-safe bowl in 30-second increments, stirring in between, until smooth. Or, use a double boiler. The goal is a completely smooth, fluid consistency.
- Remove the balls from the freezer. Working one at a time, drop a ball into the melted chocolate. Use two forks to roll it around, coating it completely. Lift it out with a fork, allowing excess chocolate to drip off.
- Place the dipped ball back on the parchment-lined baking sheet. While the chocolate is still wet, you can sprinkle it with extra crushed Butterfinger crumbs, flaky sea salt, or festive sprinkles.
- Let the Butterfinger Balls sit at room temperature until the chocolate is firm, or place them in the refrigerator for 10-15 minutes to speed up the process. Store in an airtight container in the refrigerator.