Rich & Creamy No Bake Cheesecake Cups
This recipe delivers a perfectly rich, tangy cheesecake experience without ever turning on your oven. They are the ideal make-ahead treat, perfect for any occasion and a standout in our collection of easy desserts. Get ready for a foolproof method that yields creamy, single-serving bliss every time.
Why This Method Works
This recipe is engineered for simplicity and success. By separating the components—the crust, the cream cheese base, and the whipped cream—we maximize texture and control.
- No Oven Needed: The primary benefit. Perfect for hot days or when your oven is occupied.
- Stable Filling: Folding in separately whipped heavy cream creates a light, airy, yet stable filling that sets beautifully without gelatin.
- Individual Portions: Cups or jars ensure perfect servings, easy storage, and elegant presentation. No slicing required.
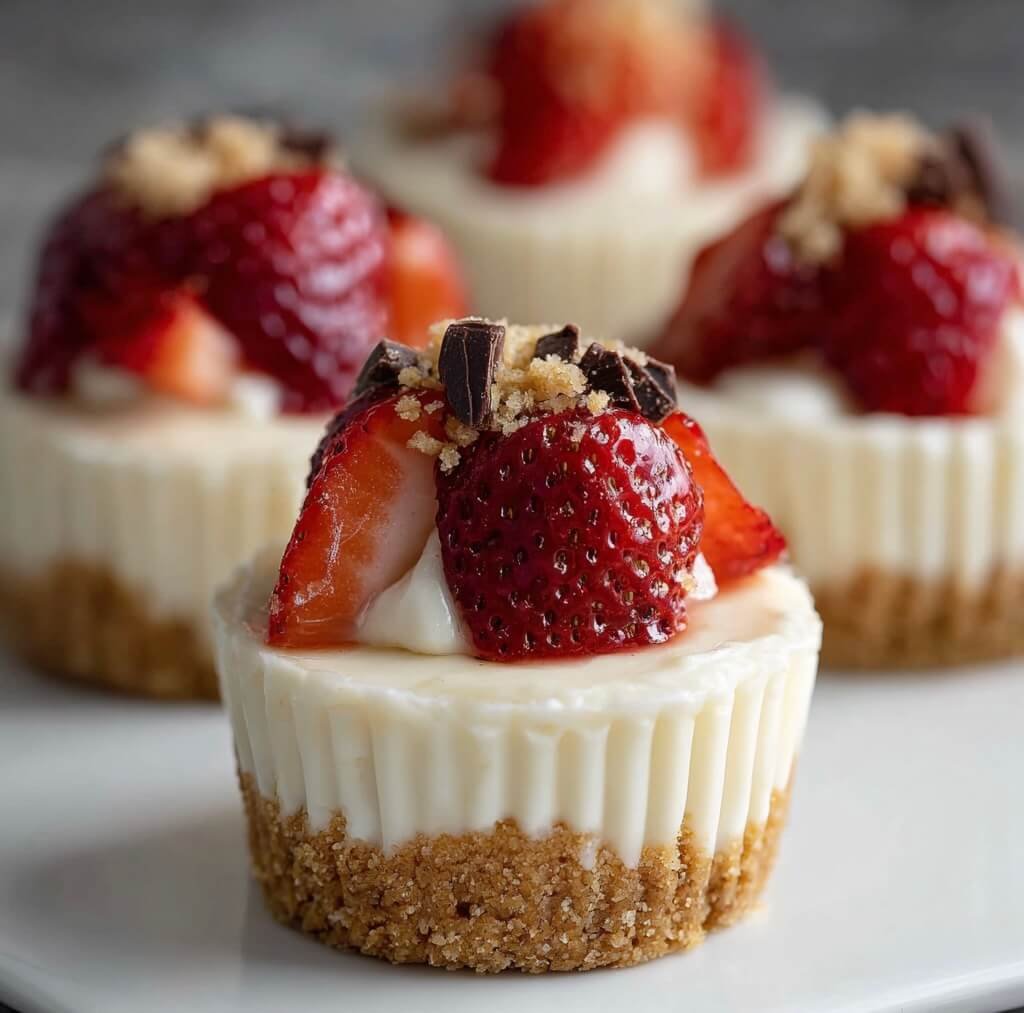
The Anatomy of a Perfect Crust
The crust is the foundation. A great crust provides a buttery, crunchy contrast to the creamy filling.
- The Classic: Graham crackers are the go-to for their honey-and-cinnamon flavor.
- The Ratio: The key is enough melted butter to moisten the crumbs so they hold their shape when pressed. Our ratio is optimized for this.
- Alternative Bases:
- Biscoff Cookies: Add a deep, caramelized spice flavor.
- Oreo Cookies: Use the whole cookie (filling and all) for a rich chocolate base.
- Pretzels: For a fantastic sweet-and-salty combination.
Mastering the Cream Cheese Filling
The heart of the cheesecake is the filling. The goal is silky smooth, never grainy or lumpy.
- Temperature is Critical: Your cream cheese and heavy cream must be at the right temperatures.
- Cream Cheese: Room temperature (softened) is non-negotiable. Cold cream cheese will create lumps.
- Heavy Cream: Must be very cold to whip into stiff peaks.
- Beat the Cream Cheese First: Before adding sugar or liquids, beat the softened cream cheese alone until it’s completely smooth and creamy. This is the most important step for preventing lumps.
- Gentle Folding: Use a spatula, not a whisk, to gently fold the whipped cream into the cream cheese base. This preserves the air you worked to create, keeping the filling light and voluminous.
These cups are the perfect sweet finish after one of our simple dinner recipes.
Step-by-Step Instructions
Prep Time: 20 minutes
Chill Time: 4 hours
Yields: 6-8 cups
Phase 1: Prepare the Crust
- Crush the Crackers: In a food processor, pulse 12 graham crackers into fine crumbs. Alternatively, place them in a zip-top bag and crush with a rolling pin.
- Combine Ingredients: In a medium bowl, mix the graham cracker crumbs, 6 tablespoons of melted unsalted butter, and 1/4 cup of granulated sugar until the mixture resembles wet sand.
- Form the Base: Divide the crumb mixture evenly among 6-8 small glasses, jars, or ramekins. Use the back of a spoon to press the crumbs down into a firm, even layer.
- Chill: Place the cups in the refrigerator for at least 30 minutes to allow the crust to set.
Phase 2: Create the Filling
- Whip the Heavy Cream: In a large, chilled bowl, use an electric mixer to beat 1 cup of cold heavy whipping cream on high speed until stiff peaks form. Set aside.
- Smooth the Cream Cheese: In a separate large bowl, beat 16 ounces of room temperature cream cheese until completely smooth and free of lumps.
- Add Flavor: Add 1 cup of powdered sugar, 1 teaspoon of vanilla extract, and 1 tablespoon of fresh lemon juice to the cream cheese. Beat on medium speed until fully combined and smooth.
- Fold to Combine: Gently fold the prepared whipped cream into the cream cheese mixture using a rubber spatula. Mix until just combined, being careful not to deflate the whipped cream.
Phase 3: Assemble and Chill
- Fill the Cups: Spoon or pipe the cheesecake filling evenly over the chilled crusts.
- Chill Until Firm: Cover the cups with plastic wrap and refrigerate for at least 4 hours, or preferably overnight. The filling needs this time to set completely.
- Garnish and Serve: Before serving, top with fresh berries, a dollop of whipped cream, chocolate shavings, or your favorite pie filling.
Flavor Variations & Topping Ideas
This base recipe is a blank canvas. Experiment with different flavor profiles to make it your own.
- Chocolate Peanut Butter: Add 1/2 cup of creamy peanut butter to the cream cheese base and top with chocolate ganache and chopped peanuts.
- Lemon Berry: Add the zest of one lemon to the filling and top with a fresh berry compote.
- Key Lime: Substitute the lemon juice with key lime juice and add 1 teaspoon of lime zest. Top with whipped cream and a lime slice.
- Salted Caramel: For a truly elegant twist, drizzle with a high-quality salted caramel sauce and top with flaky sea salt. This flavor profile is inspired by classic desserts like these impressive salted caramel macarons.
COMMON MISTAKES TO AVOID
- Mistake: Lumpy filling.
- Fix: Ensure your cream cheese is fully at room temperature. Beat it by itself until 100% smooth before adding any other ingredients.
- Mistake: A soft, unset filling.
- Fix: Do not shortcut the chilling time. 4 hours is the minimum for the fats to solidify and the filling to firm up. Overnight is even better. Also, ensure you whip the heavy cream to stiff peaks.
- Mistake: A soggy crust.
- Fix: Don’t skip the step of chilling the crust before adding the filling. This helps the butter solidify and create a slight barrier.
FAQ
Q: Can I use low-fat cream cheese?
A: It’s not recommended. Full-fat block-style cream cheese provides the necessary fat content for the filling to set properly and have a rich, creamy texture.
Q: Can I make this in one large pan instead of cups?
A: Yes. You can press the crust into an 8×8 inch pan or a 9-inch pie plate. The chilling time should be increased to at least 6-8 hours to ensure it sets firmly enough to slice.
Q: How long do these last in the refrigerator?
A: They will keep well, covered, in the refrigerator for up to 4 days. The crust may soften slightly over time.
For your next savory cooking project, consider trying a comforting hearty vegetable lentil soup for a perfect weeknight meal.
NUTRITIONAL SNAPSHOT
| Nutrient | Amount per Serving |
|---|---|
| Calories | 450 kcal |
| Protein | 5g |
| Fat | 35g |
| Net Carbs | 28g |
| Fiber | 1g |
| Sugar | 25g |