
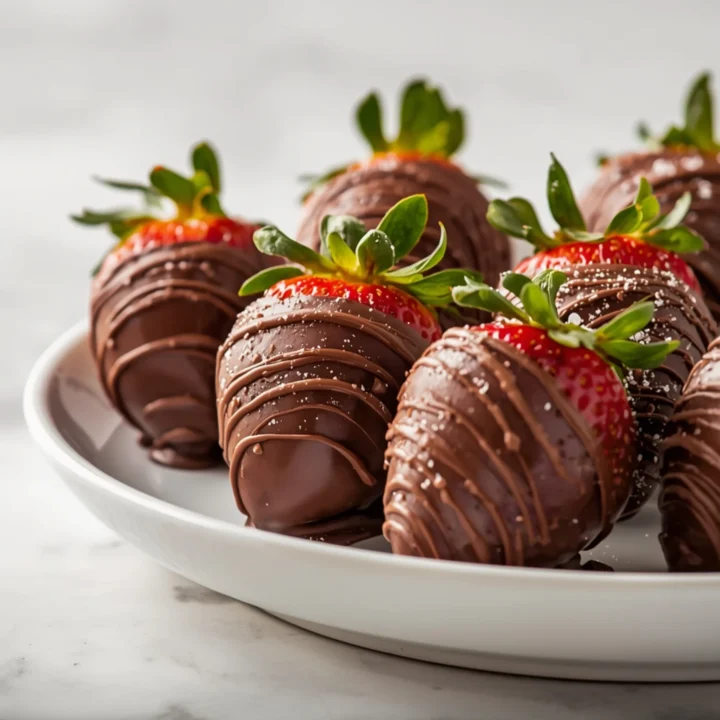
Glossy Chocolate-Covered Strawberries: A Foolproof Method
Lustrous, deep-dark chocolate snapping to reveal a perfectly sweet, juicy strawberry is a simple, elegant masterpiece. This guide skips the fluff and gives you the engineering behind a flawless batch every time. Perfect for special occasions or a simple weeknight treat, they’re one of my all-time favorite Desserts.
STEP-BY-STEP INSTRUCTIONS
- Prep Strawberries (The Foundation): Gently wash 1 lb of fresh strawberries under cool water, keeping the stems on to use as handles. CRITICAL: Dry them completely. First, pat each berry dry with a paper towel. Then, let them air-dry on a separate clean towel for at least 30 minutes. Any moisture will cause the chocolate to seize.
- Establish Your Workspace: Line a large baking sheet or platter with parchment or wax paper. This non-stick surface is essential for preventing the berries from sticking as they cool.
- Melt the Chocolate:
- Double Boiler Method (Recommended): Fill a small saucepan with about an inch of water and bring it to a simmer. Place a heatproof bowl on top (it should not touch the water). Add 8 oz of finely chopped chocolate to the bowl and stir occasionally until about 75% melted. Remove from heat and stir until smooth.
- Microwave Method (Fastest): Place the chocolate in a microwave-safe bowl. Heat in 20-second intervals, stirring thoroughly between each one. Stop when it’s mostly melted and let residual heat do the rest as you stir.
- Achieve the Gloss (Optional): Once the chocolate is smooth, stir in 1 tsp of coconut oil or vegetable shortening. This isn’t for flavor; it’s an emulsifier that creates a beautiful, glossy sheen and a slightly thinner coating that’s easier to work with.
- Dip with Precision: Holding a strawberry by its stem, dip it into the melted chocolate, swirling to coat it evenly. Lift and let the excess chocolate drip back into the bowl.
- Place and Set: Gently place the dipped strawberry on your prepared baking sheet. Repeat with the remaining berries, leaving space between each one to prevent them from sticking together.
- Apply Toppings (If Using): If you’re adding sprinkles, nuts, or other toppings, do so immediately after placing the berry on the sheet, while the chocolate is still wet.
- Chill to Set: Place the baking sheet in the refrigerator for 10-15 minutes, or just until the chocolate is firm. Do not leave them in for too long, as this can cause condensation.
The Chocolate Matrix: Choosing Your Base
The type of chocolate you use is the single most important factor. Each has a specific function.
- Couverture Chocolate: This is the professional’s choice. It contains a higher percentage of cocoa butter, resulting in a superior gloss, a satisfying “snap,” and a fluid consistency perfect for dipping. Requires tempering for best results.
- High-Quality Chocolate Chips/Bars (60-70% Cacao): The most accessible option. It delivers excellent flavor. The coating will be slightly thicker and less snappy than couverture, but still delicious. Look for brands with minimal additives.
- Melting Wafers (Candy Melts): The easiest to use. These contain vegetable oils instead of cocoa butter, so they melt smoothly and set hard without any tempering. The trade-off is a less authentic chocolate flavor. Ideal for beginners or kids.
Perfect Prep: The Strawberry Blueprint
A perfect result starts with the raw materials. Your strawberries must be in prime condition.
- Selection: Look for berries that are firm, uniformly bright red, and have fresh, green leaves. Avoid any that look bruised, soft, or shriveled. Medium-sized berries are often the easiest to handle and dip.
- Temperature: Use room-temperature strawberries. Cold berries straight from the fridge will cause the warm chocolate to set too quickly, often with a dull, streaky finish.
- The “Bone-Dry” Rule: This cannot be overstated. Water is the enemy of melted chocolate. Even a tiny droplet can cause it to “seize”—becoming a thick, grainy, unusable paste. Air-drying after patting them down is a non-negotiable step.
Advanced Topping & Decoration Techniques
Go beyond the basic dip to create stunning, professional-looking treats. These make a stunning end to any meal, from a simple weeknight dinner to a special occasion.
- The Contrast Drizzle: Melt white or milk chocolate and pour it into a small plastic bag. Snip a tiny corner off and drizzle it over your set dark-chocolate berries.
- The Crunchy Roll: Before the chocolate sets, roll the dipped berry in finely chopped nuts (pistachios, almonds), toasted coconut flakes, or colorful sprinkles.
- The Savory Accent: A tiny sprinkle of flaky sea salt (like Maldon) on top of dark chocolate berries creates an incredible sweet-and-salty flavor profile.
- The Tuxedo: Dip the berry in white chocolate and let it set completely. Then, dip each side diagonally into dark chocolate to create a “V” shape resembling a tuxedo jacket.
For those who want to take their dessert game even further, this recipe for a Bourbon Chocolate Pecan Pie is an absolute showstopper.
Storage & Make-Ahead Strategy
Chocolate-covered strawberries are best eaten the day they are made. If you need to store them, follow these guidelines.
- BEST (Up to 12 Hours): Leave them at cool room temperature on the parchment-lined sheet, uncovered. This best preserves the texture of both the chocolate and the fruit.
- GOOD (Up to 48 Hours): If you must refrigerate, line an airtight container with a paper towel. Arrange the berries in a single layer, ensuring they don’t touch. The paper towel helps absorb condensation (“sweating”). The chocolate may lose some of its snap.
- AVOID (Freezing): Do not freeze chocolate-covered strawberries. The berries release too much water upon thawing, turning them mushy and ruining the texture.
While these strawberries are a perfect dessert, they also make a great garnish. Imagine them alongside a decadent Chocolate Yule Log during the holidays. And if you’re planning a full dinner party, starting with an impressive main like an herb-crusted rack of lamb before presenting these strawberries is a guaranteed win.
COMMON MISTAKES TO AVOID
- Mistake: Watery, seized chocolate.
Fix: Ensure your berries, bowl, and utensils are 100% dry. Even a drop of water will ruin the texture of melted chocolate. - Mistake: Overheated, thick, or burnt chocolate.
Fix: Melt chocolate slowly and gently. Use short 20-second intervals in the microwave or low heat on a double boiler. If it gets too thick, you can sometimes save it by stirring in a tiny bit more coconut oil or shortening. - Mistake: “Sweating” strawberries in the fridge.
Fix: Let the chocolate set completely at room temperature or with a very brief (10-15 min) trip to the fridge. Drastic temperature changes cause condensation.
FAQ
Q: Why isn’t my chocolate smooth and shiny?
A: This usually happens for two reasons: using lower-quality chocolate with stabilizers, or slight overheating. For a guaranteed glossy finish without complex tempering, add a teaspoon of coconut oil or shortening to your melted chocolate.
Q: How far in advance can I make these for a party?
A: For best results, make them the morning of the event. They will hold perfectly at a cool room temperature for about 10-12 hours without any textural loss.
Q: Can I use white or milk chocolate?
A: Absolutely. The process is the same, but be aware that white and milk chocolate are more sensitive to heat and can burn more easily. Use even shorter heating intervals and stir frequently.
NUTRITIONAL SNAPSHOT
*(Estimated for 2 medium strawberries)*
| Nutrient | Amount per Serving |
|---|---|
| Calories | 95 kcal |
| Protein | 1g |
| Fat | 6g |
| Net Carbs | 8g |
| Fiber | 2g |
| Sugar | 7g |
Glossy Chocolate-Covered Strawberries: A Foolproof Method
Lustrous, deep-dark chocolate snapping to reveal a perfectly sweet, juicy strawberry is a simple, elegant masterpiece. This guide skips the fluff and gives you the engineering behind a flawless batch every time. Perfect for special occasions or a simple weeknight treat, they're one of my all-time favorite Desserts.
Ingredients
- 1 lb fresh strawberries (about 20-24 medium)
- 8 oz high-quality semi-sweet or dark chocolate (chips, wafers, or chopped bar)
- 1 tsp coconut oil or vegetable shortening (optional, for gloss)
- Optional Toppings: sprinkles, finely chopped nuts, flaky sea salt, melted white chocolate for drizzling
Instructions
- Gently wash 1 lb of fresh strawberries under cool water, keeping the stems on to use as handles. CRITICAL: Dry them completely. First, pat each berry dry with a paper towel. Then, let them air-dry on a separate clean towel for at least 30 minutes. Any moisture will cause the chocolate to seize.
- Line a large baking sheet or platter with parchment or wax paper. This non-stick surface is essential for preventing the berries from sticking as they cool.
- Melt the Chocolate: Double Boiler Method (Recommended): Fill a small saucepan with about an inch of water and bring it to a simmer. Place a heatproof bowl on top (it should not touch the water). Add 8 oz of finely chopped chocolate to the bowl and stir occasionally until about 75% melted. Remove from heat and stir until smooth. Microwave Method (Fastest): Place the chocolate in a microwave-safe bowl. Heat in 20-second intervals, stirring thoroughly between each one. Stop when it's mostly melted and let residual heat do the rest as you stir.
- Once the chocolate is smooth, stir in 1 tsp of coconut oil or vegetable shortening. This isn't for flavor; it's an emulsifier that creates a beautiful, glossy sheen and a slightly thinner coating that's easier to work with.
- Holding a strawberry by its stem, dip it into the melted chocolate, swirling to coat it evenly. Lift and let the excess chocolate drip back into the bowl.
- Gently place the dipped strawberry on your prepared baking sheet. Repeat with the remaining berries, leaving space between each one to prevent them from sticking together.
- If you're adding sprinkles, nuts, or other toppings, do so immediately after placing the berry on the sheet, while the chocolate is still wet.
- Place the baking sheet in the refrigerator for 10-15 minutes, or just until the chocolate is firm. Do not leave them in for too long, as this can cause condensation.