
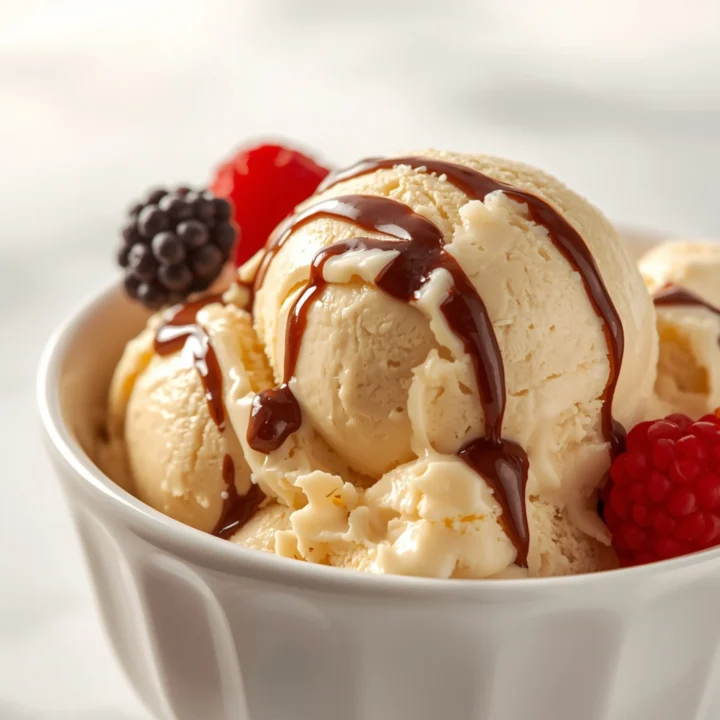
Flawless Ninja Creami Protein Ice Cream (High-Protein, Low-Sugar)
Finally, a protein ice cream that’s genuinely creamy, not icy or chalky. This recipe is your blueprint for a perfect high-protein dessert, every single time. It leverages a few key ingredients to create a rich, smooth texture that rivals traditional ice cream. If you love a surprisingly simple dessert, you should also try my fan-favorite New York Cheesecake Cookies.
Why This Base Recipe is Foolproof
This isn’t just a random mix of ingredients; it’s engineered for the perfect texture. The Ninja Creami works by shaving frozen particles, not churning, so the base must be optimized for this process.
- Protein Powder: Provides the core structure and, of course, the protein. Whey/casein blends work best as casein helps create a creamier, thicker consistency.
- Ultra-Filtered Milk (like Fairlife): This is a non-negotiable for the best results. It’s higher in protein and lower in sugar than regular milk, which means less water and fewer ice crystals.
- Pudding Mix (Sugar-Free): The secret weapon. The starches and gums (like xanthan gum or guar gum) in the mix act as stabilizers and emulsifiers, preventing large ice crystals and creating a velvety smooth texture.
- Sweetener: A zero-calorie sweetener like erythritol or allulose dissolves well and prevents the base from freezing into a solid, un-spinnable block of ice.
Step-by-Step Instructions
Prep Time: 5 minutes
Freeze Time: 18-24 hours
Spin Time: 5 minutes
- Combine Base Ingredients: In your Ninja Creami pint container, add the ultra-filtered milk, protein powder, sugar-free pudding mix, and sweetener of choice.
- Mix Thoroughly: Use a small immersion blender or a milk frother to blend the ingredients directly in the pint. Mix for at least 30-45 seconds until completely smooth with no clumps. This is a critical step to ensure a non-gritty final product.
- Level & Freeze: Scrape down the sides of the pint. Place the lid on securely and transfer to a level spot in your freezer. An uneven surface will cause issues during the spinning process.
- Freeze Solid: Freeze for a minimum of 18 hours, but 24 hours is ideal. The base must be frozen solid all the way through.
- Initial Spin: Remove the pint from the freezer and take off the lid. Place the pint into the outer bowl, attach the creamerizer paddle lid, and lock it into the Ninja Creami machine. Select the “LITE ICE CREAM” function.
- Assess & Re-spin: After the first cycle, the mixture will likely look dry or powdery. This is normal. Add 1-2 tablespoons of milk or a protein shake directly to the center of the ice cream.
- Final Spin: Re-install the pint and select the “RE-SPIN” function. Repeat the “RE-SPIN” process one more time if needed. The ice cream should now be thick, smooth, and creamy.
- Add Mix-ins (Optional): If adding mix-ins, create a small well in the center of the ice cream. Add your ingredients (crushed cookies, chocolate chips, etc.) and run the “MIX-IN” cycle.
Once you master this base, planning a full, satisfying meal is easy. For a savory main that pairs well before this dessert, you won’t regret trying this excellent Pork Tenderloin with Cranberry Glaze recipe.
The ‘Creami’ Science: Unlocking Perfect Texture
Understanding your machine is key to flawless results.
- Shaving, Not Churning: A traditional ice cream maker churns a liquid base while freezing it, breaking up ice crystals as they form. The Ninja Creami does the opposite: it flash-freezes a solid block and uses a high-speed paddle to shave and pulverize it into microscopic particles, creating a creamy texture from a solid.
- The Power of the Re-spin: The initial “LITE ICE CREAM” spin does the heavy lifting, breaking down the frozen block. The result is often powdery because the particles are separate. Adding a splash of liquid and using “RE-SPIN” re-hydrates these particles, allowing them to bind together into the smooth, scoopable texture you want. Never skip the re-spin.
Flavor Matrix: Your Customization Blueprint
Use the base recipe as your canvas. This matrix provides a blueprint for endless combinations.
Base Flavors
- Chocolate: Use chocolate protein powder, chocolate milk, and chocolate pudding mix. Add 1 tsp of black cocoa for a deep, Oreo-like flavor.
- Vanilla Bean: Use vanilla protein powder and add 1/2 tsp of vanilla bean paste or extract to the base before freezing.
- Strawberry: Use vanilla or strawberry protein powder and blend 1/4 cup of freeze-dried strawberries into the base mix.
- Coffee: Use vanilla or unflavored protein powder and replace half of the milk with strongly brewed, chilled coffee or espresso.
High-Value Mix-ins
- Texture & Crunch: Crushed Oreos, Biscoff cookies, keto-friendly cookie bits, chopped nuts, or cacao nibs.
- Gooey & Rich: A spoonful of sugar-free caramel or chocolate syrup, peanut butter, or Biscoff spread.
- Healthy & Wholesome: For a nutritious boost, crumble in some homemade energy bites. These 5-Ingredient Coconut Date Energy Balls are a perfect choice.
COMMON MISTAKES TO AVOID
- Mistake: The ice cream is icy and not creamy.
Fix: You likely used regular milk or a liquid with too much water. Switch to ultra-filtered milk like Fairlife. Also, ensure you are using a thickener like sugar-free pudding mix or a pinch (1/8 tsp) of xanthan or guar gum. - Mistake: The texture is chalky or powdery even after a re-spin.
Fix: Your base wasn’t mixed well enough before freezing. Use a milk frother or immersion blender to ensure the protein powder is fully dissolved. A few remaining clumps will turn into pockets of powder. - Mistake: The machine sounds like it’s struggling or the blade won’t go down.
Fix: The top of your frozen base is not level. You must freeze the pint on a flat surface in your freezer. If it freezes with a peak, the paddle can’t engage properly. Shave the peak flat with a spoon before spinning.
FAQ
Q: Can I use any protein powder?
A: Technically yes, but for the best texture, a whey/casein blend is superior. 100% whey can sometimes result in a slightly icier texture. Plant-based proteins also work, but may require an extra splash of liquid and an additional re-spin.
Q: Why is my ice cream still powdery after two re-spins?
A: This can be due to your freezer being too cold or the specific ingredients used. Add one more tablespoon of liquid and re-spin a third time. If it’s still not creamy, let the pint sit on the counter for 5-10 minutes to temper slightly before spinning again.
Q: How do I store leftovers?
A: Smooth the top of the remaining ice cream flat with a spoon, put the lid back on, and return it to the freezer. When you’re ready to eat it again, you will need to re-spin it (likely on the “LITE ICE CREAM” setting) to restore the original texture.
For more dessert inspiration, this Red Velvet Cake Roll Recipe is a showstopper, and for cheesecake lovers, you must check out this Cranberry White Chocolate Cheesecake Recipe.
NUTRITIONAL SNAPSHOT
(Estimates are for the vanilla base using Fairlife Skim Milk and Optimum Nutrition Gold Standard Whey)
| Nutrient | Amount per Serving |
|---|---|
| Calories | 195 |
| Protein | 38g |
| Fat | 2g |
| Net Carbs | 7g |
| Fiber | 1g |
| Sugar | 6g |
Flawless Ninja Creami Protein Ice Cream (High-Protein, Low-Sugar)
Finally, a protein ice cream that’s genuinely creamy, not icy or chalky. This recipe is your blueprint for a perfect high-protein dessert, every single time. It leverages a few key ingredients to create a rich, smooth texture that rivals traditional ice cream.
Ingredients
- 1.5 cups (360ml) Ultra-Filtered Skim Milk (e.g., Fairlife)
- 1 scoop (32g) Vanilla Protein Powder (whey/casein blend recommended)
- 1 tbsp (8g) Sugar-Free Instant Vanilla Pudding Mix
- 1-2 tbsp Erythritol, Stevia, or sweetener of choice (optional, to taste)
- 1-3 tbsp additional milk or liquid for re-spins
Instructions
- Combine Base Ingredients: In your Ninja Creami pint container, add the ultra-filtered milk, protein powder, sugar-free pudding mix, and sweetener of choice.
- Mix Thoroughly: Use a small immersion blender or a milk frother to blend the ingredients directly in the pint. Mix for at least 30-45 seconds until completely smooth with no clumps. This is a critical step to ensure a non-gritty final product.
- Level & Freeze: Scrape down the sides of the pint. Place the lid on securely and transfer to a level spot in your freezer. An uneven surface will cause issues during the spinning process.
- Freeze Solid: Freeze for a minimum of 18 hours, but 24 hours is ideal. The base must be frozen solid all the way through.
- Initial Spin: Remove the pint from the freezer and take off the lid. Place the pint into the outer bowl, attach the creamerizer paddle lid, and lock it into the Ninja Creami machine. Select the "LITE ICE CREAM" function.
- Assess & Re-spin: After the first cycle, the mixture will likely look dry or powdery. This is normal. Add 1-2 tablespoons of milk or a protein shake directly to the center of the ice cream.
- Final Spin: Re-install the pint and select the "RE-SPIN" function. Repeat the "RE-SPIN" process one more time if needed. The ice cream should now be thick, smooth, and creamy.
- Add Mix-ins (Optional): If adding mix-ins, create a small well in the center of the ice cream. Add your ingredients (crushed cookies, chocolate chips, etc.) and run the "MIX-IN" cycle.