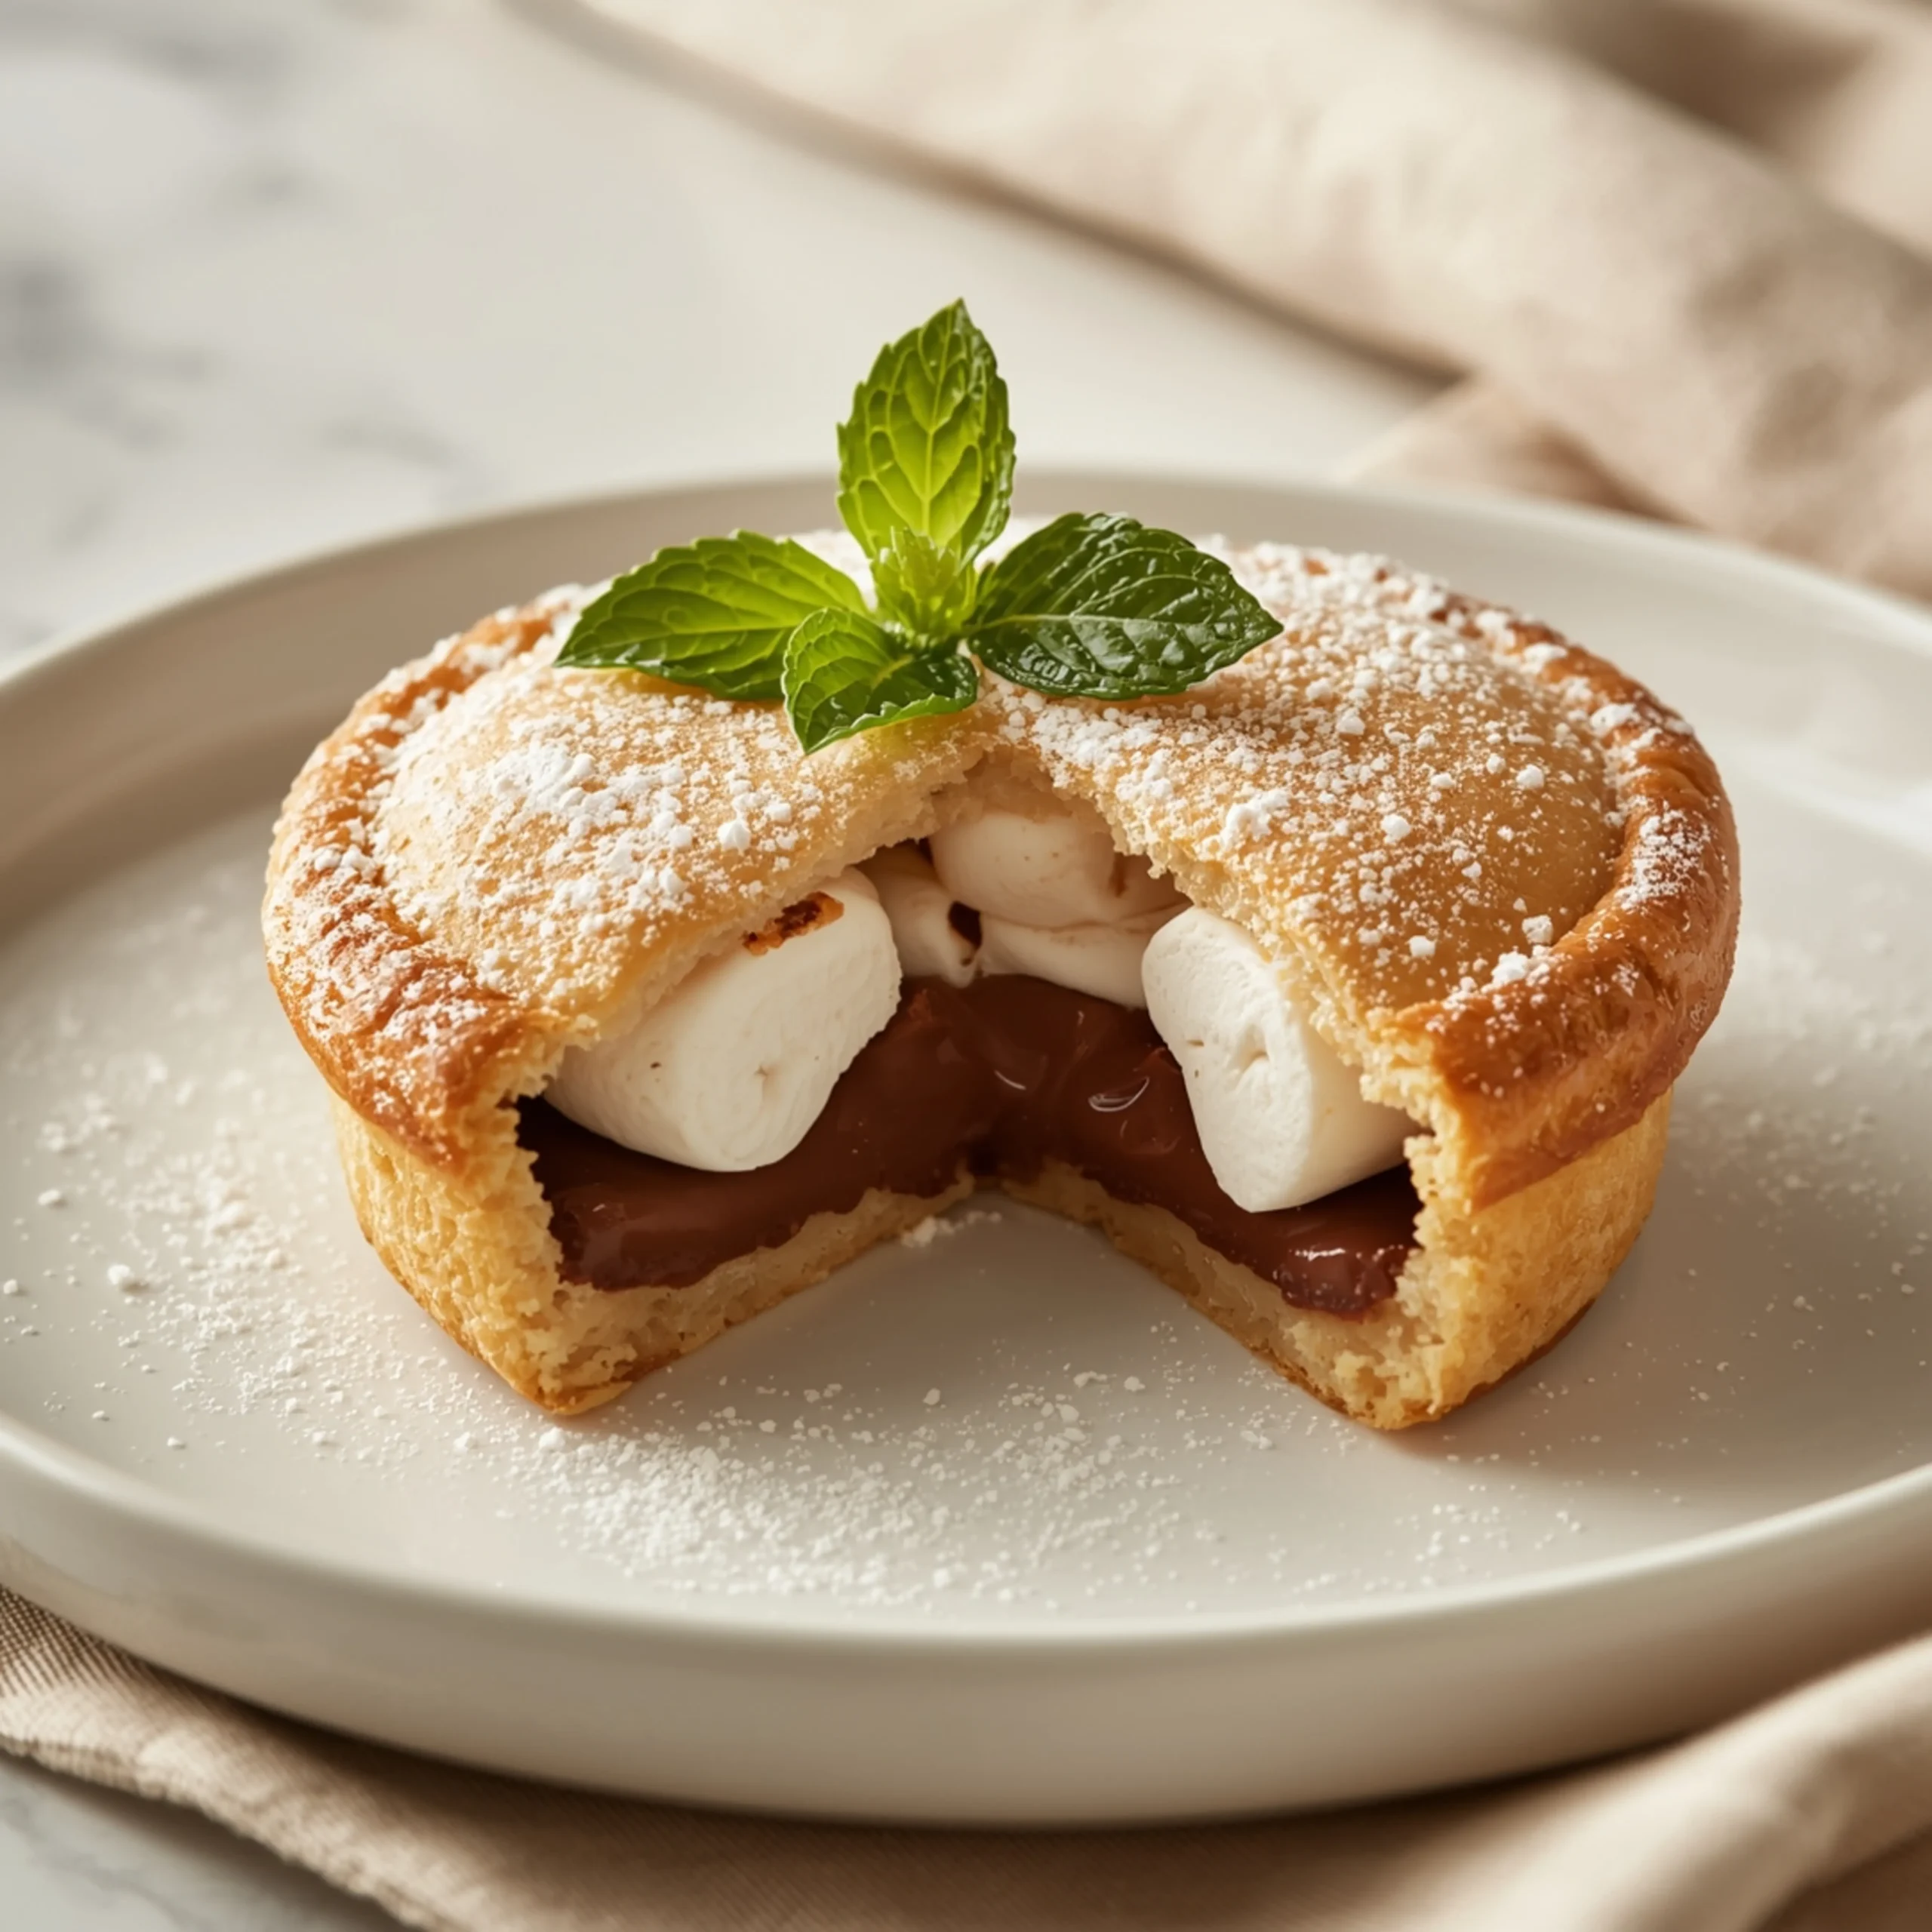
Easy S’Mores Hand Pies with a Flaky Butter Crust
These Buttery S’Mores Hand Pies capture the campfire classic in a neat, portable package. The all-butter crust is unbelievably flaky, creating the perfect pocket for gooey marshmallow and rich, melted chocolate. This is one of the simplest yet most impressive desserts you can make.
Why This Method Works
This recipe is engineered for success. Using ice-cold butter and minimal handling creates a tender, flaky crust that puffs up beautifully. We pre-toast the graham cracker crumbs to deepen their nutty flavor, and a simple egg wash guarantees a golden-brown, bakery-quality finish every time.
The Anatomy of a Perfect Hand Pie Crust
The crust is the foundation. A great hand pie requires a crust that is both sturdy enough to hold the filling and tender enough to shatter when you bite into it. Here’s the science:
- Cold is Key: Using ice-cold butter and water is non-negotiable. Cold butter creates small pockets of fat in the dough. As the pies bake, the water in the butter turns to steam, pushing the layers of dough apart and creating those coveted flaky layers.
- Minimal Handling: Overworking the dough develops gluten, which results in a tough, chewy crust instead of a tender one. Mix just until the dough comes together. A few visible streaks of butter are a good sign.
- The “Frissage” Technique: This French term simply means smearing the dough on the counter with the heel of your hand. This flattens the butter into thin sheets, which is the secret to maximum flakiness. We’ll do this just once or twice.
- Resting is Required: Chilling the dough before rolling allows the gluten to relax and the butter to firm up again. This makes the dough easier to handle and ensures it won’t shrink in the oven.
Ingredient Spotlight: Marshmallow Strategy
Choosing the right marshmallow is crucial for achieving that perfect gooey pull without a soupy mess.
- Mini Marshmallows (Recommended): These are the ideal choice. They melt evenly and are easy to portion. Their small size prevents them from creating massive air pockets that can burst through the crust.
- Marshmallow Fluff/Creme: While delicious, fluff contains more moisture and can make the bottom crust soggy. If you use it, spread a very thin layer and be aware that it may bubble out more aggressively.
- Large Marshmallows: Avoid these. They expand too much during baking and will almost certainly rupture the crust, causing the filling to leak. If it’s all you have, cut them into smaller, dime-sized pieces.
Step-by-Step Instructions
Part 1: Prepare the All-Butter Pie Dough
- Combine Dry Ingredients: In a large bowl, whisk together the flour, sugar, and salt.
- Cut in the Butter: Add the cubed, ice-cold butter to the flour. Using a pastry cutter or your fingertips, quickly cut the butter into the flour until the mixture resembles coarse crumbs with some pea-sized butter pieces remaining.
- Hydrate the Dough: Drizzle 4 tablespoons of ice water over the mixture. Use a fork to gently toss until a shaggy dough begins to form. Do not overmix. If it’s too dry, add more ice water, 1 teaspoon at a time.
- Form the Dough: Turn the dough out onto a clean surface and gently press it into a cohesive ball.
- Chill: Divide the dough in half, flatten each half into a 1-inch thick disk, wrap tightly in plastic wrap, and refrigerate for at least 1 hour (or up to 2 days).
Part 2: Assemble the Hand Pies
- Preheat and Prep: Preheat your oven to 400°F (200°C). Line two baking sheets with parchment paper.
- Make the Filling: In a small bowl, combine the toasted graham cracker crumbs, mini marshmallows, and chopped chocolate.
- Roll the Dough: On a lightly floured surface, roll out one disk of dough to about 1/8-inch thickness.
- Cut the Shapes: Using a 4-inch round cutter (or the rim of a wide glass), cut out as many circles as you can. Gather and re-roll the scraps once. Repeat with the second disk of dough. You should have about 12-16 circles in total.
- Fill the Pies: Place about 1.5 to 2 tablespoons of the s’mores filling onto the center of half of the dough circles, leaving a 1/2-inch border around the edge. If you love rich chocolate desserts, you’ll appreciate the balance here, similar to what you’d find in these delicious hot cocoa brownie bites.
- Seal the Pies: Brush the edges of the filled circles with the egg wash. Place a second dough circle on top. Gently press the edges to seal, then use the tines of a fork to crimp the edges firmly.
- Finish and Vent: Transfer the assembled pies to your prepared baking sheets. Brush the tops with the remaining egg wash and sprinkle generously with turbinado sugar. Cut two or three small slits in the top of each pie to allow steam to escape.
Part 3: Bake to Perfection
- Bake: Bake for 18-22 minutes, or until the crust is a deep golden brown and the filling is bubbly. Rotate the baking sheets halfway through for even cooking.
- Cool: Let the hand pies cool on the baking sheet for at least 10 minutes before transferring them to a wire rack to cool further. They are best served warm. This is just one of many simple baking recipes that bring so much comfort.
Flavor Variations & Upgrades
- Salted Chocolate: Use a dark chocolate bar with sea salt, or sprinkle a tiny pinch of flaky sea salt on the filling before sealing.
- Nutty Crunch: Add 2 tablespoons of finely chopped pecans or toasted walnuts to the filling mixture.
- Spiced Graham: Mix 1/4 teaspoon of cinnamon or a pinch of cardamom into the graham cracker crumbs.
- Peanut Butter S’Mores: Use chopped peanut butter cups instead of a chocolate bar for a decadent twist.
COMMON MISTAKES TO AVOID
- Mistake: A soggy bottom crust.
- Fix: Ensure your filling isn’t too wet. Using mini marshmallows instead of marshmallow creme helps significantly. Also, don’t let the assembled pies sit at room temperature for too long before baking.
- Mistake: The filling leaks out during baking.
- Fix: Do not overfill the pies. Crimp the edges very firmly with a fork to create a strong seal. Most importantly, always cut vent holes in the top crust to allow steam to escape.
- Mistake: The pie crust is tough and dense.
- Fix: Your butter wasn’t cold enough, or you over-handled the dough. Keep all ingredients cold and mix just until the dough comes together. Remember, visible butter streaks are a good thing.
FAQ
Q: Can I use store-bought pie dough?
A: Absolutely. It’s a great shortcut. One package of refrigerated pie crusts (two rolls) will work perfectly. Just unroll, cut, fill, and bake as directed.
Q: Can I make these in an air fryer?
A: Yes. Preheat your air fryer to 350°F (175°C). Place 2-3 pies in the basket, ensuring they don’t touch. Air fry for 8-10 minutes, or until golden brown. You may need to work in batches.
Q: How do I store leftover hand pies?
A: Store them in an airtight container at room temperature for up to 2 days. To reheat, warm them in a 350°F (175°C) oven or toaster oven for 5-7 minutes until the crust is crisp again. For another easy treat that stores well, check out these no-bake chocolate coconut macaroons.
NUTRITIONAL SNAPSHOT
| Nutrient | Amount per Serving |
|---|---|
| Calories | 380 kcal |
| Protein | 5g |
| Fat | 22g |
| Net Carbs | 39g |
| Fiber | 2g |
| Sugar | 20g |

Easy S'Mores Hand Pies with a Flaky Butter Crust
These Buttery S'Mores Hand Pies capture the campfire classic in a neat, portable package. The all-butter crust is unbelievably flaky, creating the perfect pocket for gooey marshmallow and rich, melted chocolate. This is one of the simplest yet most impressive desserts you can make.
Ingredients
- 2 1/2 cups all-purpose flour
- 1 tablespoon granulated sugar
- 1 teaspoon salt
- 1 cup (2 sticks) unsalted butter (ice-cold, cubed)
- 4-6 tablespoons ice water
- 1 cup mini marshmallows
- 1/2 cup coarsely chopped milk or semi-sweet chocolate
- 1/2 cup graham cracker crumbs (from ~4-5 full sheets, lightly toasted)
- 1 large egg (beaten with 1 tbsp of water for egg wash)
- 2 tablespoons turbinado sugar (for sprinkling)
Instructions
- In a large bowl, whisk together the flour, sugar, and salt.
- Add the cubed, ice-cold butter to the flour. Using a pastry cutter or your fingertips, quickly cut the butter into the flour until the mixture resembles coarse crumbs with some pea-sized butter pieces remaining.
- Drizzle 4 tablespoons of ice water over the mixture. Use a fork to gently toss until a shaggy dough begins to form. Do not overmix. If it’s too dry, add more ice water, 1 teaspoon at a time.
- Turn the dough out onto a clean surface and gently press it into a cohesive ball.
- Divide the dough in half, flatten each half into a 1-inch thick disk, wrap tightly in plastic wrap, and refrigerate for at least 1 hour (or up to 2 days).
- Preheat your oven to 400°F (200°C). Line two baking sheets with parchment paper.
- In a small bowl, combine the toasted graham cracker crumbs, mini marshmallows, and chopped chocolate.
- On a lightly floured surface, roll out one disk of dough to about 1/8-inch thickness.
- Using a 4-inch round cutter (or the rim of a wide glass), cut out as many circles as you can. Gather and re-roll the scraps once. Repeat with the second disk of dough.
- Place about 1.5 to 2 tablespoons of the s'mores filling onto the center of half of the dough circles, leaving a 1/2-inch border around the edge.
- Brush the edges of the filled circles with the egg wash. Place a second dough circle on top. Gently press the edges to seal, then use the tines of a fork to crimp the edges firmly.
- Transfer the assembled pies to your prepared baking sheets. Brush the tops with the remaining egg wash and sprinkle generously with turbinado sugar. Cut two or three small slits in the top of each pie to allow steam to escape.
- Bake for 18-22 minutes, or until the crust is a deep golden brown and the filling is bubbly. Rotate the baking sheets halfway through for even cooking.
- Let the hand pies cool on the baking sheet for at least 10 minutes before transferring them to a wire rack to cool further. They are best served warm.