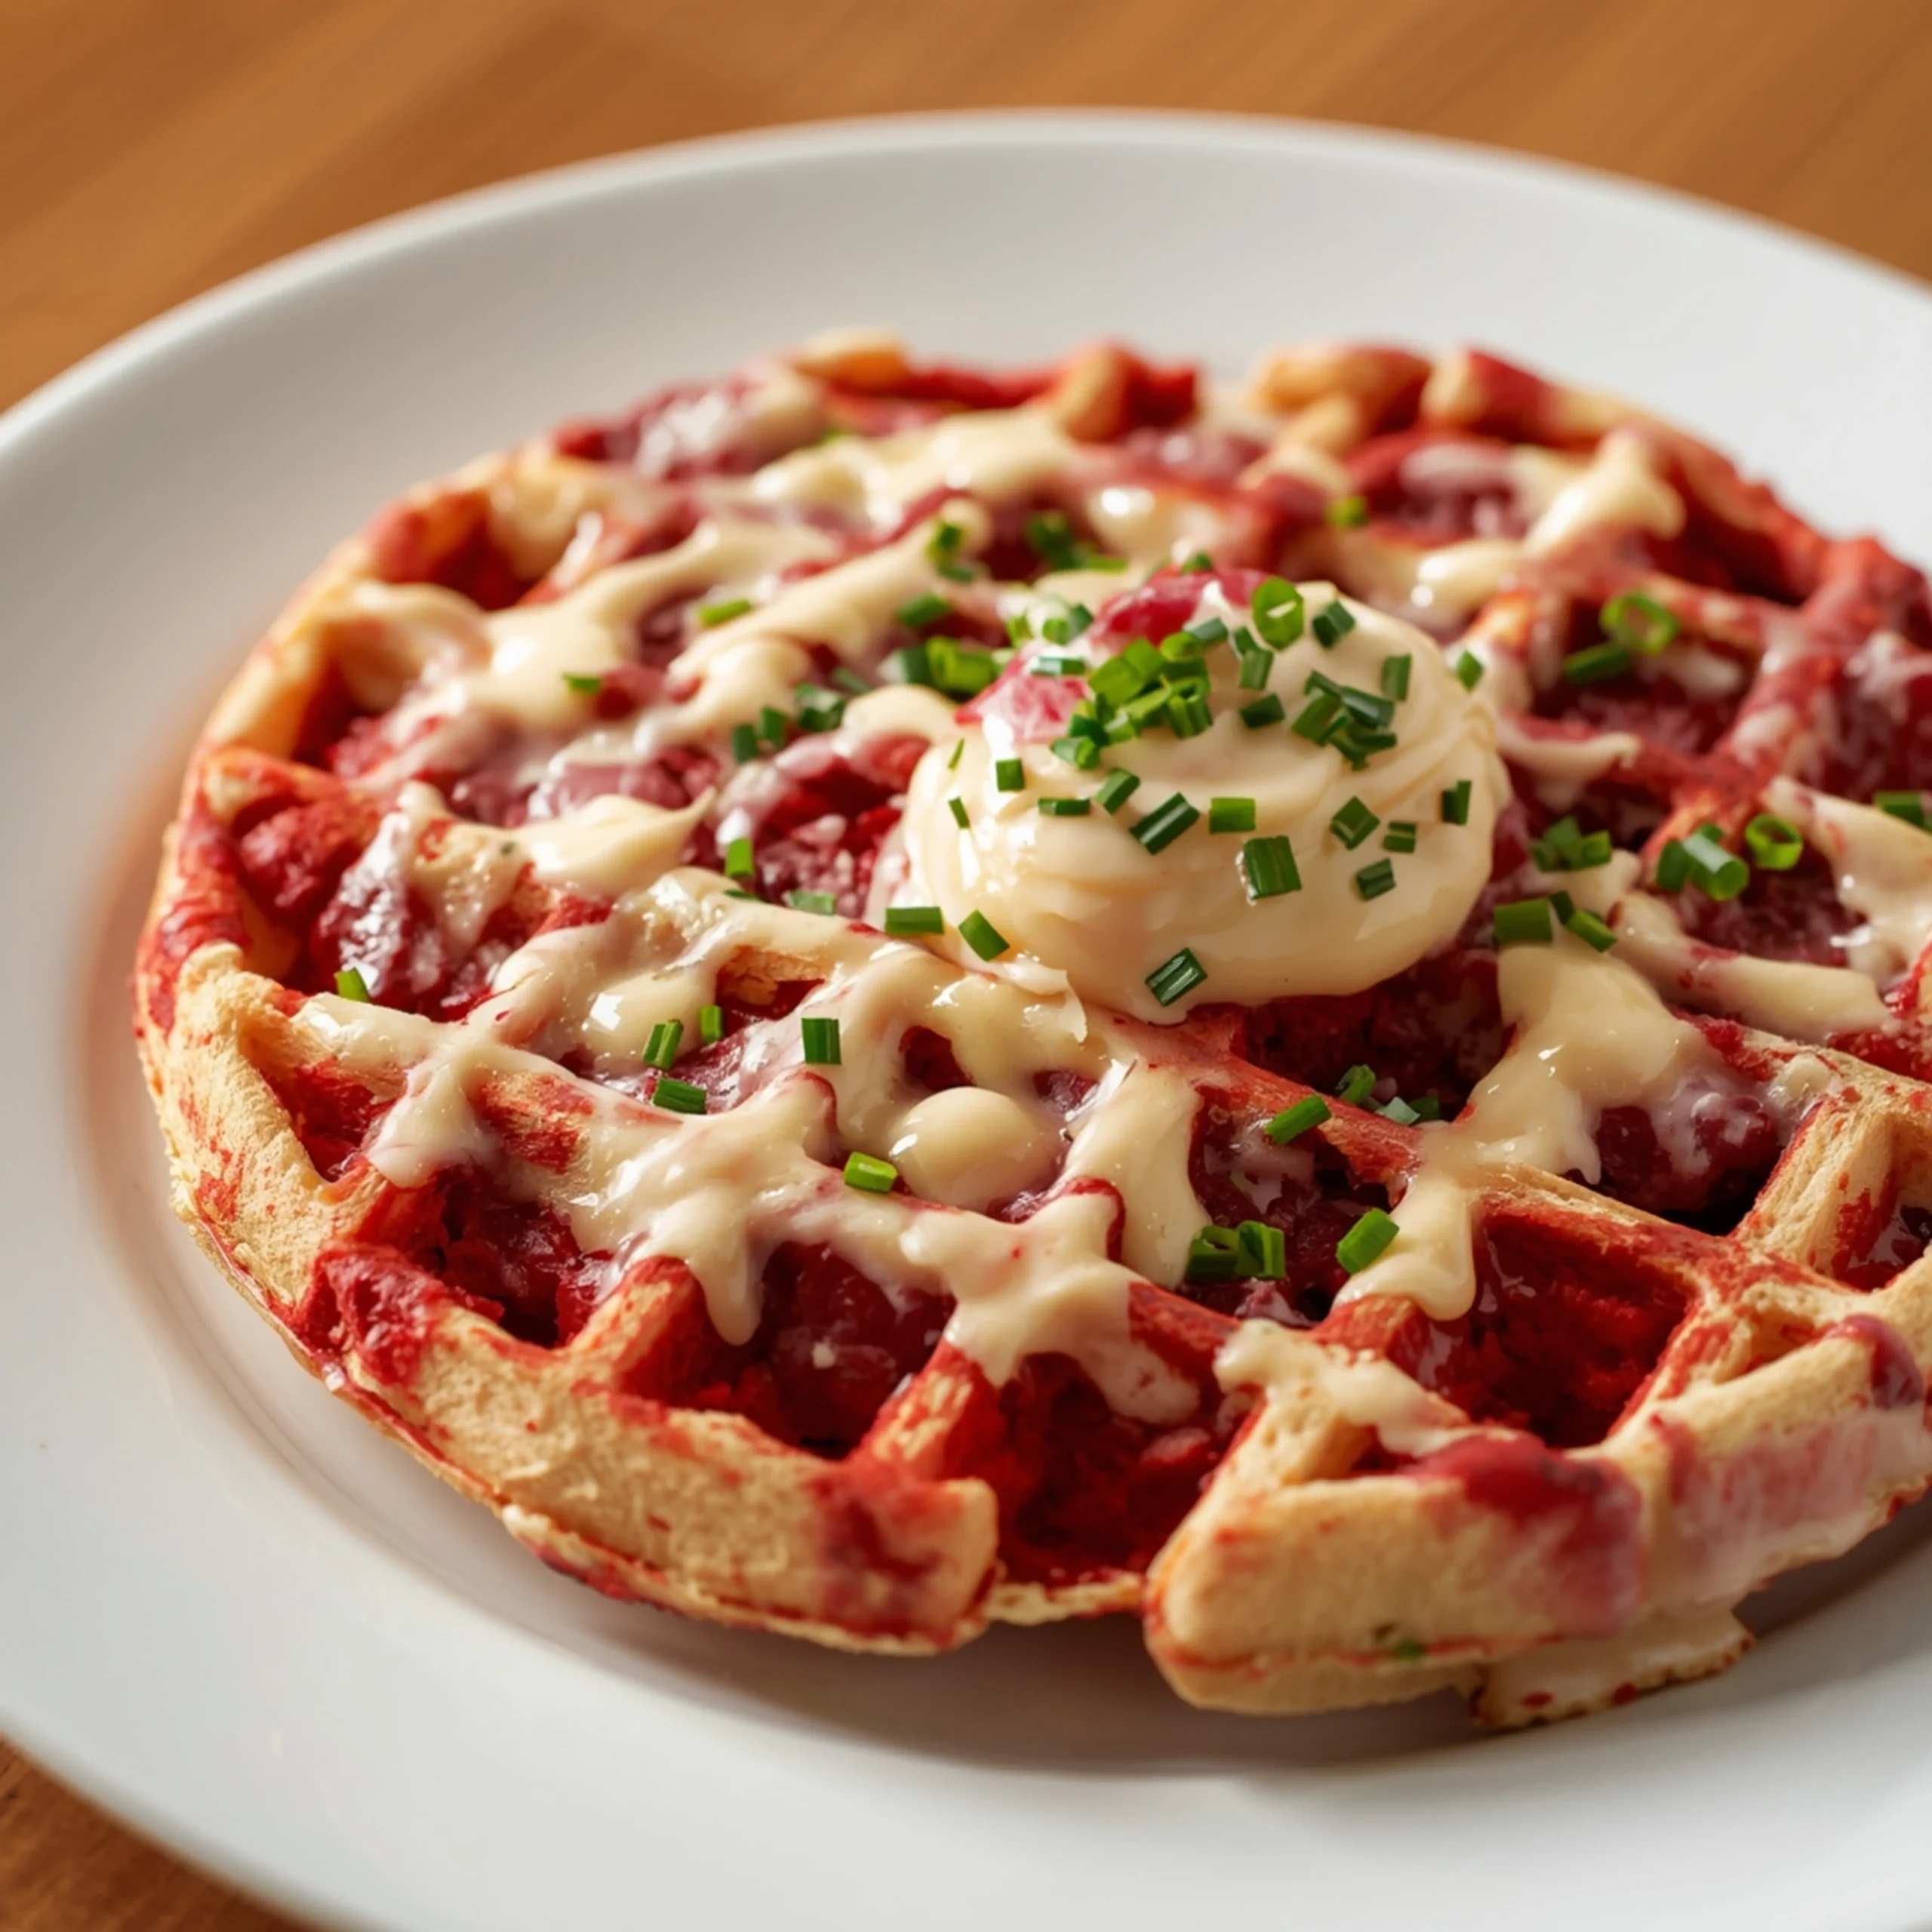
Easy Red Velvet Marble Waffles (Perfectly Swirled)
These Red Velvet Marble Waffles deliver a stunning visual with a classic, tender crumb. We skip the complicated steps for a straightforward recipe that combines a tangy buttermilk batter with a rich cocoa swirl. It’s a show-stopping breakfast that’s surprisingly easy to execute.
For home cooks looking to elevate their morning routine, this recipe is a fantastic starting point. If you love this, you’ll find even more inspiration in my collection of breakfast recipes.
Key Ingredient Breakdown
The signature Red Velvet flavor comes from a specific combination of ingredients. Understanding their role is key to success.
- Buttermilk & Vinegar: This acidic duo reacts with the baking soda for a powerful lift, creating a light, airy texture. It also provides the classic tangy flavor that balances the sweetness.
- Unsweetened Cocoa Powder: Use a small amount. The goal isn’t a deep chocolate waffle, but a subtle cocoa note that defines the Red Velvet profile.
- Red Food Coloring: Gel food coloring is superior here. It provides a vibrant red without adding excess liquid, which can alter the batter’s consistency.
- Melted Butter: This provides richness and fat, which helps create those crisp, golden-brown edges on your waffle.
The “Marble” Technique: A Visual Guide
Achieving a distinct marble effect instead of a uniform pink batter is simple. The secret is to avoid over-mixing when combining the two colors.
- Prepare a Single Base Batter: First, mix all your ingredients (except the cocoa powder and red food coloring) into one cohesive batter. This ensures both colors have the exact same consistency.
- Divide the Batter: Pour approximately half of the batter into a separate bowl. Precision isn’t critical, but a near-even split is ideal.
- Create the Colors:
- Red Batter: In the first bowl, whisk in the red food coloring until you have a vibrant, uniform red.
- Cocoa Batter: In the second bowl, whisk in the unsweetened cocoa powder. It will be a light brown color.
- Ladle Strategically: Do NOT mix the two bowls back together. Instead, ladle small amounts of each batter directly onto your preheated waffle iron, alternating between the two. Let them sit side-by-side.
- Let the Iron Do the Work: When you close the lid of the waffle iron, the pressure will spread and gently swirl the batters together, creating the perfect marble pattern.
Step-by-Step Instructions
Prep Time: 10 minutes
Cook Time: 15-20 minutes
Yields: 6-8 waffles
- Preheat & Prep: Preheat your waffle iron to a medium-high setting. In a large bowl, whisk together the dry ingredients: flour, sugar, baking powder, baking soda, and salt.
- Mix Wet Ingredients: In a separate medium bowl, whisk together the buttermilk, melted butter, eggs, vanilla extract, and white vinegar until smooth.
- Combine Batters: Pour the wet ingredients into the dry ingredients. Mix with a spatula until just combined. A few small lumps are perfectly fine—do not over-mix.
- Divide & Color: Pour half of the batter into another bowl.
- In the first bowl, stir in the red food coloring.
- In the second bowl, stir in the cocoa powder.
- Cook the Waffles: Lightly grease your preheated waffle iron. Add alternating spoonfuls of the red and plain cocoa batter onto the center of the iron.
- Close & Cook: Close the lid and cook for 3-5 minutes, or until the waffle iron’s indicator signals it’s done. The waffle should be golden-brown on the outside and cooked through.
- Serve Immediately: Carefully remove the waffle and serve immediately with your favorite toppings. Repeat with the remaining batter.
Topping & Pairing Matrix
The right topping makes all the difference. Pair these waffles with flavors that complement their tangy, lightly chocolatey profile.
- Classic Cream Cheese Glaze: The absolute best pairing. Mix powdered sugar, a block of softened cream cheese, a splash of milk, and a bit of vanilla until you have a smooth, pourable glaze.
- Fresh Berries & Whipped Cream: The slight tartness of raspberries or strawberries cuts through the richness beautifully.
- Chocolate Drizzle: For a more decadent option, melt semi-sweet chocolate chips and drizzle generously over the top.
- Pecans & Maple Syrup: Toasted pecans add a fantastic crunch and nutty flavor that works well with the waffle’s profile.
For a truly show-stopping treat, you can turn these waffles into a base for an ice cream sundae, pulling ideas from my wider dessert inspiration collection.
COMMON MISTAKES TO AVOID
- Mistake: Over-mixing the batter after adding the wet ingredients.
- Fix: Mix only until the flour streaks disappear. A few lumps are good; they lead to a more tender waffle. Over-mixing develops gluten, resulting in a tough, chewy texture.
- Mistake: Not preheating the waffle iron enough.
- Fix: A hot iron is critical for a crisp exterior. If you add batter to a warm iron, it will just steam the waffle, making it soft and floppy. Let your iron fully preheat.
- Mistake: Combining the red and cocoa batters in the bowl.
- Fix: To get a marble effect, the batters must be added to the waffle iron separately. If you mix them in the bowl, you will get a single, muddy pinkish-brown color.
FAQ
Q: Can I make this batter ahead of time?
A: It’s not recommended. The baking soda and vinegar begin reacting immediately. For the fluffiest waffles, it’s best to cook the batter right after mixing.
Q: How do I keep the waffles warm and crispy while I cook the whole batch?
A: Preheat your oven to 200°F (95°C). Place a wire cooling rack on a baking sheet and place the finished waffles on the rack in a single layer. This keeps them warm and allows air to circulate, preventing them from getting soggy.
Q: What if I want a savory breakfast instead?
A: These waffles are definitely a sweet treat. For a high-protein, savory option that is just as quick, many people enjoy a simple recipe like this cottage cheese egg sriracha protein toast.
For those who enjoy exploring decadent baked goods, you might also find inspiration in these Pecan Pie Bars for another special occasion treat.
NUTRITIONAL SNAPSHOT
*(Estimated per waffle, without toppings)*
| Nutrient | Amount per Serving |
|---|---|
| Calories | 290 |
| Protein | 7g |
| Fat | 14g |
| Net Carbs | 33g |
| Fiber | 2g |
| Sugar | 12g |

Easy Red Velvet Marble Waffles (Perfectly Swirled)
These Red Velvet Marble Waffles deliver a stunning visual with a classic, tender crumb. We skip the complicated steps for a straightforward recipe that combines a tangy buttermilk batter with a rich cocoa swirl. It’s a show-stopping breakfast that’s surprisingly easy to execute. For home cooks looking to elevate their morning routine, this recipe is a fantastic starting point.
Ingredients
- 2 cups all-purpose flour
- 1/4 cup granulated sugar
- 2 tsp baking powder
- 1/2 tsp baking soda
- 1/2 tsp salt
- 2 large eggs
- 1 3/4 cups buttermilk
- 1/2 cup unsalted butter, melted
- 1 tsp vanilla extract
- 1 tsp white vinegar
- 1 tbsp unsweetened cocoa powder
- 1 tbsp red gel food coloring
Instructions
- Preheat your waffle iron to a medium-high setting. In a large bowl, whisk together the dry ingredients: flour, sugar, baking powder, baking soda, and salt.
- In a separate medium bowl, whisk together the buttermilk, melted butter, eggs, vanilla extract, and white vinegar until smooth.
- Pour the wet ingredients into the dry ingredients. Mix with a spatula until just combined. A few small lumps are perfectly fine—do not over-mix.
- Pour half of the batter into another bowl. In the first bowl, stir in the red food coloring. In the second bowl, stir in the cocoa powder.
- Lightly grease your preheated waffle iron. Add alternating spoonfuls of the red and plain cocoa batter onto the center of the iron.
- Close the lid and cook for 3-5 minutes, or until the waffle iron's indicator signals it's done. The waffle should be golden-brown on the outside and cooked through.
- Carefully remove the waffle and serve immediately with your favorite toppings. Repeat with the remaining batter.