Chewy Brown Butter Rice Krispie Treats Recipe
Forget everything you know about basic Rice Krispie treats. This recipe uses the simple, transformative power of brown butter to create a treat with incredible depth—nutty, toasty, and perfectly chewy. If you’re a fan of no-bake sweets that deliver maximum flavor, you’ll find plenty to love in our full collection of dessert recipes.
The Brown Butter Advantage: Why This One Step Changes Everything
Browning butter is a simple technique that pays huge dividends. It’s the one step that elevates this childhood classic into a sophisticated dessert.
- What is Brown Butter? It’s just butter that has been cooked long enough to toast the milk solids. The French call it beurre noisette, or “hazelnut butter,” for its signature nutty aroma.
- The Science: As you heat butter, the water evaporates and the milk solids separate and sink. These solids then begin to toast, undergoing the Maillard reaction—the same chemical process that gives seared steak and toasted bread their complex flavor.
- The Result: You get a deep, nutty, and slightly savory flavor that cuts through the sweetness of the marshmallows, creating a perfectly balanced treat.
Ingredient Deep Dive: The Anatomy of a Perfect Treat
Success lies in using the right components. Each one plays a critical role.
- Butter: Use unsalted butter so you can control the salt level. Higher-quality butter with less water content (like European-style) will brown more efficiently and yield more flavor.
- Marshmallows: Fresh, soft marshmallows are non-negotiable. Stale, hard marshmallows won’t melt properly and will result in a tough, dense treat. We use standard-sized ones here, but minis work too (they just melt faster).
- Cereal: Classic crisped rice cereal is the goal. Avoid stale cereal at all costs, as it will make your final product taste flat and lead to a soft, unappealing texture.
- Vanilla & Salt: These are the flavor amplifiers. Use pure vanilla extract, not imitation. Flaky sea salt is the key—a sprinkle in the mix and another on top makes all the difference.
Step-by-Step Instructions
- Prep Time: 5 minutes
- Cook Time: 10 minutes
- Setting Time: 1 hour
- Yields: 16 squares
- Prepare Your Pan: Lightly grease a 9×9 inch baking pan with butter or non-stick spray. For ultra-clean removal, line the pan with parchment paper, leaving an overhang on two sides to act as “handles.”
- Brown the Butter: In a large pot or Dutch oven, melt the stick of unsalted butter over medium-low heat. Continue cooking, swirling the pan occasionally. The butter will foam, then the foam will subside. You’ll see golden-brown specks (the milk solids) forming at the bottom. Keep a close eye here—once you smell a nutty aroma and the specks are amber-colored (about 5-8 minutes), immediately remove it from the heat. Don’t let it burn.
- Melt the Marshmallows: Add the entire bag of marshmallows to the hot brown butter. Return the pot to low heat and stir constantly until the marshmallows are completely melted and smooth.
- Add Flavor: Remove the pot from the heat. Immediately stir in the vanilla extract and the sea salt. The mixture will be fragrant and glossy.
- Combine with Cereal: Pour the crisped rice cereal into the marshmallow mixture. Use a silicone spatula to gently fold everything together until the cereal is evenly coated. Work quickly but gently to avoid crushing the cereal.
- Press into Pan: Scrape the mixture into your prepared pan. To press it down without sticking, lightly grease your spatula or a piece of wax paper. Crucial Tip: Press gently to form an even layer. Compacting the mixture too tightly is the #1 cause of hard, dense treats.
- Set & Slice: Sprinkle the top with a bit more flaky sea salt, if desired. Let the treats set at room temperature for at least 1 hour before using the parchment handles to lift them out and slice into squares.
Pro-Level Variations & Flavor Boosters
Once you’ve mastered the base recipe, experiment with these additions. These treats make a fantastic, simple end to a meal, pairing wonderfully after our savory dinner recipes.
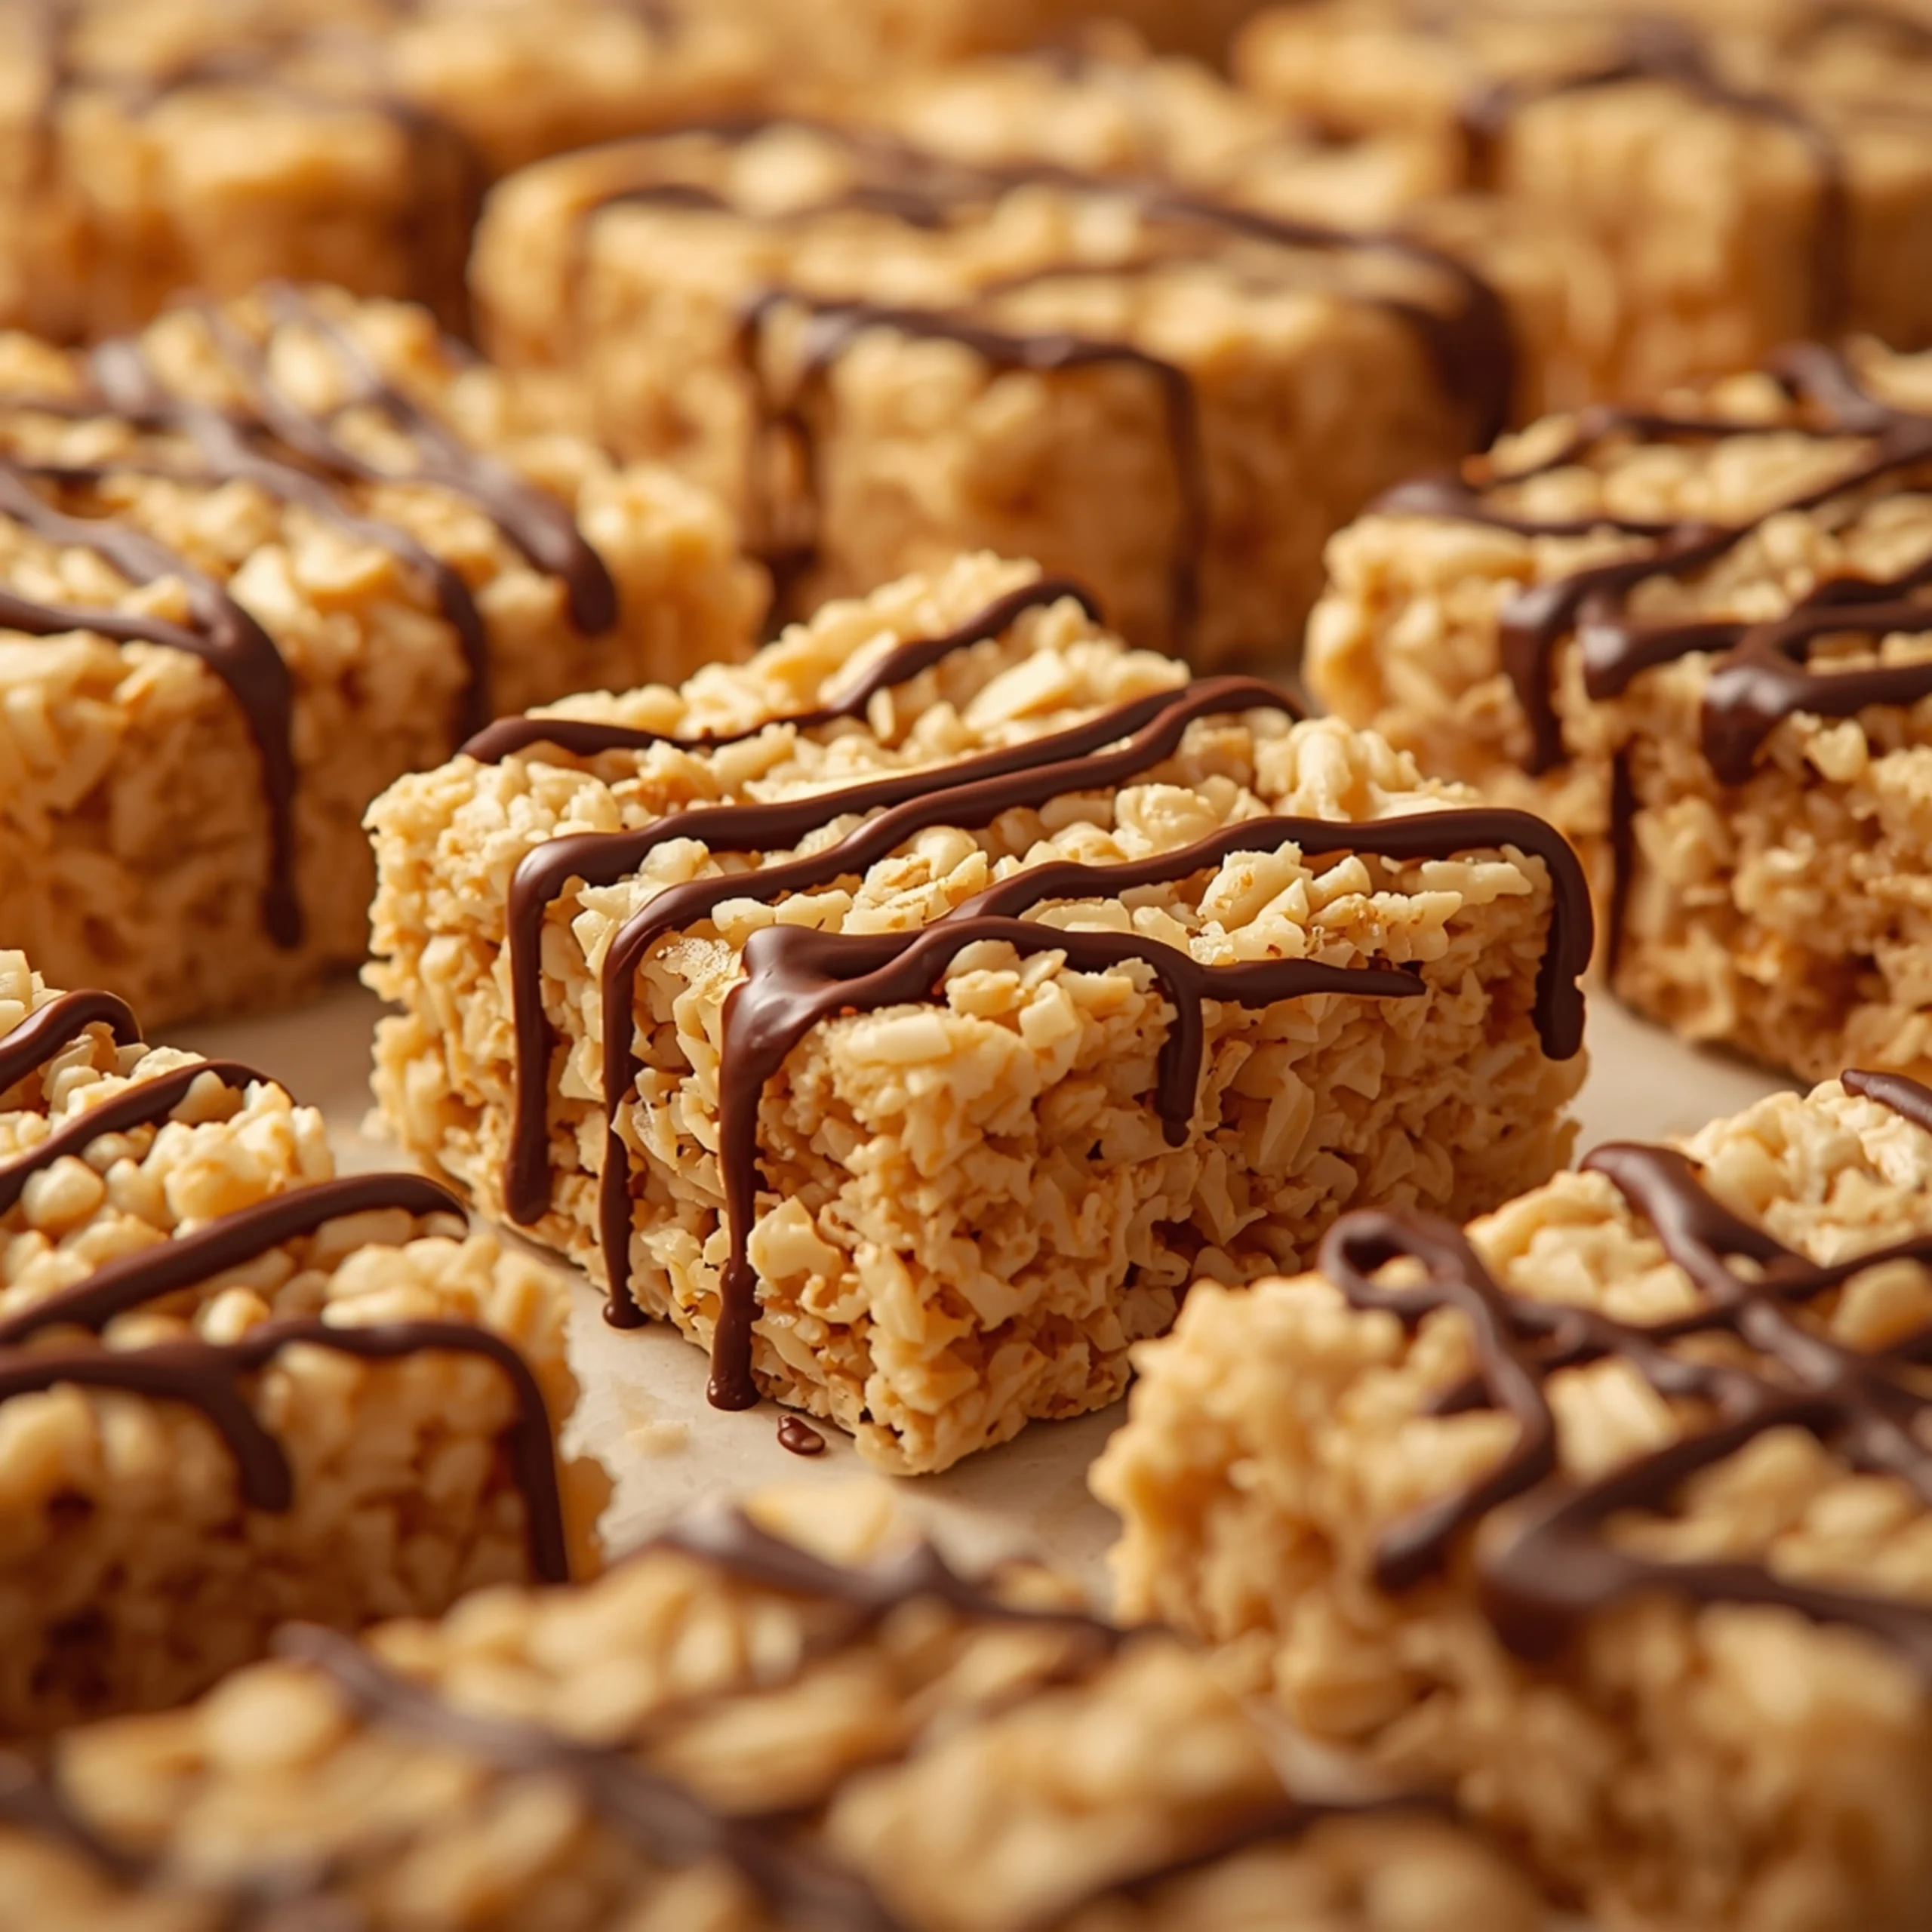
- Chocolate Drizzle: Melt 1/2 cup of high-quality dark or semi-sweet chocolate chips and drizzle over the set treats.
- Salted Caramel: Swirl 1/4 cup of thick, store-bought or homemade salted caramel sauce into the marshmallow mixture just before adding the cereal.
- Nutty Crunch: Add 1/2 cup of toasted pecans, walnuts, or sliced almonds along with the cereal.
- Coffee Infusion: Add 1 teaspoon of instant espresso powder to the butter as it browns to give it a rich, mocha-like flavor.
These simple treats are a great counterpoint to more complex savory dishes. For a full menu, consider how a simple dessert can follow a flavor-packed main like these Creamy Peppercorn Steak Bites.
COMMON MISTAKES TO AVOID
- Mistake: The treats are rock-hard.
- Fix: You either cooked the marshmallow mixture for too long or pressed the treats too firmly into the pan. Melt the marshmallows on low heat just until smooth, and press the final mixture gently—just enough to form an even layer.
- Mistake: The treats taste bland.
- Fix: You skipped or under-utilized the salt. Salt is essential for balancing the sweetness and enhancing the nutty flavor of the brown butter. Use the recommended amount and finish with a sprinkle of flaky sea salt on top.
- Mistake: The butter separated, leaving a greasy final product.
- Fix: The heat was too high when melting the marshmallows. This can cause the butter to separate from the sugar. Always melt marshmallows on low, consistent heat and stir constantly for a smooth, emulsified base.
FAQ
Q: Can I use marshmallow fluff instead of whole marshmallows?
A: Yes, you can substitute a 7-ounce jar of marshmallow creme. Add it to the browned butter off the heat and stir until fully combined before adding the cereal. The texture will be slightly softer and gooier.
Q: How do I store Brown Butter Rice Krispie Treats?
A: Store them in an airtight container at room temperature for up to 3 days. Do not refrigerate them, as it will make them hard and dry.
Q: Can I double this recipe?
A: Absolutely. Double all ingredients and press the mixture into a 9×13 inch pan. The browning and melting steps will take slightly longer.
More Recipe Inspiration
For another fantastic no-bake dessert option that is perfect for parties, check out these Chocolate Peppermint Mousse Cups. Or, for a light and savory meal idea, this Garlic Shrimp and Zucchini Noodles is a great choice. Explore all our recipes here for more kitchen inspiration.
NUTRITIONAL SNAPSHOT
(Estimates based on 16 servings)
| Nutrient | Amount per Serving |
|---|---|
| Calories | 165 |
| Protein | 1g |
| Fat | 6g |
| Net Carbs | 26g |
| Fiber | 0g |
| Sugar | 15g |

Chewy Brown Butter Rice Krispie Treats Recipe
Forget everything you know about basic Rice Krispie treats. This recipe uses the simple, transformative power of brown butter to create a treat with incredible depth—nutty, toasty, and perfectly chewy.
Ingredients
- 1/2 cup (1 stick) unsalted butter
- 1 (10-ounce) bag of marshmallows
- 1 teaspoon pure vanilla extract
- 1/2 teaspoon flaky sea salt (plus more for sprinkling)
- 6 cups crisped rice cereal
Instructions
- Prepare Your Pan: Lightly grease a 9x9 inch baking pan with butter or non-stick spray. For ultra-clean removal, line the pan with parchment paper, leaving an overhang on two sides to act as "handles."
- Brown the Butter: In a large pot or Dutch oven, melt the stick of unsalted butter over medium-low heat. Continue cooking, swirling the pan occasionally. The butter will foam, then the foam will subside. You'll see golden-brown specks (the milk solids) forming at the bottom. Keep a close eye here—once you smell a nutty aroma and the specks are amber-colored (about 5-8 minutes), immediately remove it from the heat. Don't let it burn.
- Melt the Marshmallows: Add the entire bag of marshmallows to the hot brown butter. Return the pot to low heat and stir constantly until the marshmallows are completely melted and smooth.
- Add Flavor: Remove the pot from the heat. Immediately stir in the vanilla extract and the sea salt. The mixture will be fragrant and glossy.
- Combine with Cereal: Pour the crisped rice cereal into the marshmallow mixture. Use a silicone spatula to gently fold everything together until the cereal is evenly coated. Work quickly but gently to avoid crushing the cereal.
- Press into Pan: Scrape the mixture into your prepared pan. To press it down without sticking, lightly grease your spatula or a piece of wax paper. Crucial Tip: Press gently to form an even layer. Compacting the mixture too tightly is the #1 cause of hard, dense treats.
- Set & Slice: Sprinkle the top with a bit more flaky sea salt, if desired. Let the treats set at room temperature for at least 1 hour before using the parchment handles to lift them out and slice into squares.