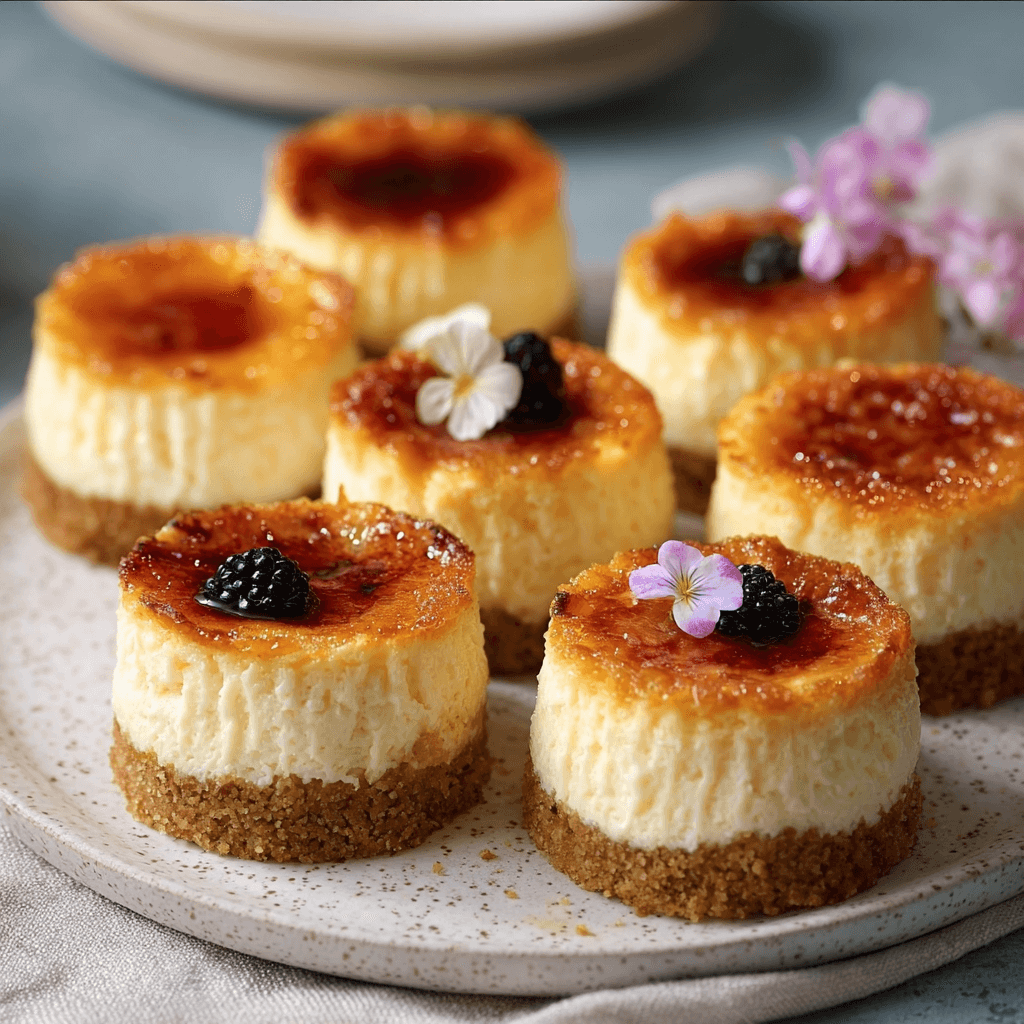
Mini Crème Brûlée Cheesecakes: The Perfect Hybrid Dessert
This recipe fuses two iconic desserts into one perfect, single-serving treat. You get the rich, tangy creaminess of cheesecake combined with the shatteringly crisp, caramelized sugar crust of crème brûlée. We’ve engineered this guide for flawless results, giving you one of the most impressive and easy stunning dessert recipes you can make.
Why This Recipe Is a Game-Changer
- No Water Bath Needed: The small size and controlled baking time eliminate the need for a fussy water bath, a common pain point with full-sized cheesecakes.
- Perfect Portions: Individual servings make them ideal for parties, portion control, and elegant presentation.
- The Ultimate Texture Combo: This is where creamy meets crunchy. It’s a sensory experience that’s deeply satisfying.
Key Component Breakdown
Success lies in understanding the three core parts of this dessert.
- The Graham Cracker Crust: This provides a sturdy, buttery, and slightly salty base that contrasts the rich filling. We pre-bake it for 5 minutes to ensure it stays crisp, not soggy.
- The Cheesecake Filling: The star of the show. Crucially, all dairy and eggs must be at room temperature. This prevents lumps and ensures a silky-smooth texture. We use a blend of heavy cream and cream cheese for a rich, dense, yet velvety consistency.
- The “Brûlée” Topping: Simple granulated sugar is all you need. When torched, it melts and caramelizes into a thin, glass-like sheet that cracks beautifully under a spoon.
Step-by-Step Instructions
Prep Time: 20 minutes
Cook Time: 22-25 minutes
Chill Time: 4 hours (minimum)
Yields: 12 mini cheesecakes
- Prepare the Pan & Crust:
- Preheat oven to 325°F (163°C). Line a standard 12-cup muffin tin with paper liners.
- In a small bowl, combine graham cracker crumbs, melted butter, and 1 tbsp of granulated sugar. Mix until it resembles wet sand.
- Press 1.5 tablespoons of the mixture firmly into the bottom of each liner. Use the bottom of a small glass or a spice jar to pack it tightly.
- Bake for 5 minutes. Set aside to cool while you prepare the filling.
- Mix the Cheesecake Filling:
- In a large bowl, use an electric mixer on medium-low speed to beat the room temperature cream cheese until completely smooth and free of lumps, about 2 minutes.
- Add the granulated sugar and salt. Mix on low until just combined. Scrape down the sides of the bowl.
- Add the eggs one at a time, mixing on low after each addition just until the yolk disappears. Do not overmix. Overmixing incorporates too much air, which causes cracks.
- Stir in the heavy cream and vanilla extract on low speed until the batter is smooth and uniform.
- Bake the Cheesecakes:
- Divide the filling evenly among the 12 prepared liners, filling each about three-quarters full.
- Bake for 22-25 minutes. The centers should have a very slight wobble, but the edges should be set. They will firm up completely as they cool.
- Chill Completely:
- Let the cheesecakes cool on a wire rack for 1 hour at room temperature.
- Transfer the tin to the refrigerator and chill, uncovered, for at least 4 hours, or preferably overnight. This step is non-negotiable for the proper cheesecake texture.
- Brûlée Before Serving:
- Just before you plan to serve, remove the cheesecakes from the fridge.
- Sprinkle about 1-2 teaspoons of granulated sugar evenly over the top of one cheesecake.
- Using a kitchen torch, hold the flame 2-3 inches from the surface and move it continuously until the sugar melts, bubbles, and turns a deep amber brown.
- Let it sit for 2-3 minutes for the sugar to harden into a glass-like shell. Repeat for all cheesecakes. Serve immediately.
Mastering the Torch: A Guide to the Perfect “Brûlée”
The final step is the most dramatic. Don’t be intimidated.
- Use a Kitchen Torch, Not the Broiler: A torch gives you precise control. A broiler is a fast track to a melted, weeping cheesecake disaster.
- Create an Even Layer: The key to a uniform crust is an even, thin layer of sugar. Don’t leave any bare spots or create thick piles.
- Keep the Flame Moving: Never hold the torch in one spot. Use a constant, sweeping motion, like you’re spray-painting, to caramelize the sugar evenly. This is similar to techniques used in other complex desserts, like achieving the perfect layers in complex flavors like this mille crepe cake.
- Watch the Color: You’re looking for a rich, amber color. It can go from perfect to burnt in a matter of seconds. As soon as it’s golden-brown, stop.
- Let It Harden: The magic happens after you remove the heat. The molten sugar will cool and harden into that signature glass-like shell within a few minutes.
Once you master this, you can explore more of our recipes and apply new techniques to your cooking repertoire.
Make-Ahead & Storage Strategy
These are excellent for making ahead, which is perfect for stress-free entertaining.
- Make the Cheesecakes: Bake and chill the cheesecakes (without the sugar topping) up to 3 days in advance.
- Store Correctly: Keep them in an airtight container in the refrigerator to prevent them from drying out or absorbing other food odors.
- Torch Just Before Serving: The brûlée topping is best when fresh. The caramelized sugar will soften and weep if left in the fridge for too long. For the best “crack,” torch right before your guests arrive.
- Freezing: You can freeze the baked and chilled cheesecakes (pre-brûlée) for up to 1 month. Thaw in the refrigerator overnight before torching and serving.
COMMON MISTAKES TO AVOID
- Mistake: Using cold ingredients.
Fix: Ensure your cream cheese, eggs, and heavy cream are all at room temperature. This is the #1 rule for a lump-free, smooth cheesecake batter. - Mistake: Overmixing the batter after adding eggs.
Fix: Mix on the lowest speed and stop as soon as each egg is incorporated. Over-whipping adds air, which expands during baking and then collapses, causing cracks. - Mistake: Torching the sugar too early.
Fix: Only brûlée the cheesecakes right before you intend to serve them. The caramelized sugar will absorb moisture in the fridge and turn into a soft, syrupy layer.
FAQ
Q: Can I make these without a kitchen torch?
A: You can try using your oven’s broiler, but it’s very risky. Place the chilled, sugared cheesecakes on a baking sheet and broil on high for 30-60 seconds, watching them constantly. The risk of melting the cheesecake is high. A torch is a worthwhile investment.
Q: Why is my cheesecake filling lumpy?
A: This is almost always caused by cold cream cheese. If it’s not fully softened to room temperature, it won’t blend smoothly with the other ingredients, leaving behind small, stubborn lumps.
Q: Can I use a different type of crust?
A: Absolutely. This recipe works well with a crust made from crushed Oreo cookies (remove the filling), Biscoff cookies, or shortbread. Simply substitute the same weight and prepare as directed.
This dessert shows how combining simple concepts can lead to something truly special. For other inventive recipes that play with texture and form, you might also enjoy exploring creative desserts like strawberry cheesecake stuffed cookies.
HUNGRY FOR MORE?
After you’ve perfected dessert, consider tackling a savory project next. You can find excellent dinner guides for savory options like this crispy chicken katsu curry to round out your weekly menu.
NUTRITIONAL SNAPSHOT
| Nutrient | Amount per Serving |
|---|---|
| Calories | 345 kcal |
| Protein | 5g |
| Fat | 25g |
| Net Carbs | 24g |
| Fiber | 0.5g |
| Sugar | 22g |
Mini Crème Brûlée Cheesecakes: The Perfect Hybrid Dessert
Ingredients
- 1 cup graham cracker crumbs (about 10 full sheets)
- 4 tbsp unsalted butter, melted
- 1 tbsp granulated sugar
- 16 oz (2 blocks) full-fat cream cheese, at room temperature
- 2/3 cup granulated sugar
- 1/4 tsp salt
- 2 large eggs, at room temperature
- 1/2 tsp pure vanilla extract
- 1/4 cup heavy cream, at room temperature
- 1/4 cup granulated sugar