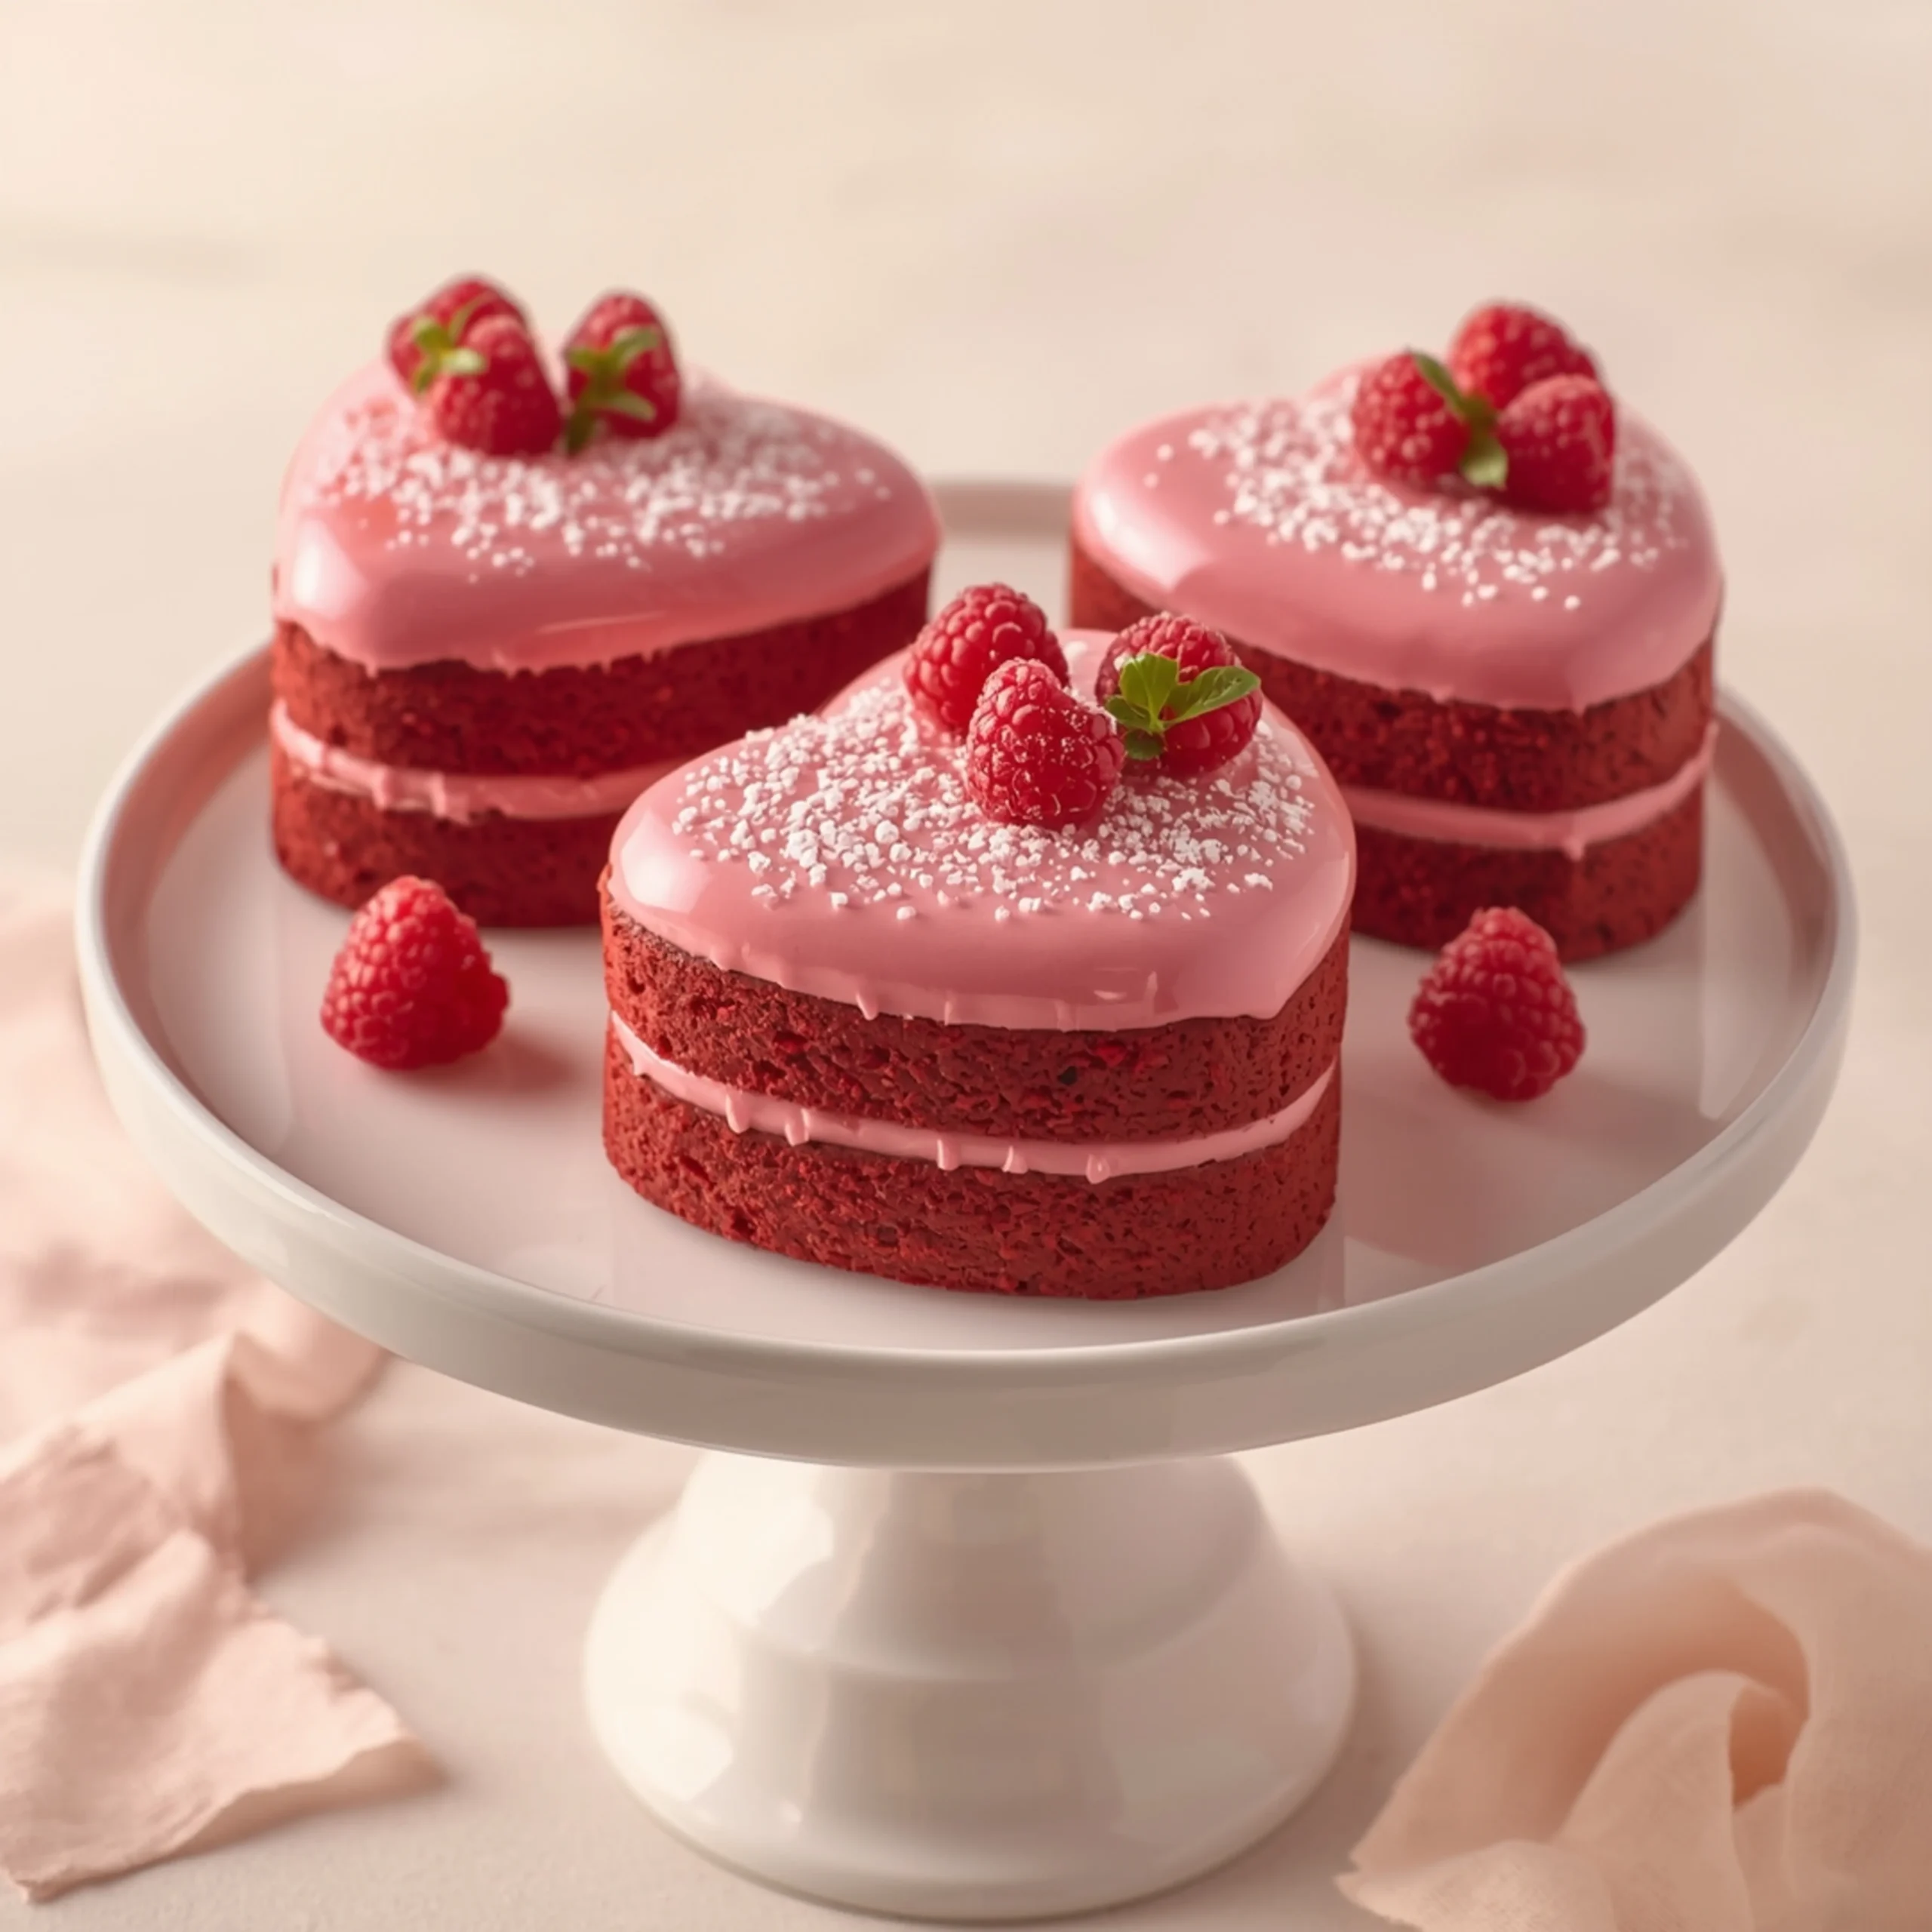
Perfect Pink Velvet Heart Cakes: A Simple Recipe
These Pink Velvet Heart Cakes deliver a moist, tender crumb with a subtle vanilla-cocoa flavor and a stunning pink hue. This recipe is engineered for success, using a simple method that guarantees a soft, velvety texture every time. For more show-stopping treats, explore our complete collection of dessert recipes.
STEP-BY-STEP INSTRUCTIONS
Part 1: The Pink Velvet Cake
- Preheat & Prep: Set your oven to 350°F (175°C). Grease and flour two 8-inch heart-shaped cake pans, or a 9×13 inch sheet pan if you plan to use a cookie cutter.
- Combine Dry Ingredients: In a large bowl, whisk together the all-purpose flour, granulated sugar, cocoa powder, baking soda, and salt. This ensures even distribution and a uniform rise.
- Combine Wet Ingredients: In a separate medium bowl, whisk the eggs, vegetable oil, vanilla extract, and white vinegar until smooth. Add the pink gel food coloring and mix until you achieve a vibrant, consistent color.
- Reverse Creaming Method: Add the softened, cubed butter to the dry ingredients. Using a stand mixer or hand mixer on low, mix until the mixture resembles coarse, damp sand. This coats the flour in fat, preventing gluten overdevelopment and ensuring a tender cake.
- Alternate Liquids: With the mixer on low, slowly stream in half of the buttermilk. Once incorporated, add the egg mixture. Finally, add the remaining buttermilk and mix just until the batter is smooth. Do not overmix.
- Bake: Divide the batter evenly between your prepared pans. Bake for 30-35 minutes, or until a wooden skewer inserted into the center comes out with moist crumbs attached.
- Cool Completely: Let the cakes cool in the pans for 15 minutes before inverting them onto a wire rack to cool completely. A fully cooled cake is critical for clean frosting.
Part 2: The Cream Cheese Frosting
- Beat Butter & Cream Cheese: In a large bowl, use a mixer to beat the softened cream cheese and butter on medium-high speed until light, fluffy, and completely smooth (about 3-4 minutes).
- Add Sugar & Vanilla: Reduce the speed to low and gradually add the powdered sugar. Once incorporated, add the vanilla extract and salt.
- Whip to Perfection: Increase the speed to medium-high and whip for another 2-3 minutes until the frosting is airy and spreadable.
Part 3: Assembly
- Level the Cakes (Optional): If your cakes have a dome, use a serrated knife to carefully level the tops for stable stacking.
- Frost: Place one heart cake layer on your serving plate. Spread a generous layer of frosting over the top. Place the second heart layer on top.
- Crumb Coat & Chill: Apply a thin layer of frosting over the entire cake to trap any loose crumbs. Refrigerate for 20-30 minutes.
- Final Coat: Apply the final, thicker layer of frosting, smoothing it with an offset spatula. Decorate as desired and serve.
The Science of a Perfect Velvet Crumb
The “velvet” texture isn’t just a name; it’s the result of specific chemical reactions. Here’s the engineering behind it:
- Acid is Key: Buttermilk and vinegar are acidic. They react with the alkaline baking soda to create carbon dioxide gas, giving the cake a light, airy lift.
- Minimal Cocoa: Unlike a full chocolate cake, velvet cakes use just a tablespoon or two of cocoa powder. This provides a subtle depth of flavor without overpowering the delicate vanilla notes.
- The Power of Fat: The combination of butter and oil is intentional. Butter provides rich flavor, while oil guarantees a moist texture that doesn’t dry out. The reverse creaming method used here coats flour particles in fat first, shortening gluten strands for an exceptionally tender crumb.
Essential Equipment & Alternatives
You don’t need a professional kitchen to make these. Here’s the breakdown:
- Heart-Shaped Pans: The most direct route. Two 8-inch pans are ideal for a layered cake.
- Sheet Pan + Cookie Cutter: No heart pan? No problem. Bake the cake in a 9×13 inch sheet pan. Once cooled, use a large heart-shaped cookie cutter to punch out your cake layers. You can use the scraps for cake pops or a trifle.
- Silicone Molds: Perfect for creating individual mini-cakes. Baking time will be shorter, so check them around the 18-22 minute mark.
- Offset Spatula: This is non-negotiable for smooth, professional-looking frosting.
Frosting & Decoration Blueprint
The cake is your canvas. Here are some high-impact, low-effort ideas:
- Classic Swirls: Use the back of a spoon to create rustic, beautiful swirls in the final frosting coat.
- Sprinkle Ombre: Use different shades of pink and white sprinkles, concentrating the darkest color at the bottom and fading to white at the top.
- Fresh Berries: A simple arrangement of fresh raspberries or sliced strawberries adds an elegant, natural touch.
- Chocolate Drizzle: Melted white or dark chocolate, drizzled over the top, provides a striking contrast. For those who appreciate unique dessert combinations, you might also find inspiration in these Caramel Cheesecake Cookies.
Make-Ahead & Storage Strategy
Proper planning makes assembly a breeze. For more ideas on planning your cooking, you can browse our full collection of simple recipes.
- Cake Layers: Can be baked, cooled, and wrapped tightly in plastic wrap. Store at room temperature for up to 2 days or freeze for up to 1 month. Thaw at room temperature before frosting.
- Frosting: Can be made ahead and stored in an airtight container in the refrigerator for up to 1 week. Let it come to room temperature and re-whip for a few minutes to restore its fluffy texture before using.
- Assembled Cake: The finished cake is best stored in the refrigerator due to the cream cheese frosting. It will keep for up to 4 days. Let it sit at room temperature for 20-30 minutes before serving for the best flavor and texture.
These Pink Velvet Heart Cakes are more than a dessert; they’re a perfect project for a special occasion. We hope you love them. If you’re planning a full special meal, a dish like this Creamy Parmesan Tuscan Salmon recipe would make a fantastic main course.
COMMON MISTAKES TO AVOID
- Mistake: Overmixing the batter after adding the liquid.
Fix: Mix only until the last streaks of flour disappear. A few small lumps are okay. Overmixing develops gluten, leading to a tough, rubbery cake. - Mistake: Frosting a warm cake.
Fix: Patience is critical. The cake must be 100% cool to the touch. Warmth will melt the butter and cream cheese, creating a soupy, sliding mess. - Mistake: Using cold cream cheese or butter for the frosting.
Fix: Ensure both are properly softened to room temperature. Cold ingredients won’t combine smoothly, resulting in a lumpy, greasy frosting.
FAQ
Q: Can I use a different color?
A: Absolutely. This recipe is a perfect base for any color. Simply swap the pink gel coloring for blue, green, or lavender to match any theme. Gel coloring provides vibrant color without adding excess liquid.
Q: Can I make this as cupcakes?
A: Yes. This recipe will yield approximately 24 cupcakes. Line a muffin tin with paper liners and fill them 2/3 full. Bake at 350°F (175°C) for 18-22 minutes.
Q: My cream cheese frosting is too thin. How do I fix it?
A: This usually happens if the butter or cream cheese was too soft. The quickest fix is to chill the frosting in the refrigerator for 30-45 minutes to firm it up, then re-whip it. If it’s still too thin, you can add more powdered sugar, 1/4 cup at a time, until it reaches the desired consistency. For other cozy and comforting meal ideas, this Easy Bratwurst Soup Recipe is another great choice.
NUTRITIONAL SNAPSHOT
| Nutrient | Amount per Serving |
|---|---|
| Calories | 580 kcal |
| Protein | 6g |
| Fat | 35g |
| Net Carbs | 60g |
| Fiber | 1g |
| Sugar | 48g |
*Estimates are for one slice of a 12-serving cake.*

Perfect Pink Velvet Heart Cakes: A Simple Recipe
These Pink Velvet Heart Cakes deliver a moist, tender crumb with a subtle vanilla-cocoa flavor and a stunning pink hue. This recipe is engineered for success, using a simple method that guarantees a soft, velvety texture every time.
Ingredients
- 2 1/2 cups all-purpose flour
- 1 1/2 cups granulated sugar
- 1 tbsp unsweetened cocoa powder
- 1 tsp baking soda
- 1 tsp salt
- 1 cup unsalted butter (softened)
- 3 large eggs (room temp)
- 1 cup vegetable oil
- 1 tbsp vanilla extract
- 1 tsp white vinegar
- 1 cup buttermilk (room temp)
- 1-2 tsp pink gel food coloring
- 16 oz cream cheese (softened)
- 1 cup unsalted butter (softened)
- 4 cups powdered sugar
- 2 tsp vanilla extract
- 1/8 tsp salt
Instructions
- Set your oven to 350°F (175°C). Grease and flour two 8-inch heart-shaped cake pans, or a 9x13 inch sheet pan if you plan to use a cookie cutter.
- In a large bowl, whisk together the all-purpose flour, granulated sugar, cocoa powder, baking soda, and salt. This ensures even distribution and a uniform rise.
- In a separate medium bowl, whisk the eggs, vegetable oil, vanilla extract, and white vinegar until smooth. Add the pink gel food coloring and mix until you achieve a vibrant, consistent color.
- Add the softened, cubed butter to the dry ingredients. Using a stand mixer or hand mixer on low, mix until the mixture resembles coarse, damp sand. This coats the flour in fat, preventing gluten overdevelopment and ensuring a tender cake.
- With the mixer on low, slowly stream in half of the buttermilk. Once incorporated, add the egg mixture. Finally, add the remaining buttermilk and mix just until the batter is smooth. Do not overmix.
- Divide the batter evenly between your prepared pans. Bake for 30-35 minutes, or until a wooden skewer inserted into the center comes out with moist crumbs attached.
- Let the cakes cool in the pans for 15 minutes before inverting them onto a wire rack to cool completely. A fully cooled cake is critical for clean frosting.
- In a large bowl, use a mixer to beat the softened cream cheese and butter on medium-high speed until light, fluffy, and completely smooth (about 3-4 minutes).
- Reduce the speed to low and gradually add the powdered sugar. Once incorporated, add the vanilla extract and salt.
- Increase the speed to medium-high and whip for another 2-3 minutes until the frosting is airy and spreadable.
- If your cakes have a dome, use a serrated knife to carefully level the tops for stable stacking.
- Place one heart cake layer on your serving plate. Spread a generous layer of frosting over the top. Place the second heart layer on top.
- Apply a thin layer of frosting over the entire cake to trap any loose crumbs. Refrigerate for 20-30 minutes.
- Apply the final, thicker layer of frosting, smoothing it with an offset spatula. Decorate as desired and serve.