
Creamy No-Bake Mini Biscoff Cheesecakes
Introduction
These Mini Biscoff Cheesecakes deliver that signature spiced, caramelized cookie butter flavor in a perfectly portioned, no-bake dessert. The velvety cream cheese filling sits on a crunchy Biscoff cookie crust, creating a texture and taste combination that’s impossible to resist. If you love incredibly easy desserts, this will become your new go-to recipe.
The Anatomy of a Perfect Biscoff Cheesecake
Understanding the components is key to success. Each layer plays a critical role in the final product.
- The Crust: We use crushed Biscoff cookies mixed with melted butter. This creates a crisp, flavorful base that is sturdy enough to hold the filling but tender enough to melt in your mouth. It’s the foundation of that iconic cookie butter flavor.
- The Filling: The star of the show. We use full-fat, block-style cream cheese for maximum richness. Biscoff cookie butter is whipped directly into the filling, infusing every bite. Whipped heavy cream is folded in at the end to create an airy, mousse-like texture that sets beautifully without baking.
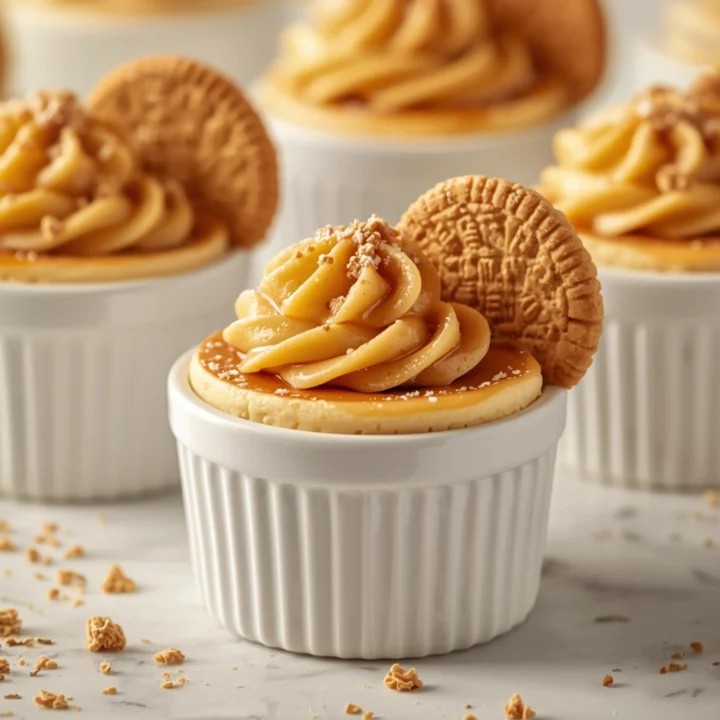
- The Topping: Simplicity wins. A drizzle of melted Biscoff spread and a single Biscoff cookie for garnish not only looks professional but also adds an extra hit of flavor and a satisfying crunch.
Essential Equipment for Flawless Minis
You don’t need professional gear, but the right tools make the process seamless.
- Standard 12-cup Muffin Pan: This is the perfect mold for creating uniform mini cheesecakes.
- Paper or Silicone Liners: Absolutely essential for easy removal. Silicone liners are reusable and provide a super clean release.
- Electric Mixer (Hand or Stand): Crucial for achieving a lump-free cream cheese filling and for whipping the heavy cream to stiff peaks. Doing this by hand is possible but requires significant effort.
- Food Processor (Optional): The fastest way to get fine, even crumbs for the crust. A sealed plastic bag and a rolling pin also work well.
Step-by-Step Instructions
Prep Time: 20 minutes
Chill Time: 4 hours (minimum)
Yields: 12 mini cheesecakes
Phase 1: Prepare the Crust
- Crush the Cookies: Using a food processor, pulse the Biscoff cookies until they form fine crumbs. Alternatively, place them in a zip-top bag and crush them with a rolling pin.
- Combine: In a medium bowl, mix the cookie crumbs with the melted butter until the texture resembles wet sand.
- Press into Pan: Line a 12-cup muffin pan with paper liners. Spoon approximately 1.5 tablespoons of the crust mixture into each liner. Use the bottom of a small glass or a spice jar to press the crumbs down firmly and evenly.
- Chill: Place the muffin pan in the freezer to set the crust while you prepare the filling.
Phase 2: Create the Filling
- Beat Cream Cheese: In a large bowl, use an electric mixer to beat the room temperature cream cheese, powdered sugar, and vanilla extract on medium-high speed until completely smooth and creamy, about 2-3 minutes. Scrape down the sides of the bowl as needed.
- Add Biscoff Spread: Add the Biscoff cookie butter to the cream cheese mixture and beat again until fully incorporated and smooth.
- Whip Cream: In a separate, chilled bowl, whip the heavy cream on high speed until stiff peaks form. This is when the whipped cream holds its shape and the peaks stand straight up when the beaters are lifted.
- Fold Gently: Using a spatula, gently fold about one-third of the whipped cream into the Biscoff-cream cheese mixture to lighten it. Then, add the remaining whipped cream and fold until just combined. Do not overmix, as this will deflate the air.
- Fill the Liners: Remove the pan from the freezer. Spoon or pipe the filling evenly over the chilled crusts, smoothing the tops with the back of a spoon.
Phase 3: Chill and Garnish
- Chill to Set: Cover the pan loosely with plastic wrap and refrigerate for at least 4 hours, or preferably overnight. The cheesecakes need this time to firm up completely.
- Garnish: Just before serving, gently warm the remaining 1/4 cup of Biscoff spread in the microwave for 10-15 seconds until it’s pourable. Drizzle over each mini cheesecake. Top with a whole Biscoff cookie or cookie crumbs.
Pro-Tips for a Silky-Smooth Filling
The texture of a no-bake cheesecake is everything. Here’s how to guarantee a perfect, velvety result every time.
- Use Room Temperature Cream Cheese: This is the single most important rule. Cold cream cheese will not blend smoothly and will leave you with a lumpy filling. Set it on the counter for at least an hour before you begin. This technique is something we rely on for many of our most popular recipes.
- Sift Your Powdered Sugar: To avoid any small clumps, sift your powdered sugar before adding it to the cream cheese.
- Don’t Over-whip: When you fold in the whipped cream, use a gentle hand. Over-mixing will knock out the air you just whipped into it, resulting in a denser, less-fluffy cheesecake.
- Chill the Bowl and Beaters: For the fluffiest whipped cream, place your mixing bowl and beaters in the freezer for 10-15 minutes before you start. Cold equipment helps the cream whip up faster and more voluminously. These are perfect to make ahead for a party, especially after serving a simple main course like a Salmon and Veggie Sheet Pan Dinner.
COMMON MISTAKES TO AVOID
- Mistake: Using cold cream cheese.
- Fix: Ensure your cream cheese is at true room temperature. This prevents a lumpy, uneven filling and is non-negotiable for a smooth texture.
- Mistake: A soggy or crumbly crust.
- Fix: Pack the crust mixture down firmly and evenly in the liners. Chilling the crust in the freezer while you make the filling helps it set into a solid, crisp base.
- Mistake: Under-chilling the cheesecakes.
- Fix: Be patient. The cheesecakes need a minimum of 4 hours in the refrigerator to set properly. Rushing this step will result in a soft, pudding-like consistency that won’t hold its shape.
FAQ
- Q: Can I make one large Biscoff cheesecake instead?
A: Yes. Press the crust into a 9-inch springform pan. Pour the filling over the top and chill for at least 6-8 hours, or overnight, until fully set.
- Q: How long will these keep in the fridge?
A: Store the mini cheesecakes in an airtight container in the refrigerator for up to 5 days. The cookie garnish may soften over time, so it’s best to add it just before serving.
- Q: Is this recipe low-carb or keto-friendly?
A: No, this recipe is high in sugar and carbs due to the Biscoff cookies and spread. If you’re seeking a low-carb alternative, a recipe like a Creamy Keto Coconut Vanilla Smoothie would be a more suitable choice.
For another comforting classic that pairs perfectly with a sweet dessert, you might enjoy this Biscuit Pot Pie recipe for your next dinner.
NUTRITIONAL SNAPSHOT
| Nutrient | Amount per Serving |
|---|---|
| Calories | 390 kcal |
| Protein | 4g |
| Fat | 28g |
| Net Carbs | 30g |
| Fiber | 1g |
| Sugar | 22g |
Creamy No-Bake Mini Biscoff Cheesecakes
These Mini Biscoff Cheesecakes deliver that signature spiced, caramelized cookie butter flavor in a perfectly portioned, no-bake dessert. The velvety cream cheese filling sits on a crunchy Biscoff cookie crust, creating a texture and taste combination that's impossible to resist. If you love incredibly easy desserts, this will become your new go-to recipe.
Ingredients
- 24 Biscoff cookies (about 175g or 6.2 oz)
- 6 tbsp unsalted butter, melted
- 16 oz full-fat block cream cheese, softened to room temperature
- 1 cup powdered sugar
- 1 tsp vanilla extract
- 1 cup Biscoff cookie butter spread
- 1 cup heavy whipping cream, cold
- 1/4 cup Biscoff cookie butter spread, for drizzling
- 12 Biscoff cookies
Instructions
- Using a food processor, pulse the Biscoff cookies until they form fine crumbs. Alternatively, place them in a zip-top bag and crush them with a rolling pin.
- In a medium bowl, mix the cookie crumbs with the melted butter until the texture resembles wet sand.
- Line a 12-cup muffin pan with paper liners. Spoon approximately 1.5 tablespoons of the crust mixture into each liner. Use the bottom of a small glass or a spice jar to press the crumbs down firmly and evenly.
- Place the muffin pan in the freezer to set the crust while you prepare the filling.
- In a large bowl, use an electric mixer to beat the room temperature cream cheese, powdered sugar, and vanilla extract on medium-high speed until completely smooth and creamy, about 2-3 minutes. Scrape down the sides of the bowl as needed.
- Add the Biscoff cookie butter to the cream cheese mixture and beat again until fully incorporated and smooth.
- In a separate, chilled bowl, whip the heavy cream on high speed until stiff peaks form. This is when the whipped cream holds its shape and the peaks stand straight up when the beaters are lifted.
- Using a spatula, gently fold about one-third of the whipped cream into the Biscoff-cream cheese mixture to lighten it. Then, add the remaining whipped cream and fold until just combined. Do not overmix, as this will deflate the air.
- Remove the pan from the freezer. Spoon or pipe the filling evenly over the chilled crusts, smoothing the tops with the back of a spoon.
- Cover the pan loosely with plastic wrap and refrigerate for at least 4 hours, or preferably overnight. The cheesecakes need this time to firm up completely.
- Just before serving, gently warm the remaining 1/4 cup of Biscoff spread in the microwave for 10-15 seconds until it's pourable. Drizzle over each mini cheesecake. Top with a whole Biscoff cookie or cookie crumbs.