Soft Red Velvet Blossom Cookies: A Foolproof Recipe
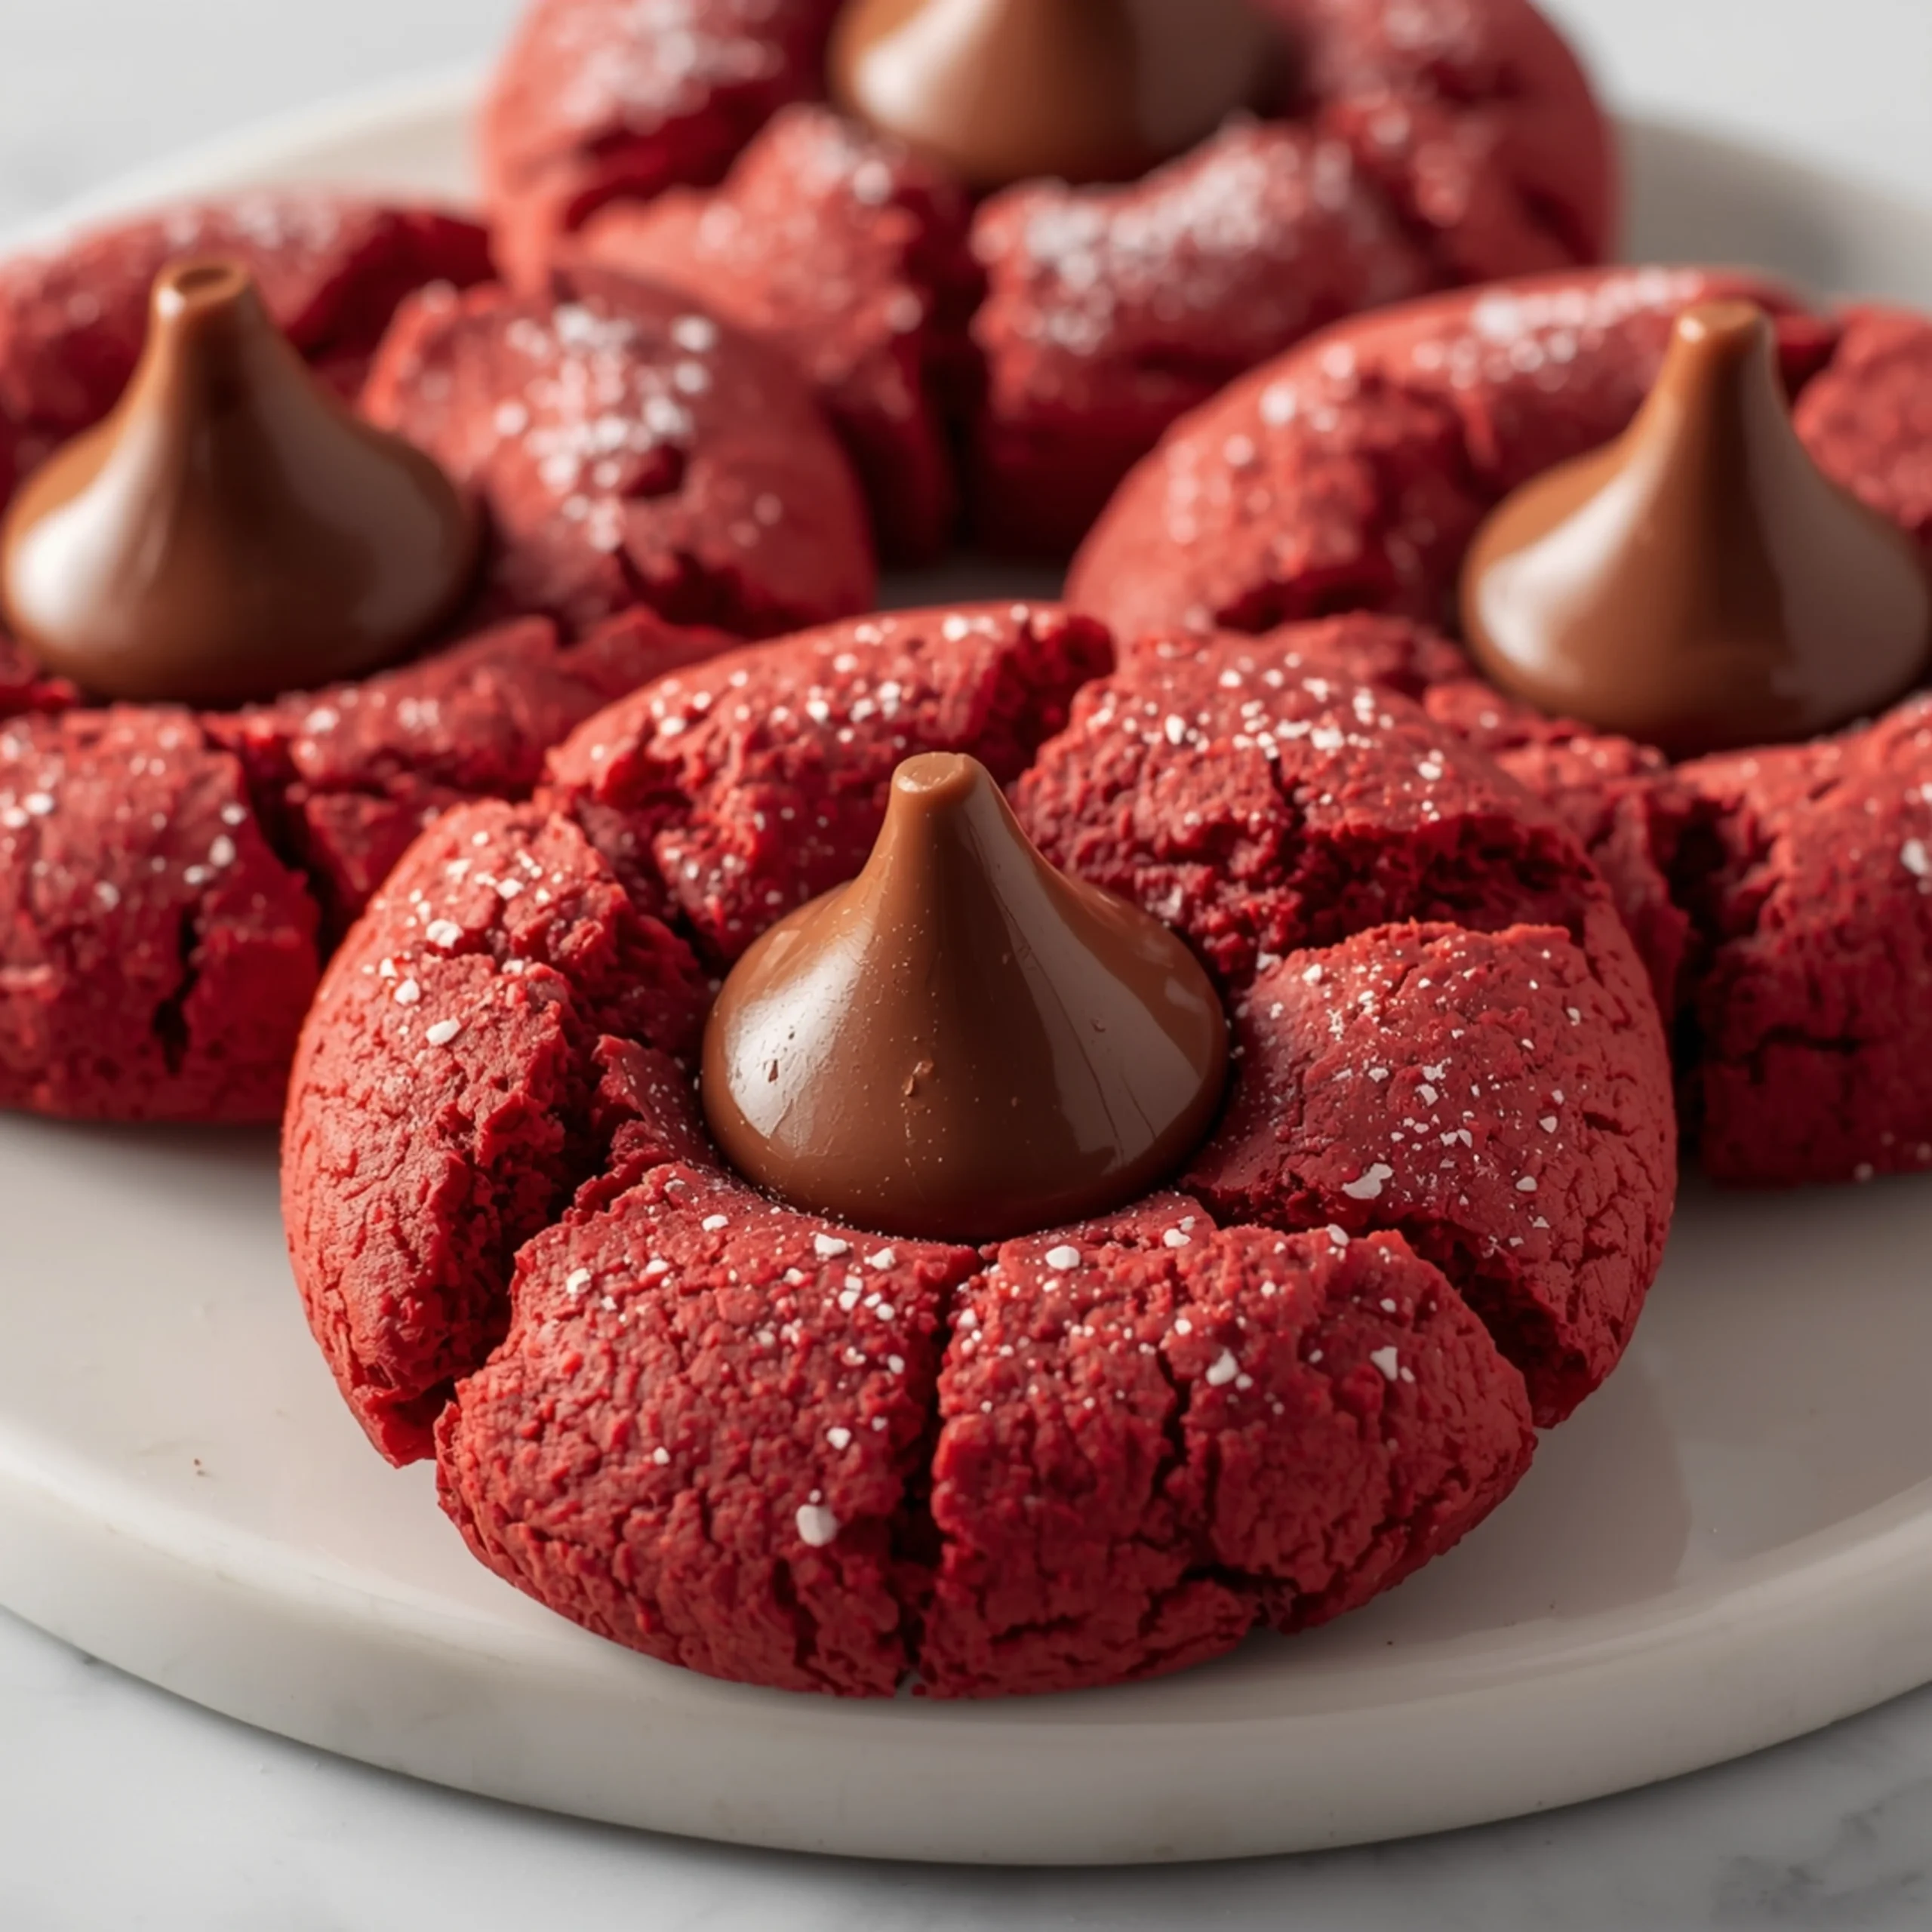
These Red Velvet Blossom Cookies are engineered for success: a soft, chewy cookie with a deep cocoa tang, crowned with a classic Hershey’s Kiss. This recipe delivers that signature red velvet flavor without the fuss, making it a perfect holiday staple or year-round treat.
If you love simple, high-impact desserts, these are in the same league as these effortless no-bake Oreo cheesecake cups. They look complex but are surprisingly straightforward.
Why This Recipe is a Go-To
This method prioritizes efficiency and reliable results, a core principle for any recipe worth keeping. It’s built for home cooks who need recipes that just work.
- No-Fail Texture: A precise butter-to-flour ratio combined with a touch of buttermilk (or a substitute) guarantees a soft, chewy crumb that doesn’t spread into a greasy mess.
- Deep Flavor Profile: We use both granulated and brown sugar for moisture and a hint of molasses. A small amount of unsweetened cocoa powder provides the classic chocolatey base without overwhelming the subtle tang.
- Visual Appeal: The vibrant red dough rolled in sparkling sugar creates a high-contrast, professional-looking cookie that’s perfect for cookie exchanges and gift-giving. It’s the kind of reliable recipe we love, just like our favorite quick weeknight dinners.
The Science of Red Velvet
True red velvet isn’t just a chocolate cookie with red food coloring. The magic lies in a simple chemical reaction that creates its signature texture and flavor.
- The Acid-Base Reaction: Historically, “red velvet” got its subtle reddish hue from the reaction between acidic ingredients (like buttermilk and vinegar) and the anthocyanins in non-Dutched cocoa powder.
- Tenderizing the Crumb: This same acidic component reacts with the baking soda (an alkaline), creating carbon dioxide gas. This leavening action produces a finer, softer, and more tender crumb than you’d get from baking powder alone.
- Flavor Nuance: The acid provides a subtle, pleasant tang that cuts through the sweetness of the sugar and the richness of the chocolate, resulting in a more complex and balanced flavor profile.
Step-by-Step Instructions
Prep Time: 20 minutes
Chill Time: 30 minutes (recommended)
Bake Time: 8-10 minutes per batch
Yield: Approx. 24 cookies
- Preparation: Preheat your oven to 375°F (190°C). Line two baking sheets with parchment paper. Unwrap about 24 Hershey’s Kisses and set them aside. For best results, place the unwrapped Kisses in the freezer while you prepare the dough.
- Whisk Dry Ingredients: In a medium bowl, whisk together the all-purpose flour, unsweetened cocoa powder, baking soda, and salt. This ensures even distribution and prevents clumps.
- Cream Butter & Sugars: In a large bowl using a stand mixer or hand mixer, beat the softened butter, granulated sugar, and brown sugar on medium-high speed until light and fluffy, about 2-3 minutes.
- Add Wet Ingredients: Beat in the egg, buttermilk (or milk/vinegar mixture), vanilla extract, and red food coloring until fully combined. Scrape down the sides of the bowl as needed.
- Combine Mixtures: Reduce the mixer speed to low and gradually add the dry ingredient mixture to the wet ingredients. Mix only until just combined—do not overmix. The dough will be soft.
- Chill the Dough (Optional but Recommended): Cover the bowl and chill the dough for at least 30 minutes. This prevents the cookies from spreading too much and makes the dough easier to handle.
- Shape & Roll: Place the extra granulated sugar in a small, shallow bowl. Use a small cookie scoop (about 1 tablespoon) to portion the chilled dough. Roll each portion into a smooth ball, then roll it in the sugar to coat completely.
- Bake: Place the sugar-coated balls about 2 inches apart on the prepared baking sheets. Bake for 8-10 minutes, or until the edges are set and the tops are slightly puffed and crackled.
- Add the Kiss: Immediately after removing the cookies from the oven, gently press one frozen Hershey’s Kiss into the center of each hot cookie. The cookie will crack slightly around the edges—this is normal.
- Cool: Let the cookies cool on the baking sheet for 5-10 minutes before transferring them to a wire rack to cool completely. The chocolate will be soft, so handle with care until it sets.
Pro-Tips for Flawless Blossoms
- Freeze the Kisses: Placing the unwrapped Kisses in the freezer for 30 minutes before pressing them into the hot cookies prevents them from melting into a puddle and helps them retain their iconic shape.
- Use a Cookie Scoop: A spring-loaded scoop ensures every cookie is uniform in size. This is key for even baking and a professional-looking final product.
- Don’t Overbake: Pull the cookies from the oven when the edges are just set and the centers still look slightly soft. They will continue to cook on the hot baking sheet. This is the secret to a chewy, not cakey, texture.
- Work Quickly: Have your Kisses unwrapped and ready. You must press them into the cookies the moment they come out of the oven while they are still hot and pliable.
Flavor Variations & Upgrades
While the classic is excellent, this base dough is a great canvas for experimentation.
- Chocolate Kiss Swaps: Use Hershey’s Hugs (white and milk chocolate), Dark Chocolate Kisses, or even Caramel-Filled Kisses for a different flavor profile.
- Add-Ins: Fold in 1/2 cup of white chocolate chips or finely chopped pecans into the dough before chilling for extra texture.
- Holiday Sparkle: For a festive touch, use a mix of red and green sparkling sugar for rolling. This is a simple swap that looks great on a holiday platter alongside other festive treats like these Candy Cane Brownie Bombs.
COMMON MISTAKES TO AVOID
- Mistake: Cookies spreading too thin.
Fix: Your butter was likely too soft, or you skipped the chilling step. Use butter that is softened but still cool to the touch. Chilling the dough for at least 30 minutes solidifies the fat, which helps the cookies hold their shape during baking. - Mistake: The Hershey’s Kiss melted completely.
Fix: You didn’t freeze the Kisses. Placing them in the freezer while you make the dough is a critical step. The frozen Kiss cools down the hot cookie center quickly, allowing it to set instead of melt. - Mistake: Dry, crumbly cookies.
Fix: You either overmeasured your flour or overbaked the cookies. Always spoon flour into your measuring cup and level it off. And remember to pull the cookies from the oven when they look slightly underdone in the center.
FAQ
Q: Can I make the cookie dough ahead of time?
A: Absolutely. The dough can be made and refrigerated for up to 3 days. You can also roll it into balls, freeze them on a baking sheet, and then transfer them to a zip-top bag. Bake directly from frozen, adding 1-2 minutes to the baking time.
Q: Why didn’t my cookies crack on top?
A: A lack of cracking usually means the oven temperature was too low or the dough was too warm. Ensure your oven is fully preheated. Chilled dough hitting a hot oven creates the steam burst needed for those perfect crinkles.
Q: What are some other unique holiday desserts I can try?
A: For a different texture and flavor profile, an elegant Eggnog Panna Cotta with Nutmeg Whipped Cream is a fantastic make-ahead option. If you want to stick with chocolate, these Hot Cocoa Brownie Bites are always a crowd-pleaser.
NUTRITIONAL SNAPSHOT
| Nutrient | Amount per Serving (1 Cookie) |
|---|---|
| Calories | 115 kcal |
| Protein | 1.2g |
| Fat | 6g |
| Net Carbs | 14g |
| Fiber | 0.5g |
| Sugar | 9g |

Soft Red Velvet Blossom Cookies: A Foolproof Recipe
These Red Velvet Blossom Cookies are engineered for success: a soft, chewy cookie with a deep cocoa tang, crowned with a classic Hershey's Kiss. This recipe delivers that signature red velvet flavor without the fuss, making it a perfect holiday staple or year-round treat.
Ingredients
- 1 1/2 cups all-purpose flour
- 1/4 cup unsweetened cocoa powder
- 1 tsp baking soda
- 1/4 tsp salt
- 1/2 cup unsalted butter (softened)
- 3/4 cup granulated sugar
- 1/4 cup packed light brown sugar
- 1 large egg
- 1 tbsp buttermilk (or 1 tbsp milk + 1/4 tsp white vinegar)
- 1 tsp vanilla extract
- 1 tbsp red food coloring
- 1/4 cup granulated sugar for rolling
- 24 Hershey's Kisses
Instructions
- Preparation: Preheat your oven to 375°F (190°C). Line two baking sheets with parchment paper. Unwrap about 24 Hershey's Kisses and set them aside. For best results, place the unwrapped Kisses in the freezer while you prepare the dough.
- Whisk Dry Ingredients: In a medium bowl, whisk together the all-purpose flour, unsweetened cocoa powder, baking soda, and salt. This ensures even distribution and prevents clumps.
- Cream Butter & Sugars: In a large bowl using a stand mixer or hand mixer, beat the softened butter, granulated sugar, and brown sugar on medium-high speed until light and fluffy, about 2-3 minutes.
- Add Wet Ingredients: Beat in the egg, buttermilk (or milk/vinegar mixture), vanilla extract, and red food coloring until fully combined. Scrape down the sides of the bowl as needed.
- Combine Mixtures: Reduce the mixer speed to low and gradually add the dry ingredient mixture to the wet ingredients. Mix only until just combined—do not overmix. The dough will be soft.
- Chill the Dough (Optional but Recommended): Cover the bowl and chill the dough for at least 30 minutes. This prevents the cookies from spreading too much and makes the dough easier to handle.
- Shape & Roll: Place the extra granulated sugar in a small, shallow bowl. Use a small cookie scoop (about 1 tablespoon) to portion the chilled dough. Roll each portion into a smooth ball, then roll it in the sugar to coat completely.
- Bake: Place the sugar-coated balls about 2 inches apart on the prepared baking sheets. Bake for 8-10 minutes, or until the edges are set and the tops are slightly puffed and crackled.
- Add the Kiss: Immediately after removing the cookies from the oven, gently press one frozen Hershey's Kiss into the center of each hot cookie. The cookie will crack slightly around the edges—this is normal.
- Cool: Let the cookies cool on the baking sheet for 5-10 minutes before transferring them to a wire rack to cool completely. The chocolate will be soft, so handle with care until it sets.