5-Ingredient No-Bake Peanut Butter Balls
These no-bake peanut butter balls are the definition of low-effort, high-reward. With just five simple ingredients, you get a rich, creamy, and deeply satisfying treat that requires zero oven time. This is one of those essential desserts that proves you don’t need complex steps to create something incredible, a core philosophy behind all my favorite recipes.
Ingredient Blueprint: The 5 Key Players
This recipe’s strength lies in its simplicity. Understanding the role of each component is key to mastering the final product.
- Creamy Peanut Butter: The star of the show. Use a standard commercial brand like Jif or Skippy. These contain stabilizers that prevent oil separation, which is critical for the right texture. Natural peanut butter will make the mixture too oily and soft.
- Unsalted Butter, Softened: Adds richness, fat content, and helps the balls firm up when chilled. Softening is crucial for easy mixing.
- Confectioners’ (Powdered) Sugar: This isn’t just for sweetness. It dissolves instantly, creating a smooth, fudge-like texture without the graininess you’d get from granulated sugar. It also acts as a binder.
- Semi-Sweet Chocolate Chips: The classic coating. The slight bitterness of semi-sweet chocolate perfectly balances the sweet peanut butter filling.
- Shortening or Coconut Oil: This is a non-negotiable for the chocolate coating. Just a small amount helps the melted chocolate become smoother, shinier, and easier to work with. It prevents the chocolate from becoming too thick or seizing.
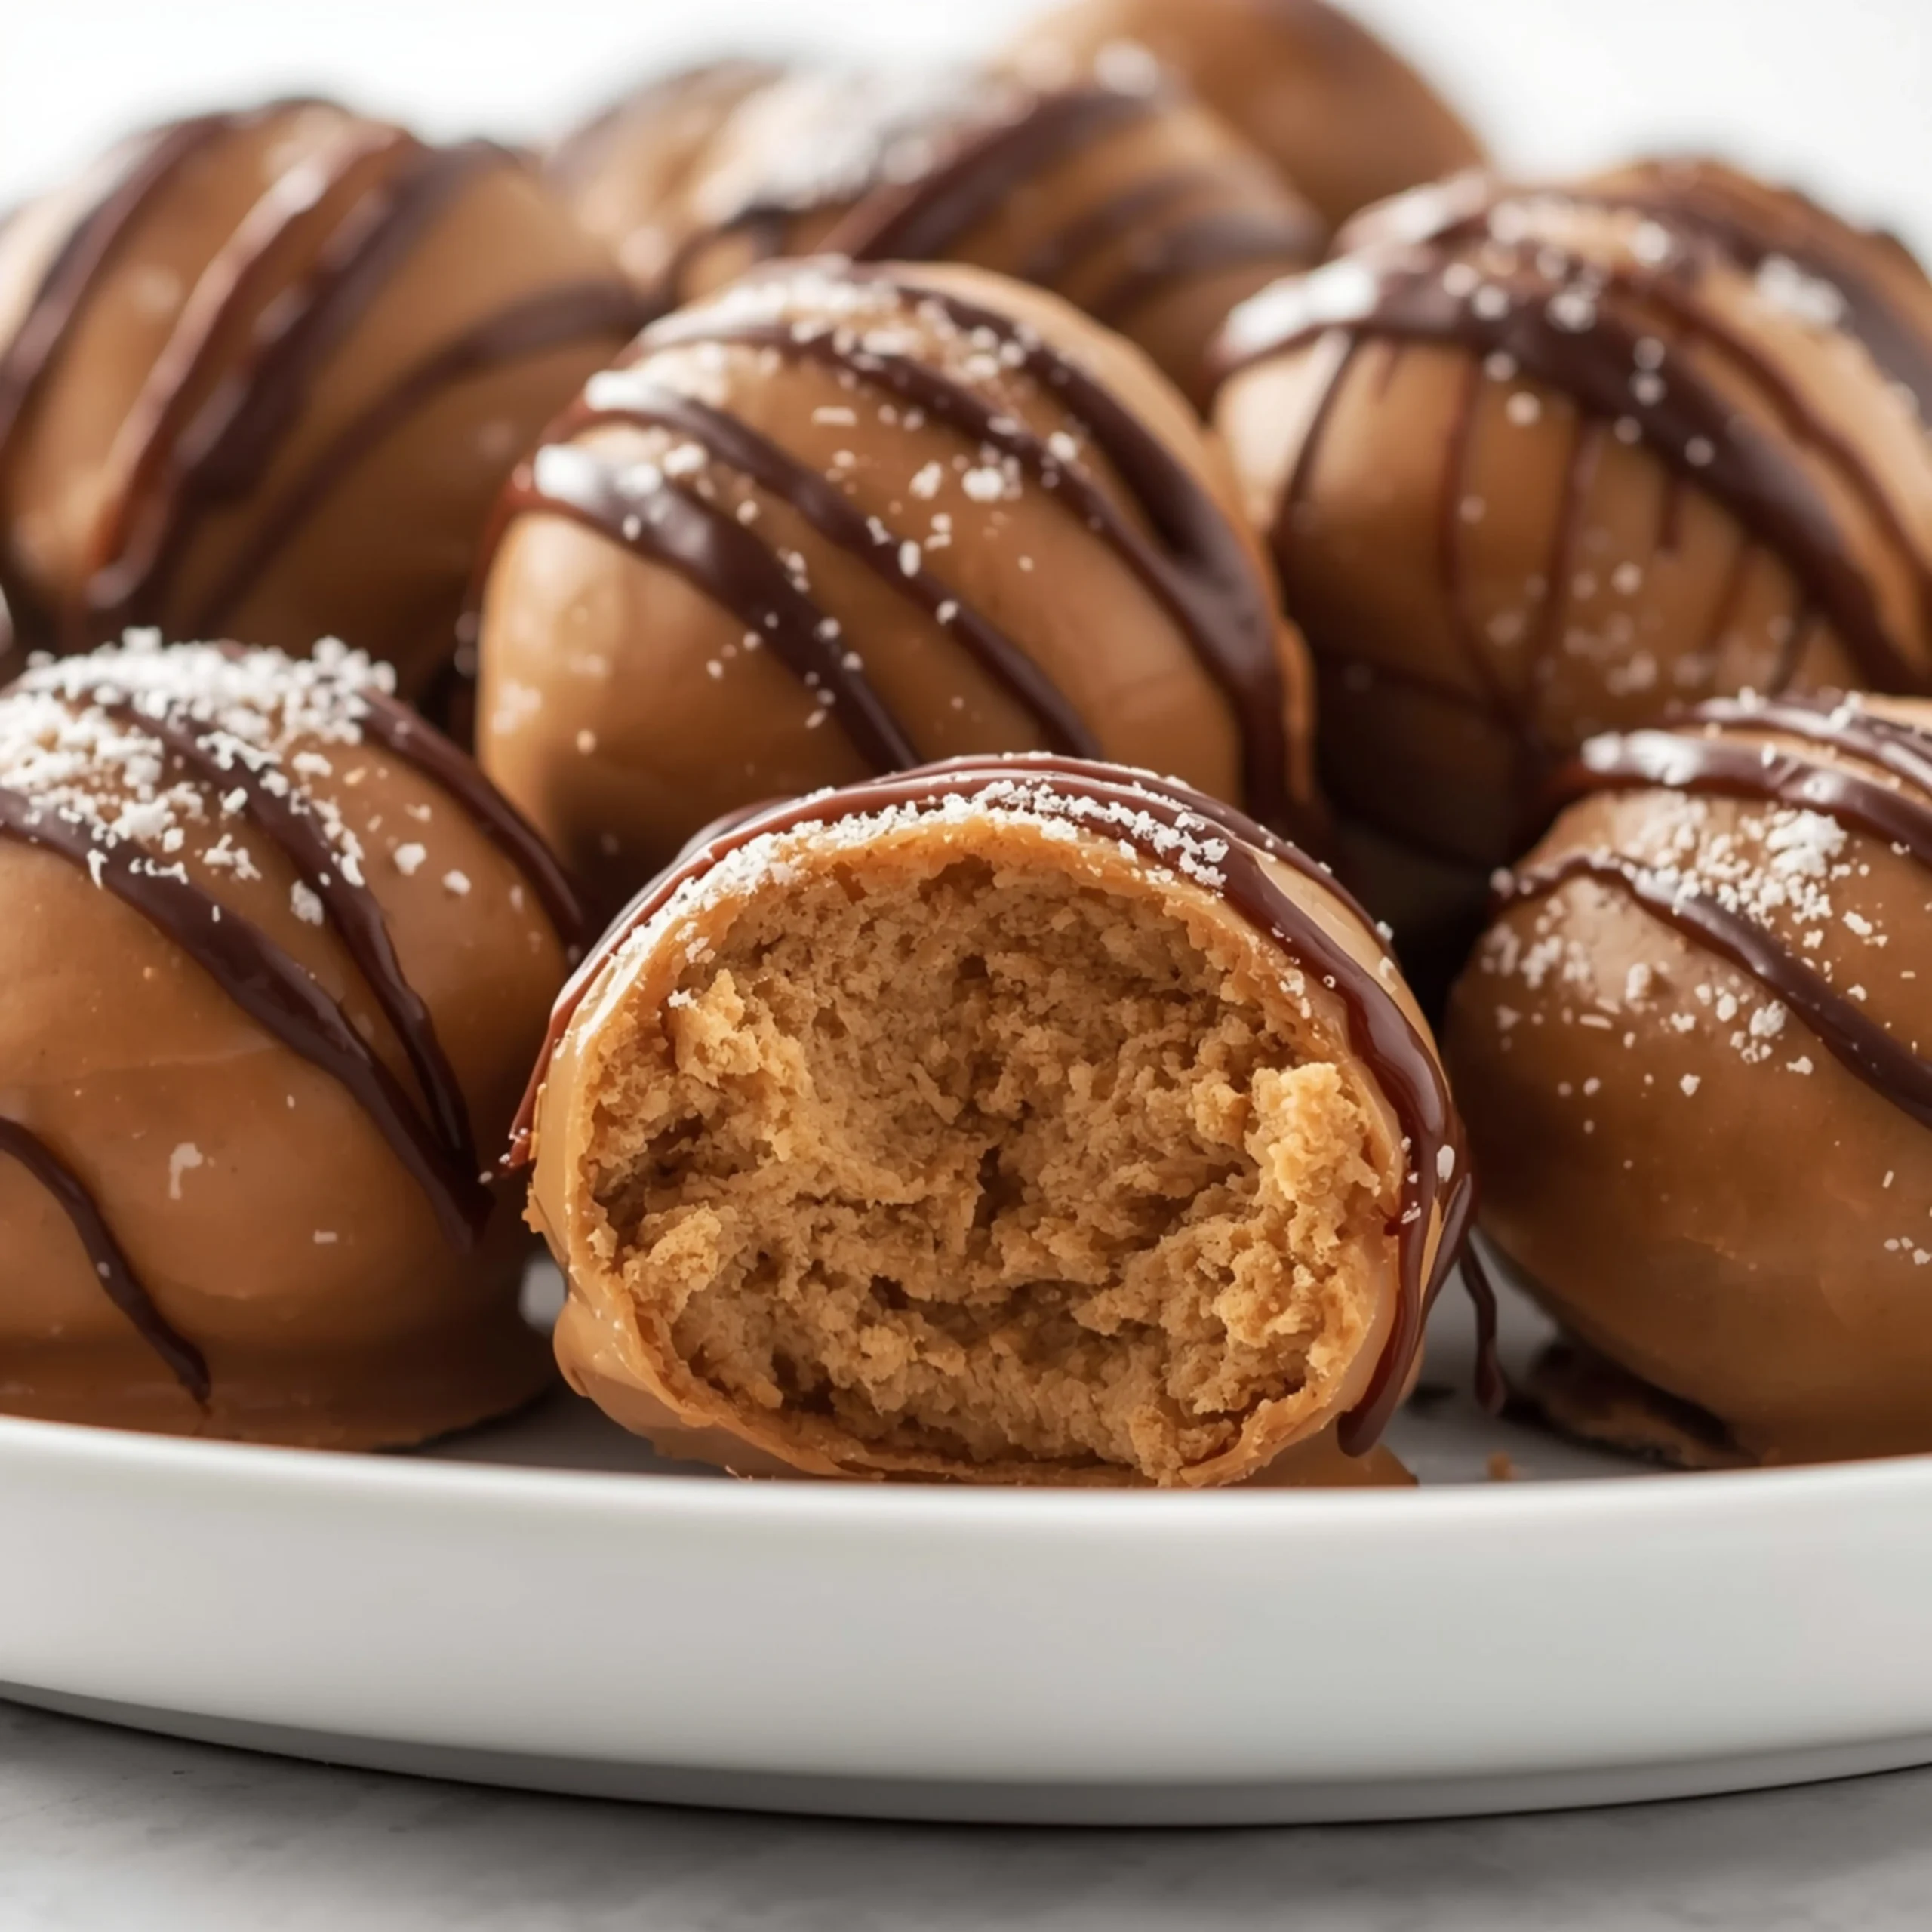
The Texture Test: Achieving Perfect Consistency
The ideal peanut butter ball filling is firm enough to hold its shape but soft enough to melt in your mouth. The texture is all in the mixing process.
- The Target: Your goal is a thick, slightly stiff dough that feels like play-doh. It should pull away from the sides of the bowl.
- Too Sticky? If the mixture feels greasy or overly sticky and won’t roll easily, it’s likely too warm or needs more structure.
- Fix: Add more confectioners’ sugar, 1 tablespoon at a time, until the dough is manageable. You can also chill the mixture for 15-20 minutes before rolling.
- Too Dry? If the mixture is crumbly and won’t hold together, it needs more moisture.
- Fix: Add more creamy peanut butter, 1 tablespoon at a time, until it comes together. Avoid adding more butter, as this can make it greasy when it warms up.
STEP-BY-STEP INSTRUCTIONS
- Prep Your Station: Line a large baking sheet with parchment or wax paper. This is essential for preventing the balls from sticking after dipping.
- Mix the Filling: In a large bowl, combine 1 cup of creamy peanut butter, ½ cup of softened unsalted butter, and 2 cups of confectioners’ sugar. Mix with an electric mixer (or a sturdy spoon and some effort) until the mixture is smooth and well-combined.
- Chill and Roll: Cover the bowl and chill the mixture in the refrigerator for at least 30 minutes. This step is crucial for making the dough firm and easy to handle. Once chilled, roll the dough into 1-inch balls and place them on your prepared baking sheet.
- Freeze for Firmness: Place the baking sheet with the rolled balls into the freezer for another 20-30 minutes. Freezing them ensures they hold their shape perfectly when dipped into the warm chocolate. Do not skip this step.
- Melt the Chocolate: While the balls are freezing, combine 1 cup of semi-sweet chocolate chips and 1 tablespoon of shortening (or coconut oil) in a microwave-safe bowl. Microwave in 30-second intervals, stirring between each, until the chocolate is completely smooth.
- Dip and Set: Remove the peanut butter balls from the freezer. Using a fork or a dipping tool, dip each ball into the melted chocolate, allowing any excess to drip off. Place the coated ball back on the parchment-lined baking sheet.
- Final Chill: Refrigerate the finished peanut butter balls for at least 15 minutes, or until the chocolate shell is completely firm. Store in an airtight container in the refrigerator.
Flavor Matrix: Simple Customizations
Once you’ve mastered the base recipe, use it as a canvas. These simple swaps and additions can completely change the final product.
- Add Texture: Mix in ½ cup of rice cereal treats or quick-cooking oats for a delightful crunch. Adding oats can even make them a more substantial treat, perfect alongside your morning breakfast.
- Vary the Coating:
- Dark Chocolate: For a more intense, less sweet flavor.
- White Chocolate: For a sweeter, creamier finish.
- Butterscotch Chips: Creates a classic, caramel-like pairing.
- Introduce New Flavors:
- Espresso Powder: A teaspoon mixed into the melted chocolate adds a deep, mocha flavor.
- Flaky Sea Salt: A sprinkle on top of the wet chocolate coating enhances all the flavors.
- Mini Chocolate Chips: Mix ½ cup of mini chips directly into the peanut butter filling.
Storage & Make-Ahead Strategy
These treats are perfect for making ahead of time. Proper storage is key to maintaining their texture and flavor.
- Refrigerator (Recommended): Store in a single layer in an airtight container. They will last for up to 2 weeks. The cool temperature keeps the chocolate shell crisp and the filling firm.
- Freezer: For long-term storage, place them in a freezer-safe container or bag, separated by layers of wax paper. They will keep for up to 3 months.
- Thawing: Thaw frozen peanut butter balls in the refrigerator for an hour before serving for the best texture. You can also enjoy them straight from the freezer for a firmer, icier treat.
For a party, you can serve these on a platter with other diverse bites. While these peanut butter balls cover the sweet side, you could offer a savory contrast like a unique Muffuletta Pizza to create a well-rounded menu.
COMMON MISTAKES TO AVOID
- Mistake: Using natural peanut butter.
Fix: Stick to conventional, stabilized peanut butter (like Jif or Skippy). Natural peanut butter’s oil separates, which will result in a greasy, soft mixture that won’t firm up properly.
- Mistake: Skipping the chill/freeze times.
Fix: Do not rush the process. Chilling the dough makes it easy to roll. Freezing the balls before dipping is the secret to a clean, even chocolate coating that sets quickly.
- Mistake: Overheating the chocolate.
Fix: Microwave your chocolate in short, 30-second bursts and stir thoroughly each time. This gentle heating prevents it from seizing (getting thick and grainy).
FAQ
Q: Can I use crunchy peanut butter?
A: Yes, absolutely. Crunchy peanut butter works well and adds a great texture. The base recipe remains the same; just swap it 1:1 for the creamy version.
Q: How do I make these vegan?
A: It’s simple. Use a high-quality vegan butter substitute in place of the dairy butter and ensure your chocolate chips are dairy-free. Most semi-sweet and dark chocolate chips are naturally vegan, but always check the label.
Q: Why are my peanut butter balls too soft or sticky?
A: This usually happens for two reasons: the dough is too warm, or the ratio of wet-to-dry ingredients is off. First, try chilling the dough for at least 30-60 minutes. If it’s still too soft to roll, add more confectioners’ sugar, 1 tablespoon at a time, until you reach a workable consistency.
Further Dessert Inspiration
Once you’ve mastered this simple recipe, you might be interested in exploring other no-bake or minimally complex desserts. For a sophisticated holiday treat, consider this elegant Eggnog Panna Cotta with Nutmeg Whipped Cream. Or, for a savory dish that uses a similar simple-ingredient philosophy, check out this Cheesy Zucchini Casserole.
NUTRITIONAL SNAPSHOT
*Estimates are per ball, assuming recipe makes ~30 balls.*
| Nutrient | Amount per Serving |
|---|---|
| Calories | 145 kcal |
| Protein | 2g |
| Fat | 10g |
| Net Carbs | 11g |
| Fiber | 1g |
| Sugar | 10g |
5-Ingredient No-Bake Peanut Butter Balls
These no-bake peanut butter balls are the definition of low-effort, high-reward. With just five simple ingredients, you get a rich, creamy, and deeply satisfying treat that requires zero oven time. This is one of those essential desserts that proves you don't need complex steps to create something incredible, a core philosophy behind all my favorite recipes.
Ingredients
- 1 cup creamy peanut butter
- 1/2 cup unsalted butter (softened)
- 2 cups confectioners' sugar
- 1 cup semi-sweet chocolate chips
- 1 tbsp shortening or coconut oil
Instructions
- Line a large baking sheet with parchment or wax paper.
- In a large bowl, combine 1 cup of creamy peanut butter, ½ cup of softened unsalted butter, and 2 cups of confectioners' sugar. Mix with an electric mixer (or a sturdy spoon and some effort) until the mixture is smooth and well-combined.
- Cover the bowl and chill the mixture in the refrigerator for at least 30 minutes. Once chilled, roll the dough into 1-inch balls and place them on your prepared baking sheet.
- Place the baking sheet with the rolled balls into the freezer for another 20-30 minutes. Freezing them ensures they hold their shape perfectly when dipped into the warm chocolate. Do not skip this step.
- While the balls are freezing, combine 1 cup of semi-sweet chocolate chips and 1 tablespoon of shortening (or coconut oil) in a microwave-safe bowl. Microwave in 30-second intervals, stirring between each, until the chocolate is completely smooth.
- Remove the peanut butter balls from the freezer. Using a fork or a dipping tool, dip each ball into the melted chocolate, allowing any excess to drip off. Place the coated ball back on the parchment-lined baking sheet.
- Refrigerate the finished peanut butter balls for at least 15 minutes, or until the chocolate shell is completely firm. Store in an airtight container in the refrigerator.