
How to Make Strawberry Shortcake Cheesecake Sushi Rolls
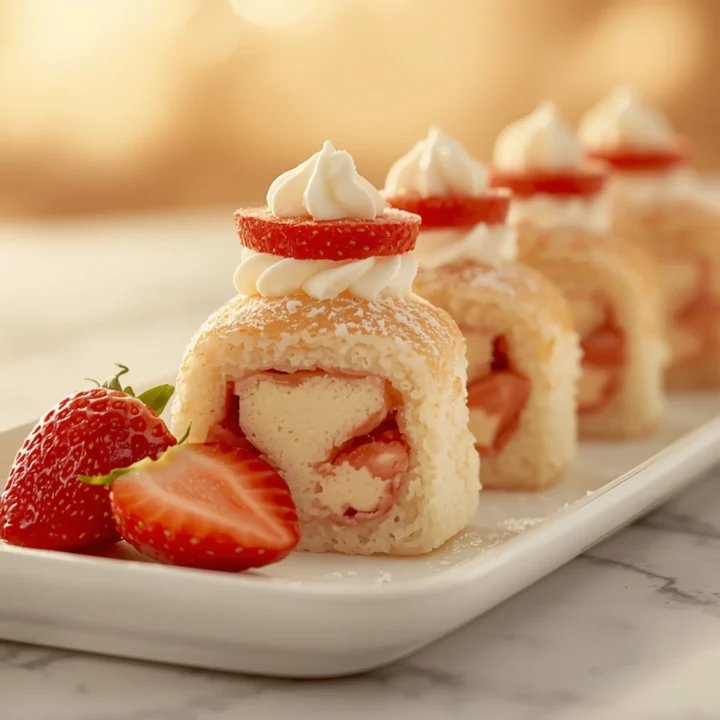
This recipe transforms a classic into a show-stopping dessert. We’re combining creamy no-bake cheesecake, fresh strawberries, and a soft vanilla cake “rice” into a fun, sliceable roll. It’s one of my favorite creative desserts because it’s impressive yet surprisingly straightforward to assemble.
Component Breakdown: The 4 Key Layers
This dessert looks complex, but it’s just four simple components working together. Think of it as an engineering project for your kitchen.
- The Cheesecake Filling: A rich, tangy, no-bake cheesecake mixture forms the core. It’s stabilized with a little gelatin to ensure clean slices.
- The Strawberry Center: A single, fresh strawberry hidden in the middle provides a burst of fresh, tart flavor and a beautiful look when sliced.
- The Cake “Rice”: We use a simple, store-bought pound cake, crumbled and pressed into a sheet. This mimics the texture and role of sushi rice, providing a soft, sweet base.
- The Fruit Roll-Up “Nori”: Red fruit leather (like Fruit by the Foot) acts as the “nori,” holding everything together. It adds a subtle fruity chew and a vibrant, glossy finish.
The Engineering of a Perfect Roll
Assembling these rolls is all about technique and temperature control. Follow these principles for a tight, clean, and stable dessert sushi roll.
- Chill Everything: Your enemy is warmth. A soft, warm cheesecake filling will squish out the sides and make rolling impossible. Ensure the filling is thoroughly chilled and firm before you even think about assembling.
- Use Plastic Wrap: This is your most important tool. It prevents the sticky cake “rice” from adhering to your sushi mat (or your hands) and helps you create a tight, compressed log.
- The Sushi Mat is Your Friend: While not strictly necessary, a bamboo sushi mat provides even pressure along the entire roll. This is key for a uniform, compact shape that won’t fall apart. If you don’t have one, you can use a clean kitchen towel lined with plastic wrap.
- Gentle, Firm Pressure: When you roll, apply consistent pressure. Start by tucking the edge of the cake over the filling, then use the mat to roll it forward, tightening as you go. The goal is to eliminate air gaps without squeezing the filling out.
Flavor & Texture Customization
This recipe is a fantastic template. Once you master the technique, you can modify the components for endless variations.
- Fruit Swaps:
- Raspberry & White Chocolate: Swap strawberries for whole raspberries and mix white chocolate shavings into the cheesecake.
- Mango & Coconut: Use a mango spear for the center and mix toasted coconut flakes into the cake “rice.”
- Kiwi & Lime: Use a strip of kiwi in the center and add fresh lime zest to the cheesecake filling.
- Coating & Topping Ideas:
- Roll the finished logs in crushed shortbread cookies or graham cracker crumbs before slicing for a crunchy exterior.
- Toast slivered almonds or chopped pistachios and press them onto the outside.
- Drizzle the sliced “sushi” with melted chocolate or a strawberry coulis.
- Creative Fillings: For those who love exploring unique dessert combinations, you could even draw inspiration from other recipes. Imagine a filling inspired by the rich flavors of Gooey Butter Cake Bars for an ultra-decadent version.
Make-Ahead & Storage Strategy
Proper planning makes this recipe a breeze, especially for parties. You can prep all the components in advance.
- Cheesecake Filling: Can be made up to 2 days ahead. Keep it covered tightly in the refrigerator.
- Cake “Rice”: You can crumble the pound cake and store it in an airtight container at room temperature for up to 24 hours.
- Assembly: The rolls can be fully assembled and wrapped tightly in plastic wrap up to 24 hours before slicing. Store them in the coldest part of your fridge. Do not slice until just before serving for the cleanest cuts.
- For more ideas on how to prep ingredients for a variety of dishes, check out our general collection of recipes.
Step-by-Step Instructions
Part 1: Prepare the Cheesecake Filling
- Bloom the Gelatin: In a small bowl, sprinkle the gelatin powder over the cold water. Let it sit for 5-10 minutes to “bloom” and absorb the liquid.
- Melt Gelatin: Microwave the bloomed gelatin in 5-second bursts until it’s fully liquid. Set aside to cool slightly.
- Beat Cream Cheese & Sugar: In a large bowl, use an electric mixer to beat the cream cheese and powdered sugar until completely smooth and free of lumps.
- Add Flavor: Beat in the heavy cream, vanilla extract, and lemon juice until well combined and the mixture is light and airy.
- Temper & Combine: Add a large spoonful of the cheesecake mixture into the slightly cooled liquid gelatin and stir quickly to combine. Pour this gelatin mixture back into the main bowl of cheesecake filling and beat on low speed until fully incorporated.
- Chill: Transfer the filling to a piping bag (or a zip-top bag with the corner snipped off). Refrigerate for at least 4 hours, or up to overnight, until very firm. This step is critical.
Part 2: Assemble the Rolls
- Prep Station: Lay a bamboo sushi mat on your work surface. Place a large sheet of plastic wrap on top of it.
- Create the Cake “Rice”: In a medium bowl, crumble the pound cake into fine crumbs using your fingers. Add the 2 tablespoons of melted butter and mix until the crumbs are moist and clump together, like wet sand.
- Form the Sheet: Spread the cake crumb mixture evenly over the plastic wrap, forming a rectangle approximately 8×7 inches. Use your hands or a small roller to press it into a thin, even, and compact layer.
- Pipe the Filling: Pipe a thick log of the chilled cheesecake filling horizontally along the long edge of the cake sheet closest to you.
- Add Strawberries: Gently press the hulled strawberries, tip to stem, into the center of the cheesecake log, creating a continuous line of fruit.
- Roll it Up: Using the plastic wrap and sushi mat to help, lift the edge of the cake “rice” and roll it tightly over the filling. Continue rolling forward, using the mat to apply even pressure and create a compact log.
- Seal and Chill: Once rolled, twist the ends of the plastic wrap tightly to seal the log. Place the roll in the refrigerator to chill and firm up for at least 30-60 minutes before slicing.
Part 3: Final Touches
- Wrap in “Nori”: Carefully unwrap the chilled cake roll. Unroll the fruit leather and wrap it snugly around the cake log. The moisture from the cake should help it adhere.
- Slice and Serve: Use a very sharp, thin knife. For extra-clean cuts, dip the knife in hot water and wipe it clean between each slice. Slice the log into 1-inch thick “sushi” pieces.
- Garnish: Serve immediately. Garnish with a dollop of whipped cream, fresh mint leaves, or a sprinkle of crushed freeze-dried strawberries.
For those who enjoy a full culinary project, this dessert is a fantastic follow-up after a show-stopping main course like Braised Short Ribs with Red Wine Sauce.
COMMON MISTAKES TO AVOID
- Mistake: The cheesecake filling is too soft and squishes out during rolling.
- Fix: Be patient with chilling. The filling needs a minimum of 4 hours in the fridge to set up properly. If your fridge runs warm, give it more time. Don’t skip this.
- Mistake: The cake “rice” sticks to everything and falls apart.
- Fix: Use plastic wrap as your work surface. The melted butter in the cake crumbs is the binder, but the plastic wrap is the tool that prevents sticking and allows you to form a tight, compact sheet.
- Mistake: The slices are messy and fall apart.
- Fix: Use a hot, sharp knife. A cold, dull knife will drag and tear the roll. Run your sharpest knife under hot water, wipe it dry, make one slice, and repeat. The final chill before slicing is also non-negotiable.
FAQ
Q: Can I make this gluten-free?
A: Absolutely. Simply substitute the pound cake with your favorite gluten-free pound cake or vanilla cake. The rest of the ingredients are naturally gluten-free.
Q: Do I really need a sushi mat?
A: It helps immensely for creating a perfectly round, evenly compressed roll, but it’s not essential. You can use a clean, flexible cutting board or a clean kitchen towel lined with plastic wrap to help you roll and tighten the log.
Q: Can I use different fruit leather for the “nori”?
A: Yes, any flavor will work. Strawberry, raspberry, or a mixed berry fruit leather are great choices. Just ensure it’s the type that unrolls into a flat sheet. If you’re looking for a different kind of fruity and colorful dish, this Rainbow Vegetable Gratin also uses a similar visual layering technique.
NUTRITIONAL SNAPSHOT
| Nutrient | Amount per Serving |
|---|---|
| Calories | 380 kcal |
| Protein | 4g |
| Fat | 22g |
| Net Carbs | 39g |
| Fiber | 1g |
| Sugar | 30g |
Estimates are for one serving, assuming the recipe makes 8 servings.
How to Make Strawberry Shortcake Cheesecake Sushi Rolls
This recipe transforms a classic into a show-stopping dessert. We’re combining creamy no-bake cheesecake, fresh strawberries, and a soft vanilla cake "rice" into a fun, sliceable roll. It’s one of my favorite creative desserts because it’s impressive yet surprisingly straightforward to assemble.
Ingredients
- 1 tsp unflavored gelatin powder
- 2 tbsp cold water
- 8 oz (226g) full-fat cream cheese, softened
- 1/2 cup (60g) powdered sugar
- 1/4 cup (60ml) heavy whipping cream
- 1 tsp vanilla extract
- 1 tsp fresh lemon juice
- 1 (10-12 oz) store-bought pound cake
- 2 tbsp unsalted butter, melted
- 6-8 large fresh strawberries, hulled
- 2-3 rolls of red fruit leather (like Fruit by the Foot)
- Whipped cream
- Fresh mint leaves
- Crushed freeze-dried strawberries
Instructions
- In a small bowl, sprinkle the gelatin powder over the cold water. Let it sit for 5-10 minutes to "bloom" and absorb the liquid.
- Microwave the bloomed gelatin in 5-second bursts until it's fully liquid. Set aside to cool slightly.
- In a large bowl, use an electric mixer to beat the cream cheese and powdered sugar until completely smooth and free of lumps.
- Beat in the heavy cream, vanilla extract, and lemon juice until well combined and the mixture is light and airy.
- Add a large spoonful of the cheesecake mixture into the slightly cooled liquid gelatin and stir quickly to combine. Pour this gelatin mixture back into the main bowl of cheesecake filling and beat on low speed until fully incorporated.
- Transfer the filling to a piping bag (or a zip-top bag with the corner snipped off). Refrigerate for at least 4 hours, or up to overnight, until very firm. This step is critical.
- Lay a bamboo sushi mat on your work surface. Place a large sheet of plastic wrap on top of it.
- In a medium bowl, crumble the pound cake into fine crumbs using your fingers. Add the 2 tablespoons of melted butter and mix until the crumbs are moist and clump together, like wet sand.
- Spread the cake crumb mixture evenly over the plastic wrap, forming a rectangle approximately 8x7 inches. Use your hands or a small roller to press it into a thin, even, and compact layer.
- Pipe a thick log of the chilled cheesecake filling horizontally along the long edge of the cake sheet closest to you.
- Gently press the hulled strawberries, tip to stem, into the center of the cheesecake log, creating a continuous line of fruit.
- Using the plastic wrap and sushi mat to help, lift the edge of the cake "rice" and roll it tightly over the filling. Continue rolling forward, using the mat to apply even pressure and create a compact log.
- Once rolled, twist the ends of the plastic wrap tightly to seal the log. Place the roll in the refrigerator to chill and firm up for at least 30-60 minutes before slicing.
- Carefully unwrap the chilled cake roll. Unroll the fruit leather and wrap it snugly around the cake log. The moisture from the cake should help it adhere.
- Use a very sharp, thin knife. For extra-clean cuts, dip the knife in hot water and wipe it clean between each slice. Slice the log into 1-inch thick "sushi" pieces.
- Serve immediately. Garnish with a dollop of whipped cream, fresh mint leaves, or a sprinkle of crushed freeze-dried strawberries.