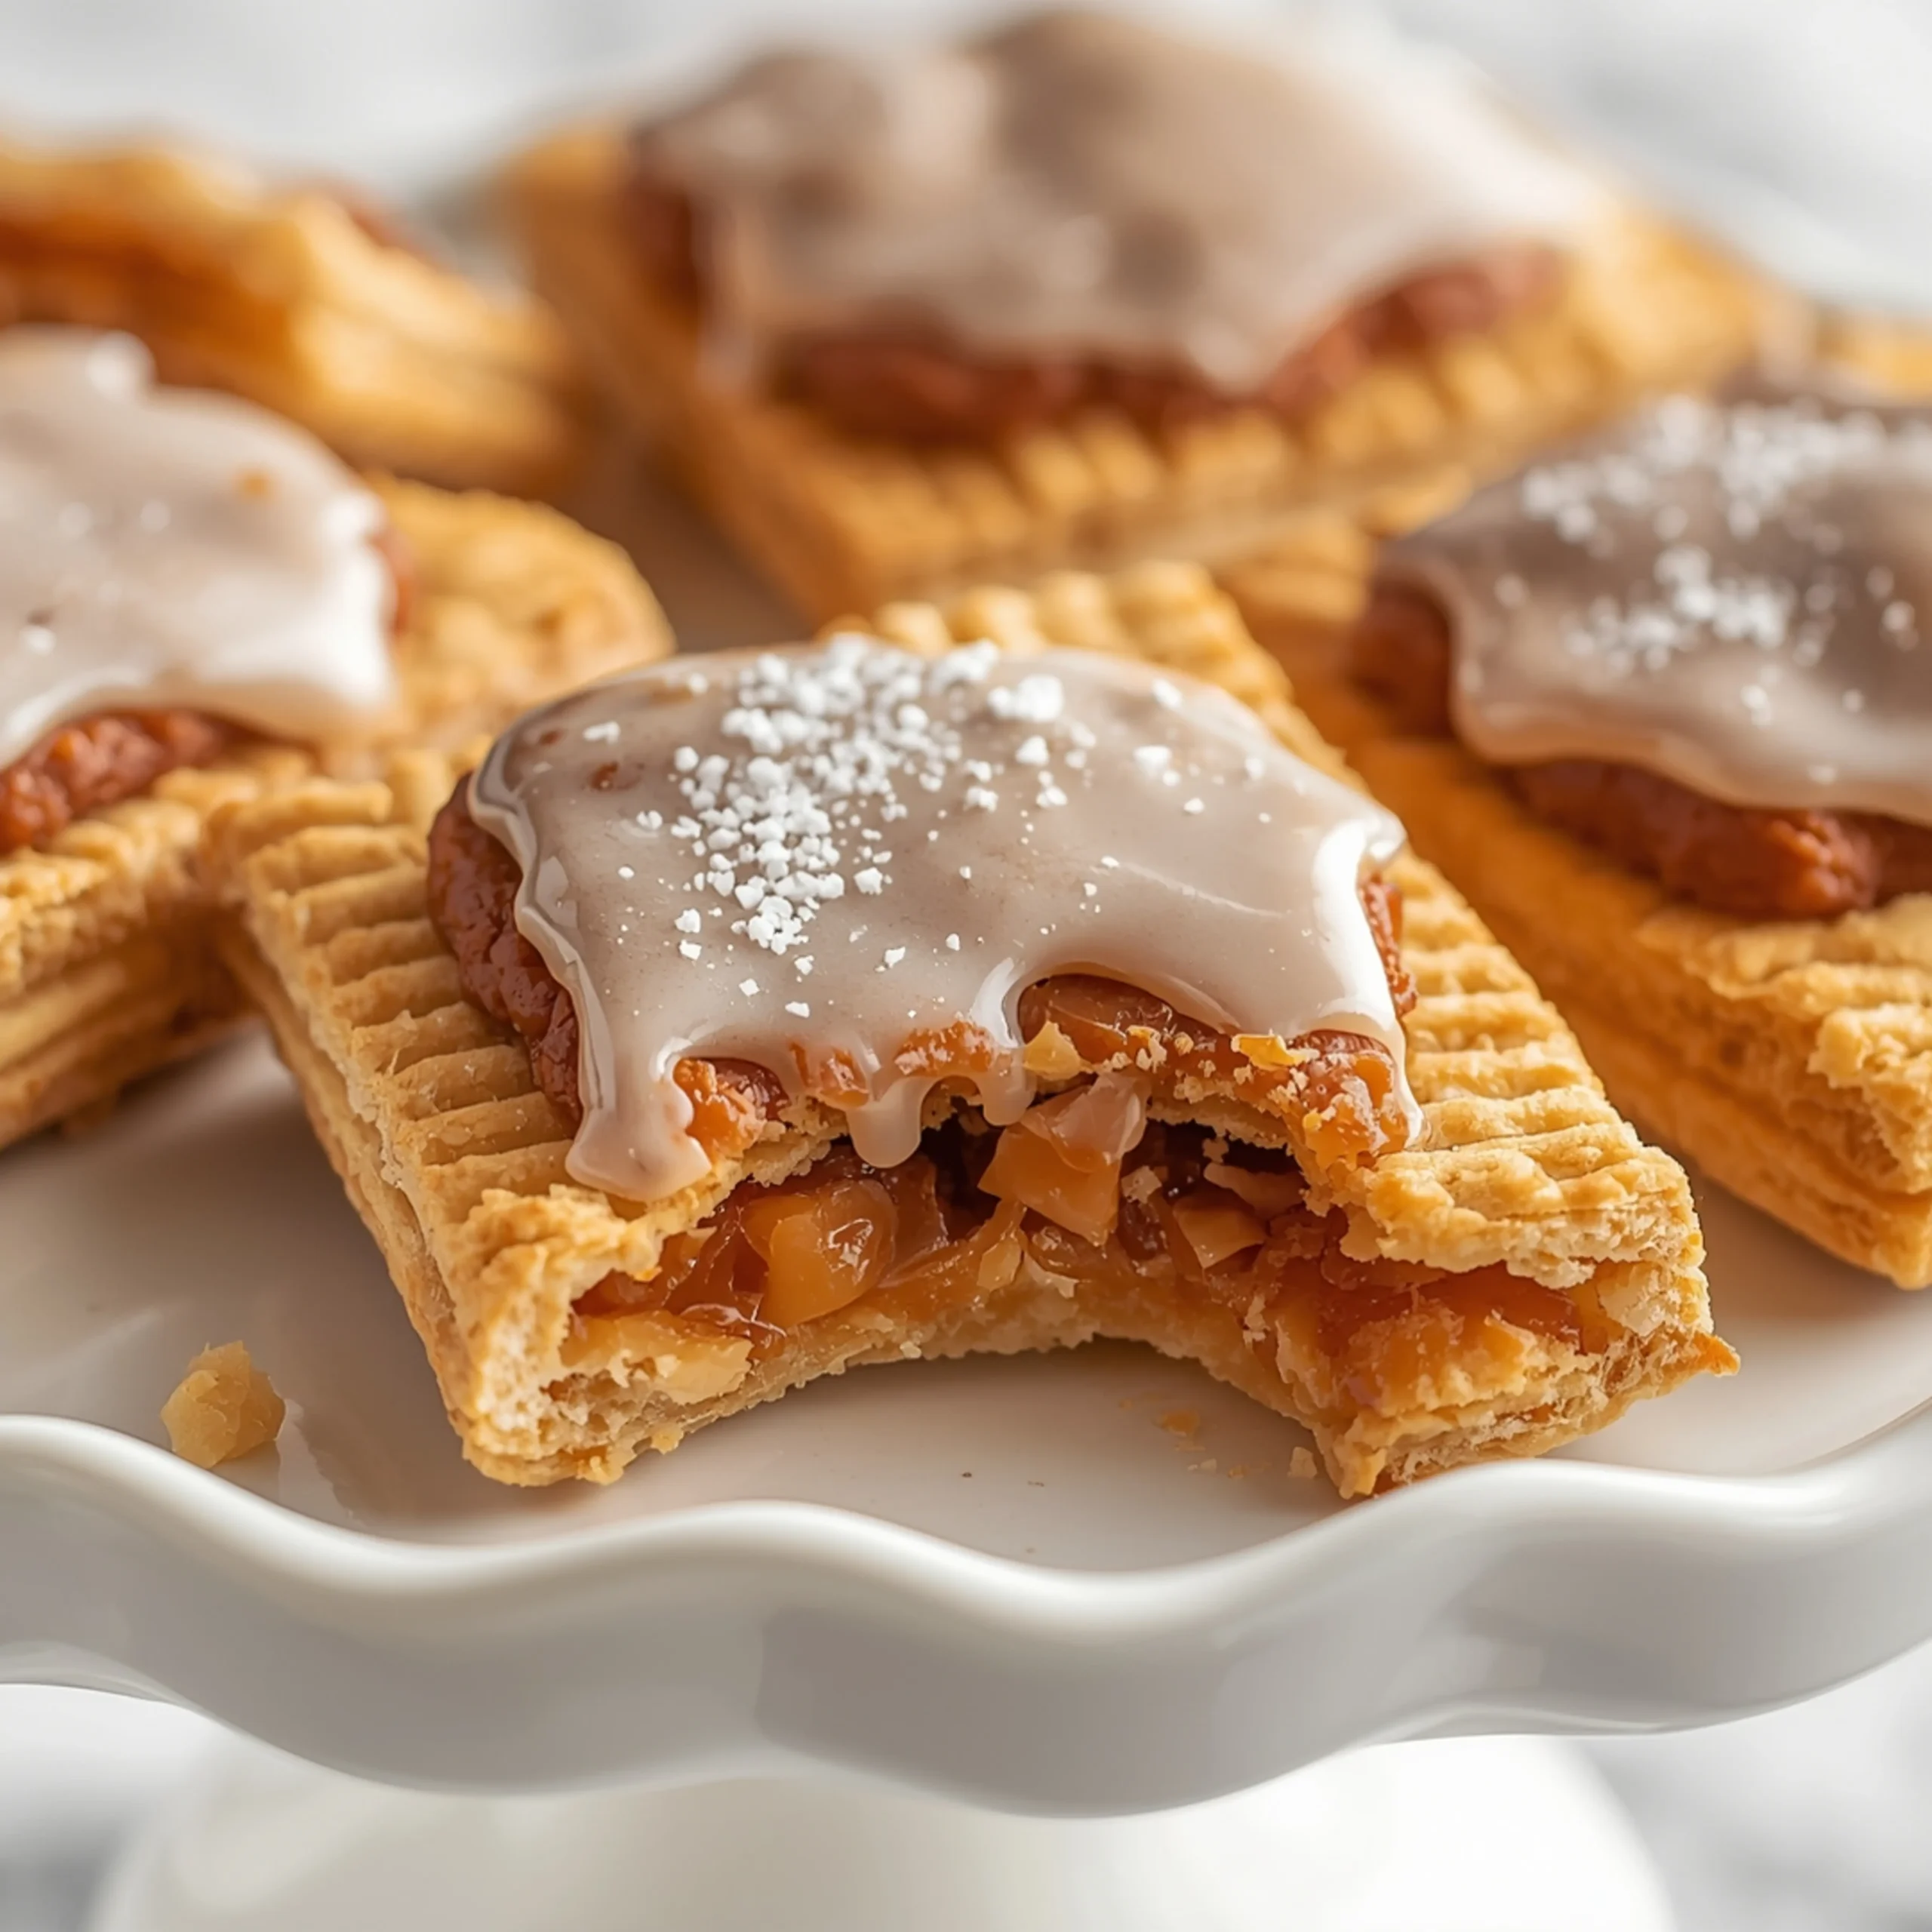
Brown Sugar Pop Tart Cookies: A Nostalgic Treat
These Brown Sugar Pop Tart Cookies capture the nostalgic comfort of a brown sugar cinnamon toaster pastry in a buttery, tender cookie. With a warm, gooey center and a simple sweet glaze, this recipe delivers a bakery-level treat that’s surprisingly easy to assemble. It’s one of those essential Desserts that feels both special and incredibly simple.
The Anatomy of a Perfect Pop Tart Cookie
Understanding the three core components is key to success. Each part is engineered for the perfect texture and flavor balance.
- The Cookie Dough: This is a stable, all-butter shortbread-style dough. It’s designed not to spread, ensuring your cookies hold their sharp rectangular shape. The flavor is rich and buttery, not overly sweet, providing the perfect base for the filling and glaze.
- The Brown Sugar Filling: A simple mixture of brown sugar, cinnamon, and a touch of flour. The butter creates a paste that’s easy to spread, and the flour prevents it from becoming runny and leaking out during baking. It caramelizes into a perfectly gooey, spiced center.
- The Simple Glaze: This isn’t a complex royal icing. It’s a thin, crackly glaze made from powdered sugar and milk that sets quickly. It adds that signature Pop-Tart finish and a final touch of sweetness without overwhelming the cookie.
Key Equipment for Flawless Results
You don’t need fancy tools, but a few basics make the process much smoother.
- Parchment Paper: Non-negotiable for rolling out the dough and for baking. It prevents sticking at every stage.
- Rolling Pin: A standard rolling pin is essential for achieving an even dough thickness.
- Pizza Cutter or Bench Scraper: The absolute best tool for cutting clean, straight rectangles. A knife works, but a pizza cutter is faster and more precise.
- Offset Spatula: Helps in spreading the filling evenly and transferring the delicate unbaked cookies.
STEP-BY-STEP INSTRUCTIONS
Part 1: Make the Cookie Dough
- Cream Butter & Sugar: In a large bowl with a hand mixer or in a stand mixer, beat the softened butter, granulated sugar, and brown sugar until light and fluffy, about 2-3 minutes.
- Add Wet Ingredients: Beat in the egg and vanilla extract until just combined. Scrape down the sides of the bowl.
- Combine Dry Ingredients: In a separate bowl, whisk together the all-purpose flour, cornstarch, baking powder, and salt.
- Mix Dough: Gradually add the dry ingredients to the wet ingredients, mixing on low speed until a soft dough forms. Do not overmix.
- Chill: Divide the dough into two equal discs, wrap them tightly in plastic wrap, and refrigerate for at least 1 hour (or up to 2 days). This is critical for a no-spread cookie.
Part 2: Prepare Filling & Assemble
- Make the Filling: In a small bowl, mix the dark brown sugar, cinnamon, and flour. Stir in the melted butter until a thick, sandy paste forms. Set aside.
- Roll the Dough: On a lightly floured sheet of parchment paper, roll one disc of dough into a large rectangle about 1/8-inch thick.
- Cut Rectangles: Using a pizza cutter or knife, trim the edges and cut the dough into 3×4 inch rectangles. You should get about 8-10 rectangles per disc.
- Fill the Cookies: Place half of the rectangles onto a parchment-lined baking sheet. Spoon about 1 to 1.5 teaspoons of filling onto the center of each, leaving a 1/2-inch border.
- Top & Seal: Gently place the remaining rectangles on top. Use the tines of a fork to press and seal the edges on all four sides. Dock the top of each cookie a few times with the fork to allow steam to escape.
- Freeze: Place the entire baking sheet in the freezer for 15-20 minutes. This final chill ensures perfectly sharp edges. Preheat your oven to 350°F (175°C) while they chill.
Part 3: Bake & Glaze
- Bake: Bake the chilled cookies for 12-15 minutes, or until the edges are lightly golden.
- Cool Completely: Let the cookies cool on the baking sheet for 5 minutes before transferring them to a wire rack to cool completely. Glazing warm cookies will result in a runny mess.
- Make the Glaze: Whisk together the powdered sugar, milk, and vanilla extract until smooth. It should be thick but pourable.
- Decorate: Spoon the glaze over the cooled cookies, spreading it gently. Top with sprinkles immediately before the glaze sets.
Pro Tips for Nailing the Details
- Don’t Skip the Chill: Chilling the dough is the most important step for preventing spread. The final 15-minute freeze before baking is the secret to bakery-perfect rectangles.
- Even Thickness is Key: Try to roll your dough to a consistent 1/8-inch thickness. This ensures the top and bottom pieces bake evenly.
- Mind the Filling: Do not overfill the cookies. Too much filling is the number one cause of blowouts. A thin layer is all you need for that gooey center.
- Seal Tightly: A firm press with a fork not only looks classic but also creates a strong seal to keep the brown sugar goodness inside.
- Work with Cold Dough: If your kitchen is warm, work with one disc of dough at a time while the other stays in the fridge.
This recipe is a fun twist on classic Breakfast flavors, perfect for a weekend baking project.
Flavor Variations & Customization
Once you master the base recipe, the possibilities are endless.
- Fruit-Filled: Swap the brown sugar filling with a thick jam like raspberry, strawberry, or apricot.
- Spiced Chocolate: Add 1/4 teaspoon of cardamom or a pinch of cayenne to the brown sugar filling and use a chocolate glaze (melted chocolate chips with a touch of coconut oil).
- Nutty Twist: Add finely chopped pecans or walnuts to the brown sugar filling for extra texture and a nutty flavor.
- Rich & Creamy Fillings: If you love rich, creamy fillings in your desserts, you might also enjoy exploring other recipes, like this decadent Cranberry White Chocolate Cheesecake Recipe.
COMMON MISTAKES TO AVOID
- Mistake: The filling leaked out during baking.
- Fix: You either overfilled the cookie or didn’t seal the edges tightly enough. Use less filling next time (about 1 teaspoon is plenty) and press firmly with a fork around all four four sides.
- Mistake: The cookies spread into blobs.
- Fix: The dough was too warm. Never skip the initial 1-hour chill, and always do the final 15-minute freeze right before baking. This solidifies the butter, ensuring the cookies hold their shape.
- Mistake: The glaze ran off the sides.
- Fix: The cookies were still warm, or the glaze was too thin. Ensure cookies are at room temperature. If the glaze is too runny, add more powdered sugar, one tablespoon at a time.
FAQ
Q: Can I make the dough ahead of time?
A: Absolutely. The dough can be wrapped and refrigerated for up to 3 days or frozen for up to 3 months. Thaw frozen dough in the refrigerator overnight before rolling.
Q: How do I store leftover cookies?
A: Store the cookies in an airtight container at room temperature for up to 4 days. The texture is best in the first two days.
Q: Can I use light brown sugar instead of dark?
A: Yes, you can. Dark brown sugar provides a deeper, more robust molasses flavor, but light brown sugar will work just fine and result in a slightly lighter-tasting filling.
For another unique sweet treat, this eggnog panna cotta recipe offers a sophisticated and creamy dessert option.
NUTRITIONAL SNAPSHOT
| Nutrient | Amount per Serving |
|---|---|
| Calories | 215 est. |
| Protein | 2g |
| Fat | 11g |
| Net Carbs | 26g |
| Fiber | <1g |
| Sugar | 16g |
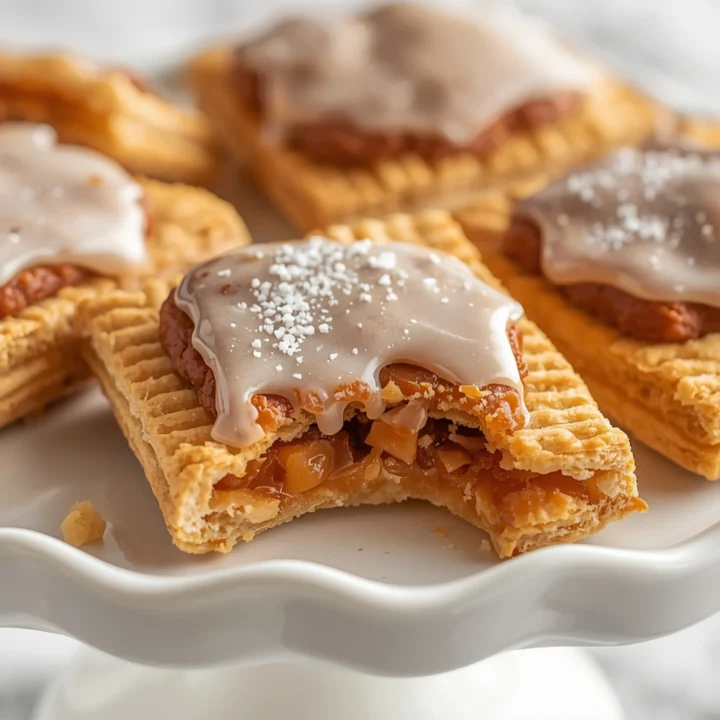
Brown Sugar Pop Tart Cookies: A Nostalgic Treat
These Brown Sugar Pop Tart Cookies capture the nostalgic comfort of a brown sugar cinnamon toaster pastry in a buttery, tender cookie. With a warm, gooey center and a simple sweet glaze, this recipe delivers a bakery-level treat that's surprisingly easy to assemble. It's one of those essential Desserts that feels both special and incredibly simple.
Ingredients
- 1 cup (227g) unsalted butter, softened
- 1/2 cup (100g) granulated sugar
- 1/4 cup (50g) packed light brown sugar
- 1 large egg
- 1 tsp vanilla extract
- 2.5 cups (300g) all-purpose flour
- 2 tbsp cornstarch
- 1/2 tsp baking powder
- 1/4 tsp salt
- 1/2 cup (100g) packed dark brown sugar
- 1 tsp ground cinnamon
- 1 tbsp all-purpose flour
- 2 tbsp unsalted butter, melted
- 1 cup (120g) powdered sugar
- 2-3 tbsp milk or cream
- 1/2 tsp vanilla extract
- Sprinkles, for topping
Instructions
- Cream Butter & Sugar: In a large bowl with a hand mixer or in a stand mixer, beat the softened butter, granulated sugar, and brown sugar until light and fluffy, about 2-3 minutes.
- Add Wet Ingredients: Beat in the egg and vanilla extract until just combined. Scrape down the sides of the bowl.
- Combine Dry Ingredients: In a separate bowl, whisk together the all-purpose flour, cornstarch, baking powder, and salt.
- Mix Dough: Gradually add the dry ingredients to the wet ingredients, mixing on low speed until a soft dough forms. Do not overmix.
- Chill: Divide the dough into two equal discs, wrap them tightly in plastic wrap, and refrigerate for at least 1 hour (or up to 2 days). This is critical for a no-spread cookie.
- Make the Filling: In a small bowl, mix the dark brown sugar, cinnamon, and flour. Stir in the melted butter until a thick, sandy paste forms. Set aside.
- Roll the Dough: On a lightly floured sheet of parchment paper, roll one disc of dough into a large rectangle about 1/8-inch thick.
- Cut Rectangles: Using a pizza cutter or knife, trim the edges and cut the dough into 3x4 inch rectangles. You should get about 8-10 rectangles per disc.
- Fill the Cookies: Place half of the rectangles onto a parchment-lined baking sheet. Spoon about 1 to 1.5 teaspoons of filling onto the center of each, leaving a 1/2-inch border.
- Top & Seal: Gently place the remaining rectangles on top. Use the tines of a fork to press and seal the edges on all four sides. Dock the top of each cookie a few times with the fork to allow steam to escape.
- Freeze: Place the entire baking sheet in the freezer for 15-20 minutes. This final chill ensures perfectly sharp edges. Preheat your oven to 350°F (175°C) while they chill.
- Bake: Bake the chilled cookies for 12-15 minutes, or until the edges are lightly golden.
- Cool Completely: Let the cookies cool on the baking sheet for 5 minutes before transferring them to a wire rack to cool completely. Glazing warm cookies will result in a runny mess.
- Make the Glaze: Whisk together the powdered sugar, milk, and vanilla extract until smooth. It should be thick but pourable.
- Decorate: Spoon the glaze over the cooled cookies, spreading it gently. Top with sprinkles immediately before the glaze sets.